Adding members to the flip online whiteboard: how to work together
Whiteboard
For business
Team
2 min read
April 22, 2025
Collaboration is a key feature of flip, which is why it's worth learning how to add members to a project properly. This lets you share ideas, edit content, discuss tasks and visualize the process in real time. In this guide, we'll go step by step through how to invite users to flip, what roles there are and how to manage them.
Why add members
Preparing the board for collaboration
Ways to add members in flip
Setting up access rights
Managing members
Why add members
By adding members to an online whiteboard, you:
organize teamwork in a single digital space;
get fast feedback;
cut down on mass emails, calls and scattered files;
speed up decision-making and project launches.
flip is especially convenient for brainstorming, planning, learning together and running visual meetings.
Preparing the board for collaboration
Before you invite users, it's important to prepare the board:
Give the board a clear name: this helps everyone find their way around quickly.
Create a structure: add sheets, captions, blocks and colors.
Set up the grid and place reference elements — arrows, sticky notes, shapes.
flip makes it easy to duplicate elements, use templates and align objects — all of which helps you create a logical, convenient layout before collaboration begins.
Ways to add members in flip
There are two main ways to invite members in flip:
Invite by link
1. Open the board.
2. In the top right corner, click the “Share” button.
3. Set up the permissions (see the next section) and copy the link.
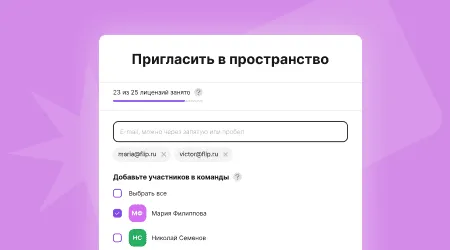
4. Send it to members yourself (for example, via a messenger or email).Invite by email
At the moment, flip doesn't require authorization for viewing: it's enough to share a link with the right access permissions. Email login is only available on corporate plans when authorization is enabled.
Setting up access rights
flip lets you set the level of interaction with the board. When generating a link, choose the option you need:
Can edit — the member can add and change elements.
View only — a safe mode for clients, teachers or guests.
This is especially important when working on projects with external partners or in an educational setting.
Managing members
After adding members, you can:
Restrict or expand access to a specific space, team or board;
Turn off access — simply switch the flip to private access;
Update permissions — change the access level right in the link settings.
Please note: flip doesn't keep track of members by name without registration, so on public boards it's important to monitor activity manually or through comments.
flip makes collaboration simple and visual. Just prepare the board, create a link and grant the right permissions, and you're all set for productive online collaboration. If you work in a team, teach or run projects, adding members to the flip online whiteboard will become part of your everyday toolkit.
Authors

flip
Team