How to create teams on an online whiteboard
For business
Team
2 min read
April 15, 2025
In today's digital world, online whiteboards have become an essential tool for organizing collaboration. They let users interact in real time, share ideas, visualize processes and manage projects effectively. Platforms such as Miro, Trello, Mural and others are widely used in many fields, from education to business, to improve communication and boost team productivity.
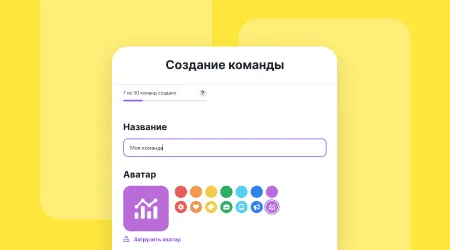
Creating teams on online whiteboards lets you centralize task management, keep processes transparent and strengthen collaboration between members. This is especially relevant for remote work and distributed teams, as these tools help overcome geographical barriers and create a single workspace for all team members.
In this article, we take a detailed look at how to create teams on online whiteboards, go over access settings and member management, and share recommendations for organizing effective collaboration.
Why you need teams on online whiteboards
On an online whiteboard, a team is a group of users brought together to work on projects and tasks. The benefits of creating teams include:
Better communication between members. All team members have access to a single workspace, which makes information sharing transparent and fast.
Centralized management of projects and tasks. Online whiteboards let you structure work, assign tasks and track their progress in one place.
More effective collaboration. Editing, discussing and visualizing ideas together makes interaction and decision-making more productive.
Steps to create a team on an online whiteboard
1. Sign up and log in
To get started, create an account on the platform of your choice, such as flip, Miro or Trello. After signing up and confirming your email, log in and get familiar with the user interface.
2. Create a new workspace or team
Most platforms let you create a team or workspace. To do this:
1
Go to the team or workspace management section.
2
Click “Create team” or a similar button.
3
Enter a team name, add a description and, if needed, upload an avatar image.
3. Invite members
Once the team is created, add members:
Send email invitations. Enter your colleagues' email addresses and send them invitations to join the team.
Create invite links. Generate a unique link that users can follow to join the team on their own.
It's also a good idea to prepare welcome messages or instructions for new members to help them settle in.
Access settings and user permissions
1. Roles and permissions
Online whiteboards usually offer several roles for members:
Administrator. Has full control over the team, including managing members and settings.
Editor. Can create and edit content on the board.
Commenter. Can view content and leave comments but cannot make changes.
Viewer. Has view-only access, without the ability to make changes or leave comments.
2. Setting up access rights
To assign roles to members:
1
Go to the settings of the team or a specific board.
2
Select a member and assign them the appropriate role.
You can also restrict access to certain boards or projects within the team by granting rights only to selected members.
3. Security management
To keep your data secure, we recommend that you:
Use strong passwords. Create long, unique passwords for your accounts.
Turn on two-factor authentication. It adds an extra layer of protection when you log in.
Monitor member activity. Check activity logs regularly to spot suspicious activity.
Organizing effective teamwork
Structure your workflows
Create a hierarchy of boards and projects to make navigation easier. Use templates for standard processes and tasks: this saves time and keeps work consistent.Communication within the team
Integrate the online whiteboard with messengers and email services to share information quickly. Use comments and mentions on the board to address specific colleagues directly.Editing and updating content together
Set up change notifications so that all members stay on top of the latest updates. Use versions and change history to track progress and roll back to previous versions if needed.Planning and tracking tasks
Integrate the online whiteboard with project management tools to assign tasks and deadlines. Use visual elements such as sticky notes and labels to show task statuses and priorities.
Online whiteboards offer powerful ways to organize collaboration, helping teams work together effectively wherever they are. Setting up teams properly, managing access and thinking through your workflows are key to using these tools successfully.
By following the recommendations in this article, you can create a structured and productive workspace that improves communication, makes processes more transparent and helps you reach your goals. By investing time in setting up and managing teams on online whiteboards properly, you lay a solid foundation for your team to work together smoothly and successfully.
Authors

flip
Team