Tips for running online meetings on a virtual whiteboard
For business
Team
5 min read
April 13, 2025
In today's world, online meetings have become an integral part of professional life. They bring together teams from different parts of the world to discuss projects, make decisions and share ideas. However, for such meetings to be truly productive, you need effective collaboration tools. Virtual whiteboards are one of these tools, helping make remote meetings more effective.
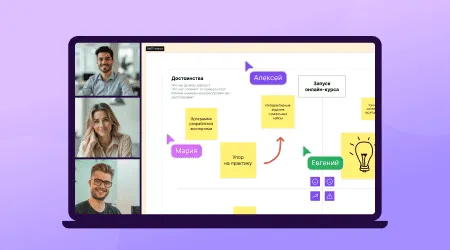
Benefits of using virtual whiteboards for online meetings
Virtual whiteboards offer a number of features that make online meetings more productive:
Visualizing ideas and concepts in real time: participants can create diagrams, charts and other visual materials together, which helps everyone better understand the issues being discussed.
Better interaction and engagement: working together on a virtual whiteboard lets every participant take an active part in the process and contribute their suggestions and comments.
Saving and documenting discussion results: all materials created during the meeting stay on the board, so you can come back to them and use them later.
Preparing for an online meeting with a virtual whiteboard
To run a successful online meeting with a virtual whiteboard, it's important to prepare carefully:
1
Defining the meeting's goals and agenda: clearly state what will be discussed and what results you want to achieve. This helps participants stay focused and on topic.
2
Choosing the right tool: there are many virtual whiteboards, such as Miro, flip, Padlet, Google Jamboard and others. Look at their features and choose the one that best suits your needs.
3
Technical check: make sure all participants have a stable internet connection and compatible equipment. Check that the chosen virtual whiteboard and any other tools you need work properly.
4
Sharing access to the virtual whiteboard and materials: send participants the board links and the materials they need in advance so they can prepare for the meeting.
Running an online meeting with a virtual whiteboard
During the meeting, it's important to follow a few principles to keep it effective:
Opening the meeting: introduce the participants, briefly explain the rules for using the virtual whiteboard and go over the agenda.
Following the agenda: structure the discussion, using the board's visual elements to display key points and ideas.
Using virtual whiteboard features: make active use of co-editing, comments, diagrams and charts to make discussions more visual.
Keeping people engaged: encourage everyone present to participate actively, ask questions and invite people to share their opinions.
Collaborating during the meeting
Effective collaboration on a virtual whiteboard includes:
Breaking into groups: if needed, split participants into subgroups to work on separate tasks on the board.
Using color codes and labels: use different colors and labels to mark topics, priorities or task statuses.
Brainstorming: use the board to generate ideas, letting participants freely suggest solutions and discuss them in real time.
Recording key decisions and tasks: write down the main conclusions and assign people responsible for follow-up actions.
Wrapping up the online meeting and next steps
Once the discussion is over, it's important to take care of the following:
1
Summary: sum up the meeting and recap the decisions and agreements made.
2
Assigning owners and deadlines: make it clear who is responsible for what and by when tasks must be completed.
3
Saving and sharing materials: make sure all materials are saved on the board and give participants access to them for future use.
4
Collecting feedback: ask participants to rate how effective the meeting was and suggest improvements for future meetings.
Practical tips for using virtual whiteboards effectively
Training participants: give a short briefing or share materials on using the chosen virtual whiteboard so that everyone feels confident working with the tool.
Keeping order and structure: make sure the information on the board is organized logically and avoid placing elements chaotically.
Updating information regularly: update the data on the board as needed so that it reflects the current state of the project or discussion.
Integration with other tools: integrate the virtual whiteboard with other services, such as video conferencing, chats and project management systems, to boost overall productivity.
Creating and editing content on an online whiteboard
Virtual whiteboards offer a wide range of tools for creating and editing content, which supports effective collaboration and the visualization of ideas. Below are the main features available to users of such whiteboards.
Adding sticky notes, notes, text, images, diagrams and files
Sticky notes and notes are a convenient way to capture ideas, tasks or comments. In Miro and flip, for example, adding a sticky note takes just a few clicks: select the "Sticky note" tool, choose a color and size, then place it on the board.
To add text, images, diagrams and files, most virtual whiteboards offer the following tools:
Text: select the "Text" tool and click where you want on the board to type.
Images: use the image upload feature to add visuals that support your ideas.
Diagrams: many platforms have built-in tools for creating diagrams and charts, which help structure information.
Files: upload the documents or presentations you need directly to the board to share and discuss them.
Moving, scaling and grouping objects
Once you've added elements to the board, you need to be able to control their position and size:
Moving: select an object and drag it to the desired location while holding down the left mouse button.
Scaling: resize an object by dragging the corners or edges of the selection box. In some cases, proportions may be preserved automatically.
Grouping: to combine several objects into a group, select them while holding down the Shift key, then choose the "Group" option. This lets you move and resize the group as a single unit.
Customizing colors, shapes and layers
Visually organizing information plays a key role in how data is perceived:
Colors: change the color of sticky notes, text and other elements to indicate different categories or priorities.
Shapes: use various geometric shapes to create flowcharts and diagrams or to highlight key points.
Layers: some virtual whiteboards let you work with layers, which helps organize elements by level and control their visibility.
Adding comments and annotations
Collaboration involves active discussion and exchanging opinions:
Comments: add comments to specific objects or areas on the board to clarify details or ask questions.
Annotations: use drawing or highlighting tools to emphasize important elements or point to specific parts of the content.
Working with change history and content versions
Tracking and managing changes keeps the work process transparent and under control:
Change history: many platforms let you view the version history and restore previous states of the board if needed.
Saving versions: regularly save copies of the board's current state, especially before making major changes, so you can go back to earlier versions.
Using these virtual whiteboard tools and features makes collaboration more productive and organized, helping teams share ideas effectively and achieve their goals.
Authors

flip
Team