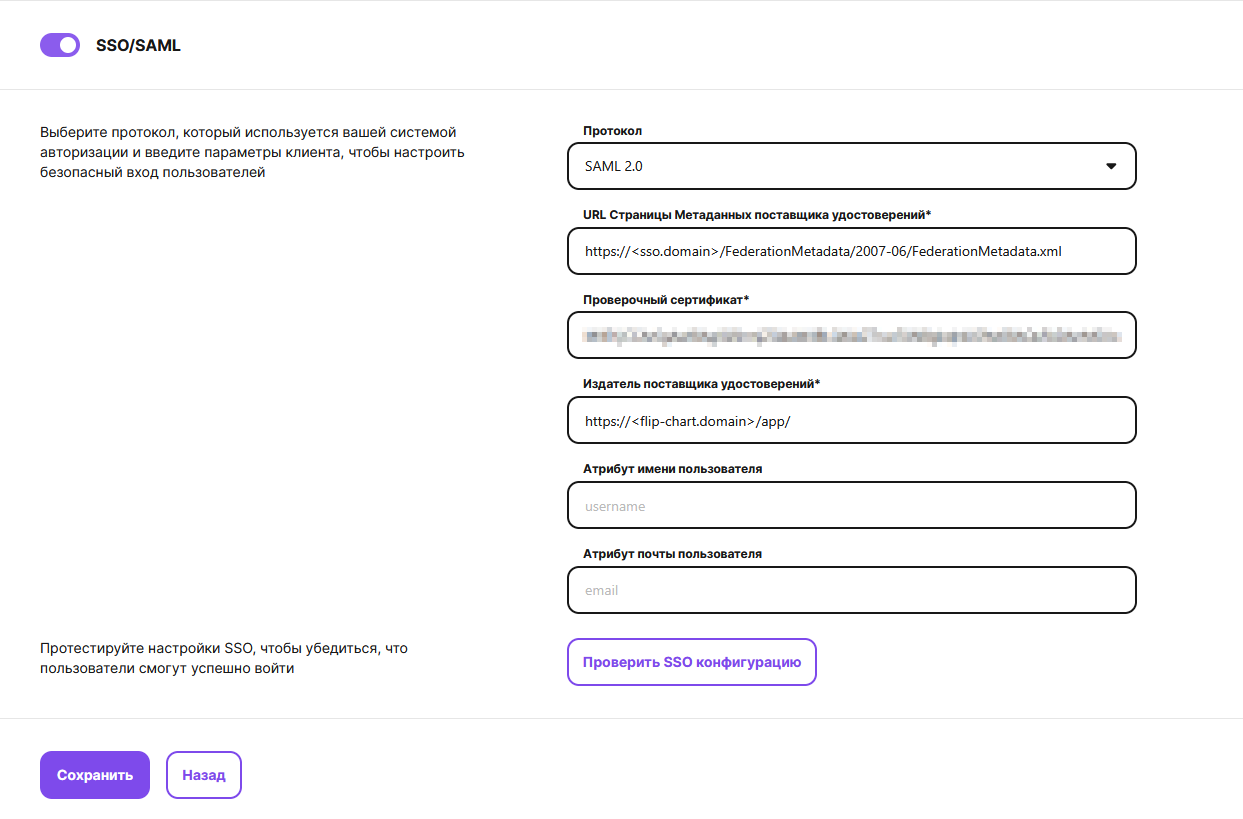
Configuring a relying party trust in ADFS for flip integration
Step 1: Open the ADFS management console
Open AD FS Management.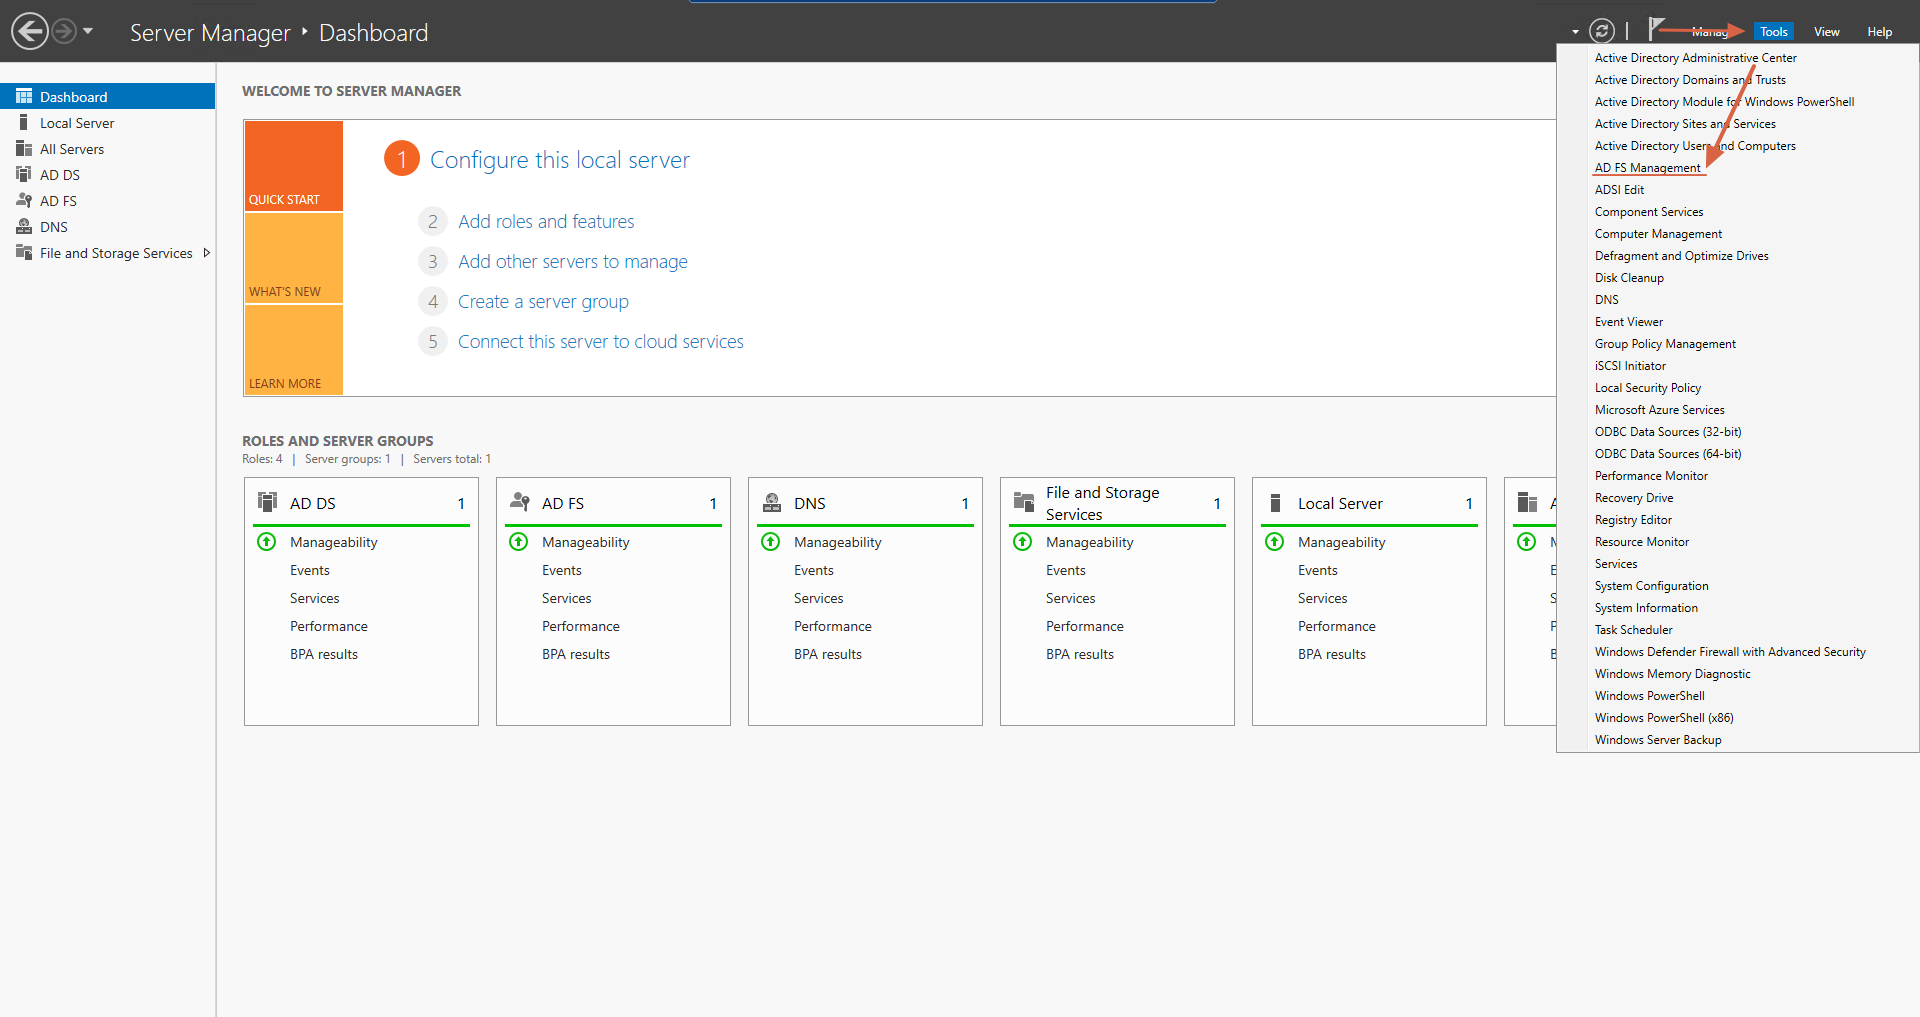
Step 2: Create a relying party trust
Go to Relying Party Trusts → select Add Relying Party Trust...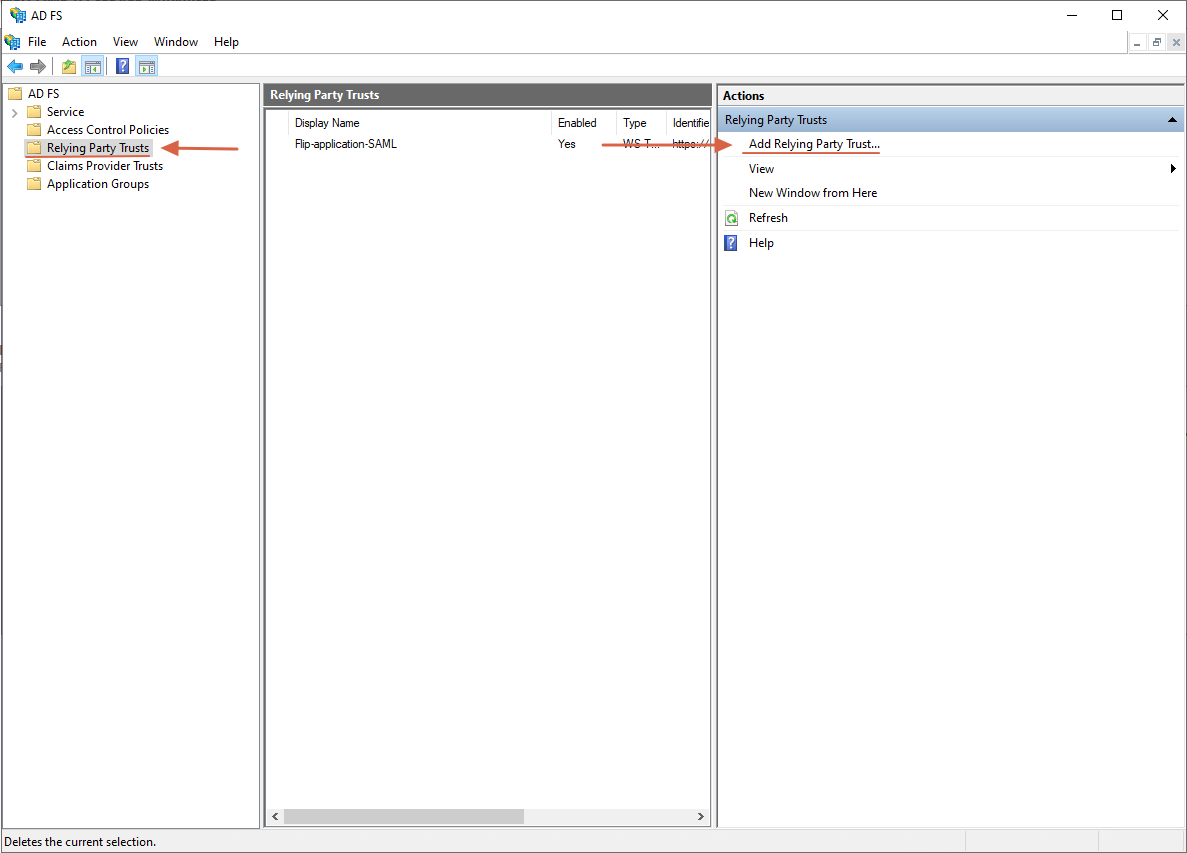
In the Add Relying Party Trust Wizard, complete the following steps:
Select the type:
Claims aware → Start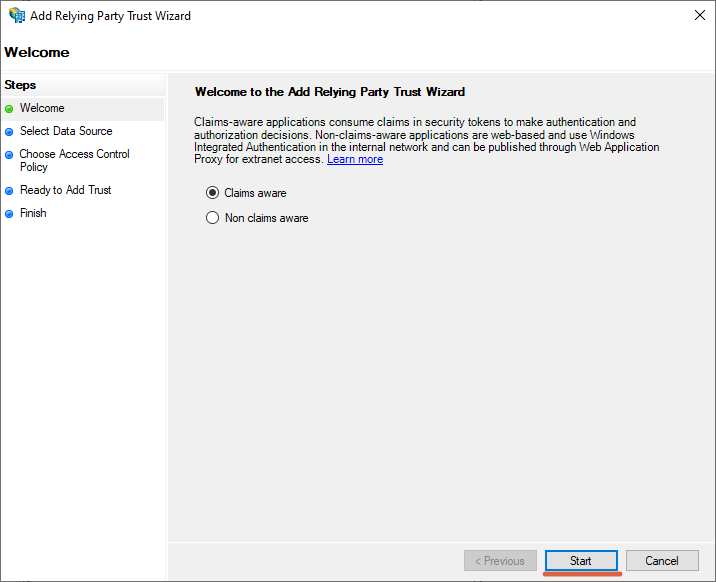
Setup method:
Enter data about the relying party manually → Next >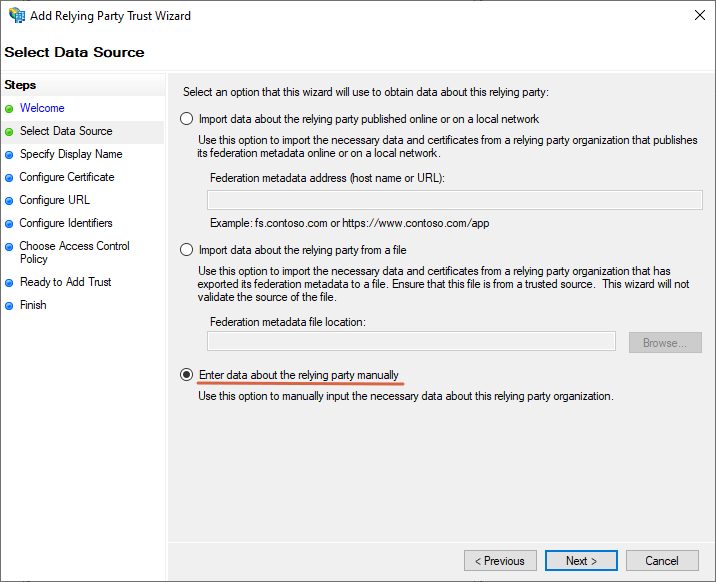
Enter a display name for the relying party trust, for example:
Flip-applications-SAML→ Next >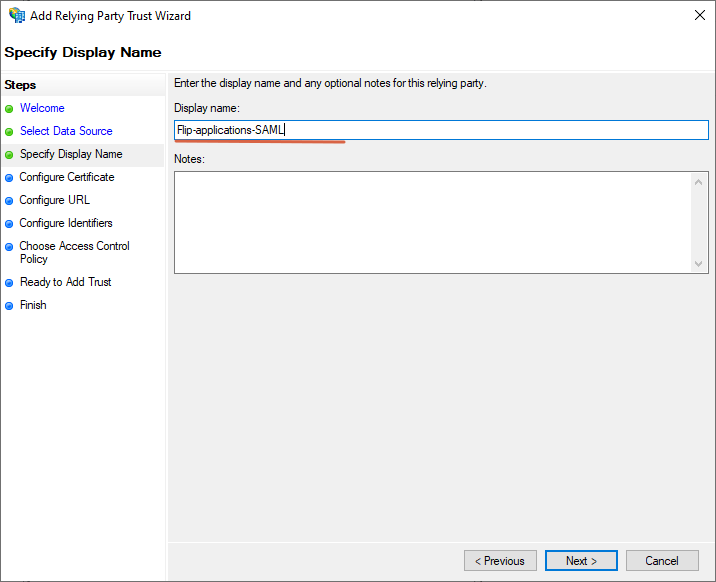
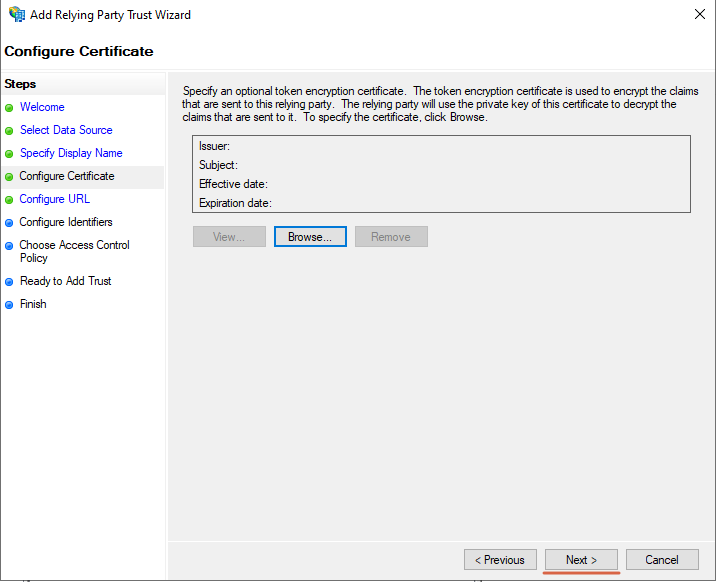
Skip the optional encryption setup step by clicking Next >
Enable SAML 2.0 support:
Select the Enable support for the SAML 2.0 WebSSO protocol check box
and enter the application's ACS URL in the following format:https://example.flip-chart.ru/app/api/v1/auth/saml/acs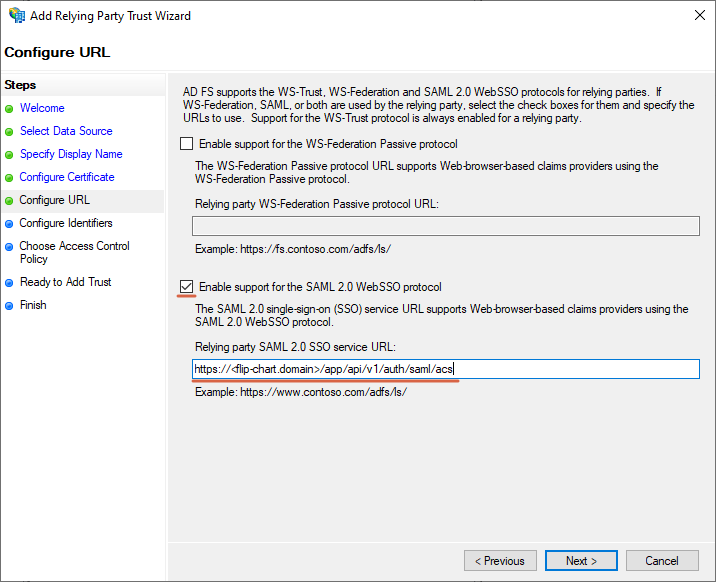
Enter the relying party trust identifier in the following format:
https://example.flip-chart.ru/app/→ Add → Next >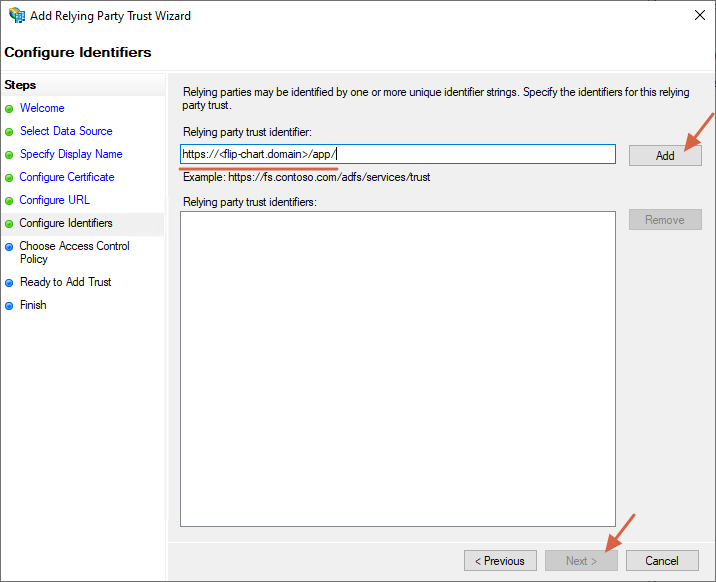
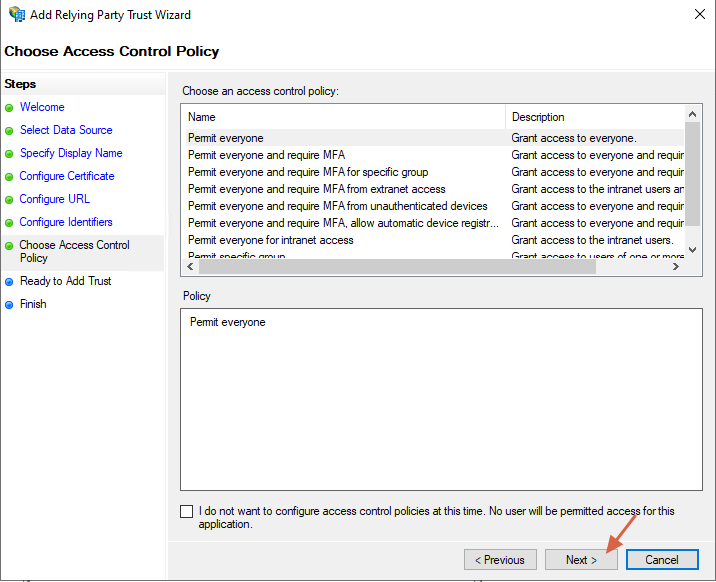
Set up an additional level of user access (Choose Access Control Policy) → Next >
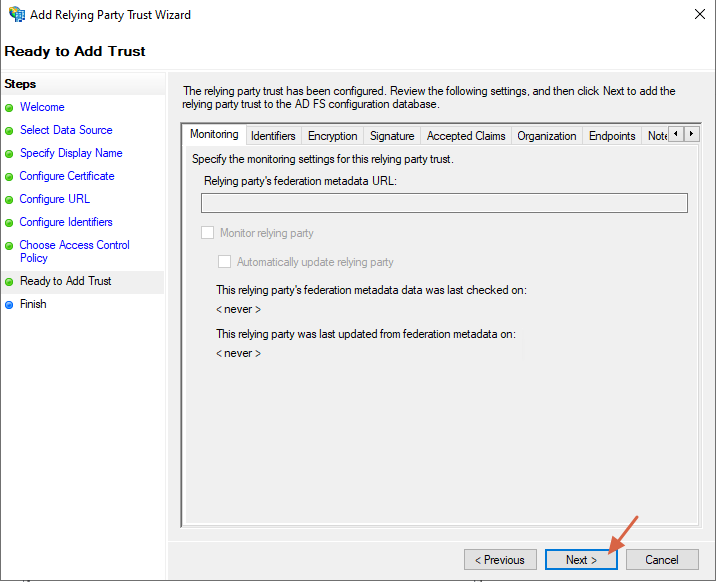
Confirm adding the relying party trust → Next >
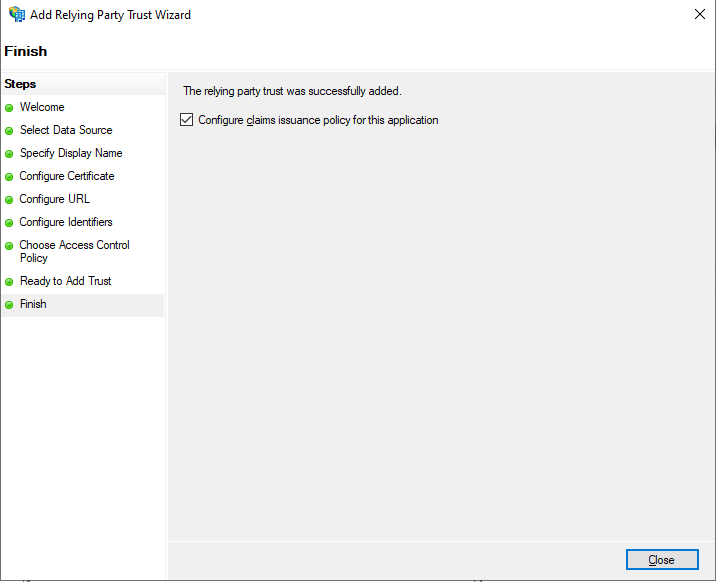
Finish creating the relying party trust for the flip integration → Close
Step 3: Configure the claim rules
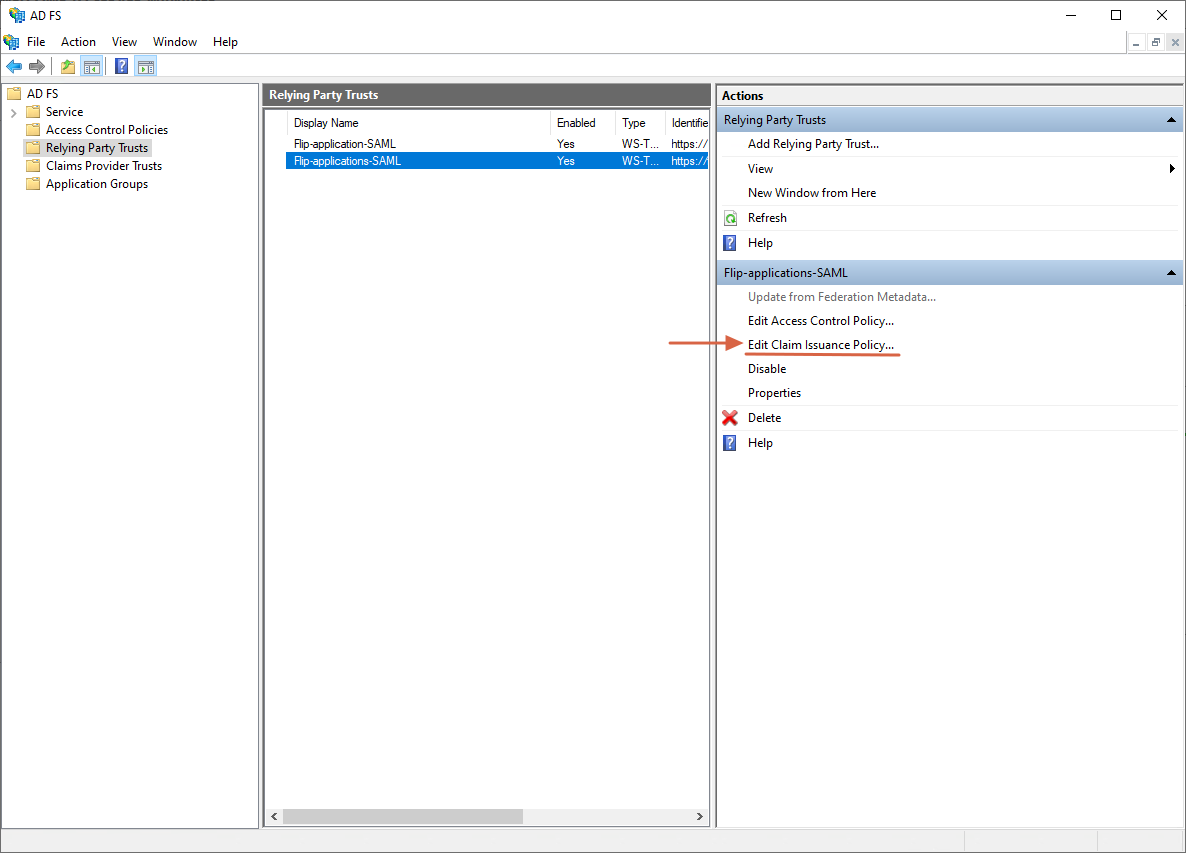
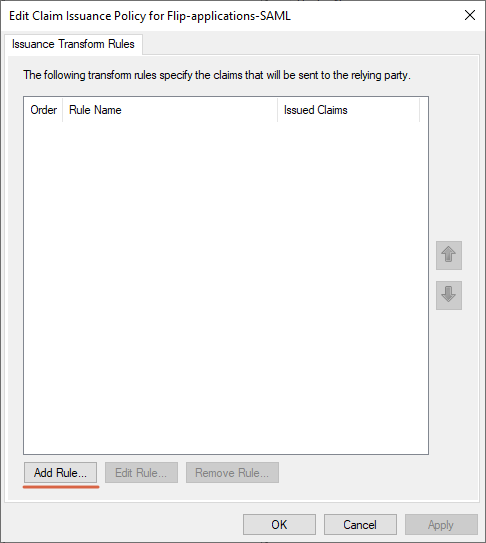
After the relying party trust is created, select it and click Edit Claim Issuance Policy... → in the window that opens, click Add Rule...
Rule 1: Issue a transient NameID
For the rule template, select:
Claim rule template: Transform an Incoming Claim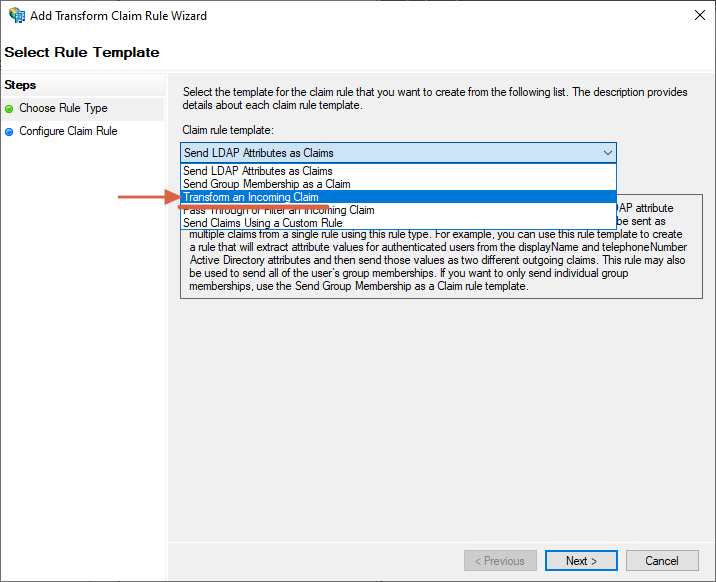
Fill in the claim rule fields:
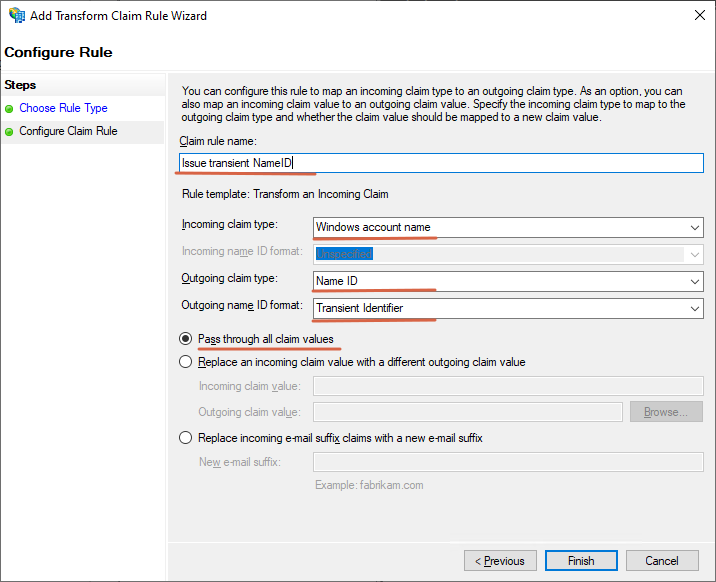
Claim rule name: Issue transient NameID
Incoming claim type: Windows account name
Outgoing claim type: Name ID
Outgoing name ID format: Transient Identifier
Pass through all claim values
Rule 2: Send LDAP attributes as claims
Click Add Rule... to add the second claim rule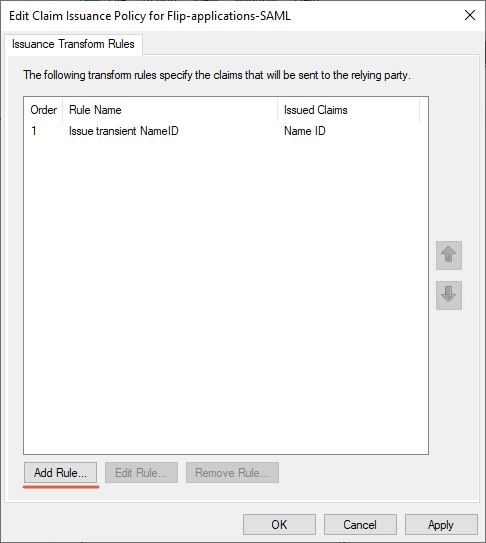
For the rule template, select:
Claim rule template: Send LDAP Attributes as Claims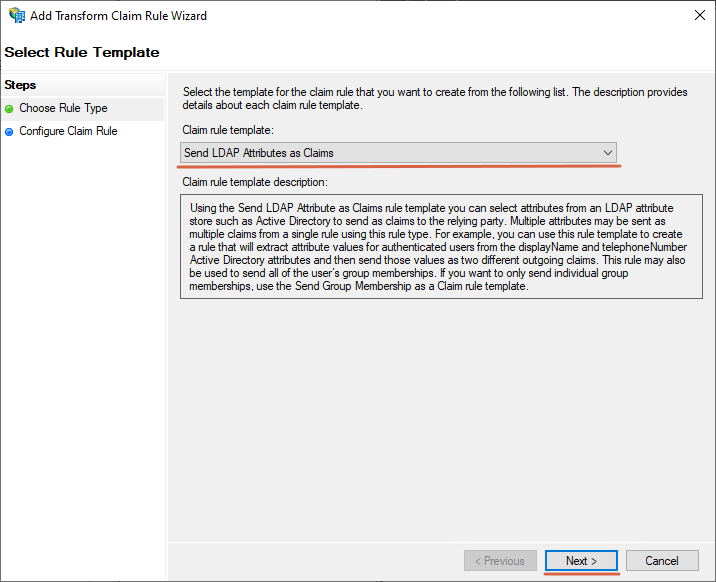
Fill in the claim rule fields:
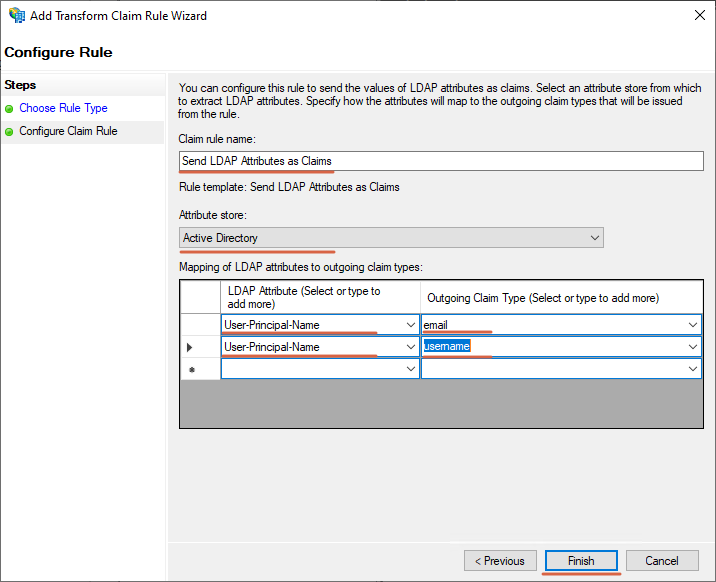
Claim rule name: Send LDAP Attributes as Claims
Attribute store: Active Directory
Mappings:
User-Principal-Name→emailUser-Principal-Name→username
Click Finish to create the rule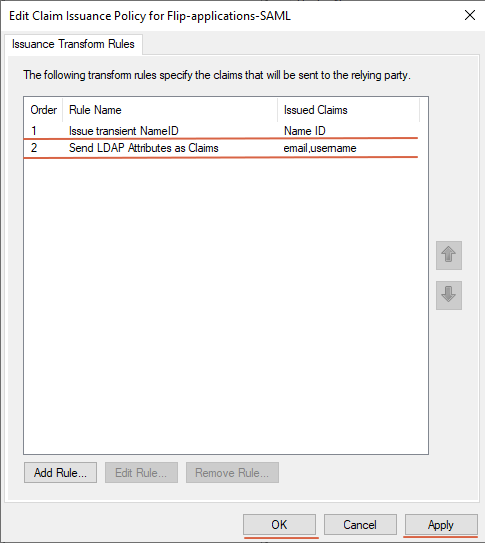
Once created, the rules should be listed in the claim issuance policy window.
Click Apply → OK to apply and save the rules.
Step 4: Complete the integration on the SSO page using the data you obtained
Go to the SSO integration settings page
Fill in the fields as follows:
- Protocol:
SAML 2.0 - Identity provider metadata URL:
https://adfs.example.ru/FederationMetadata/2007-06/FederationMetadata.xml - Verification certificate: the certificate data from the metadata page
- Identity provider issuer:
https://example.flip-chart.ru/app/