

SAML integration with Keycloak
Step 1. Creating a client
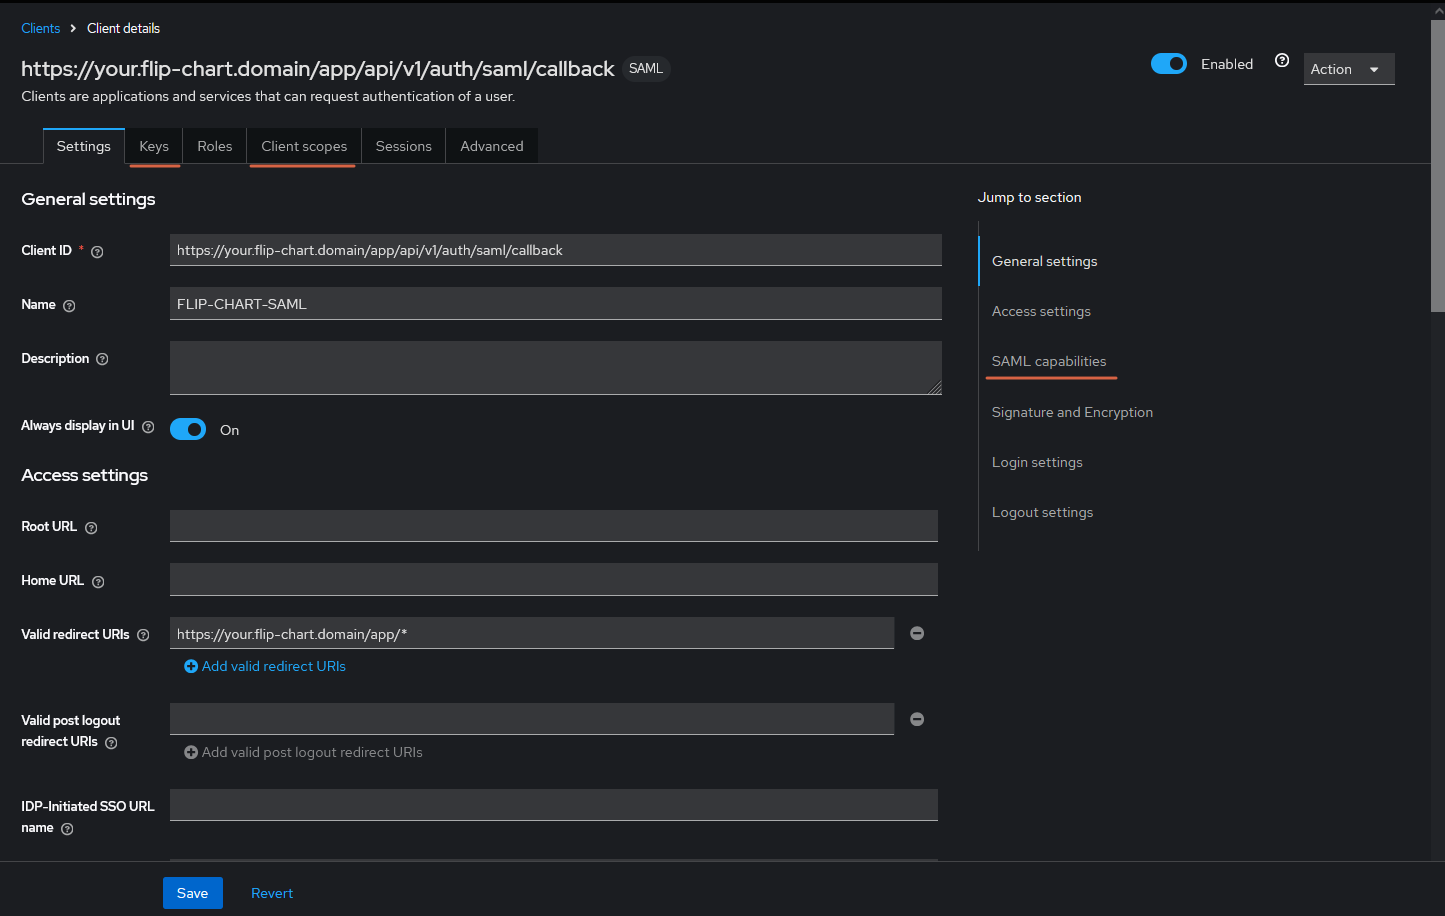
- Go to Clients.
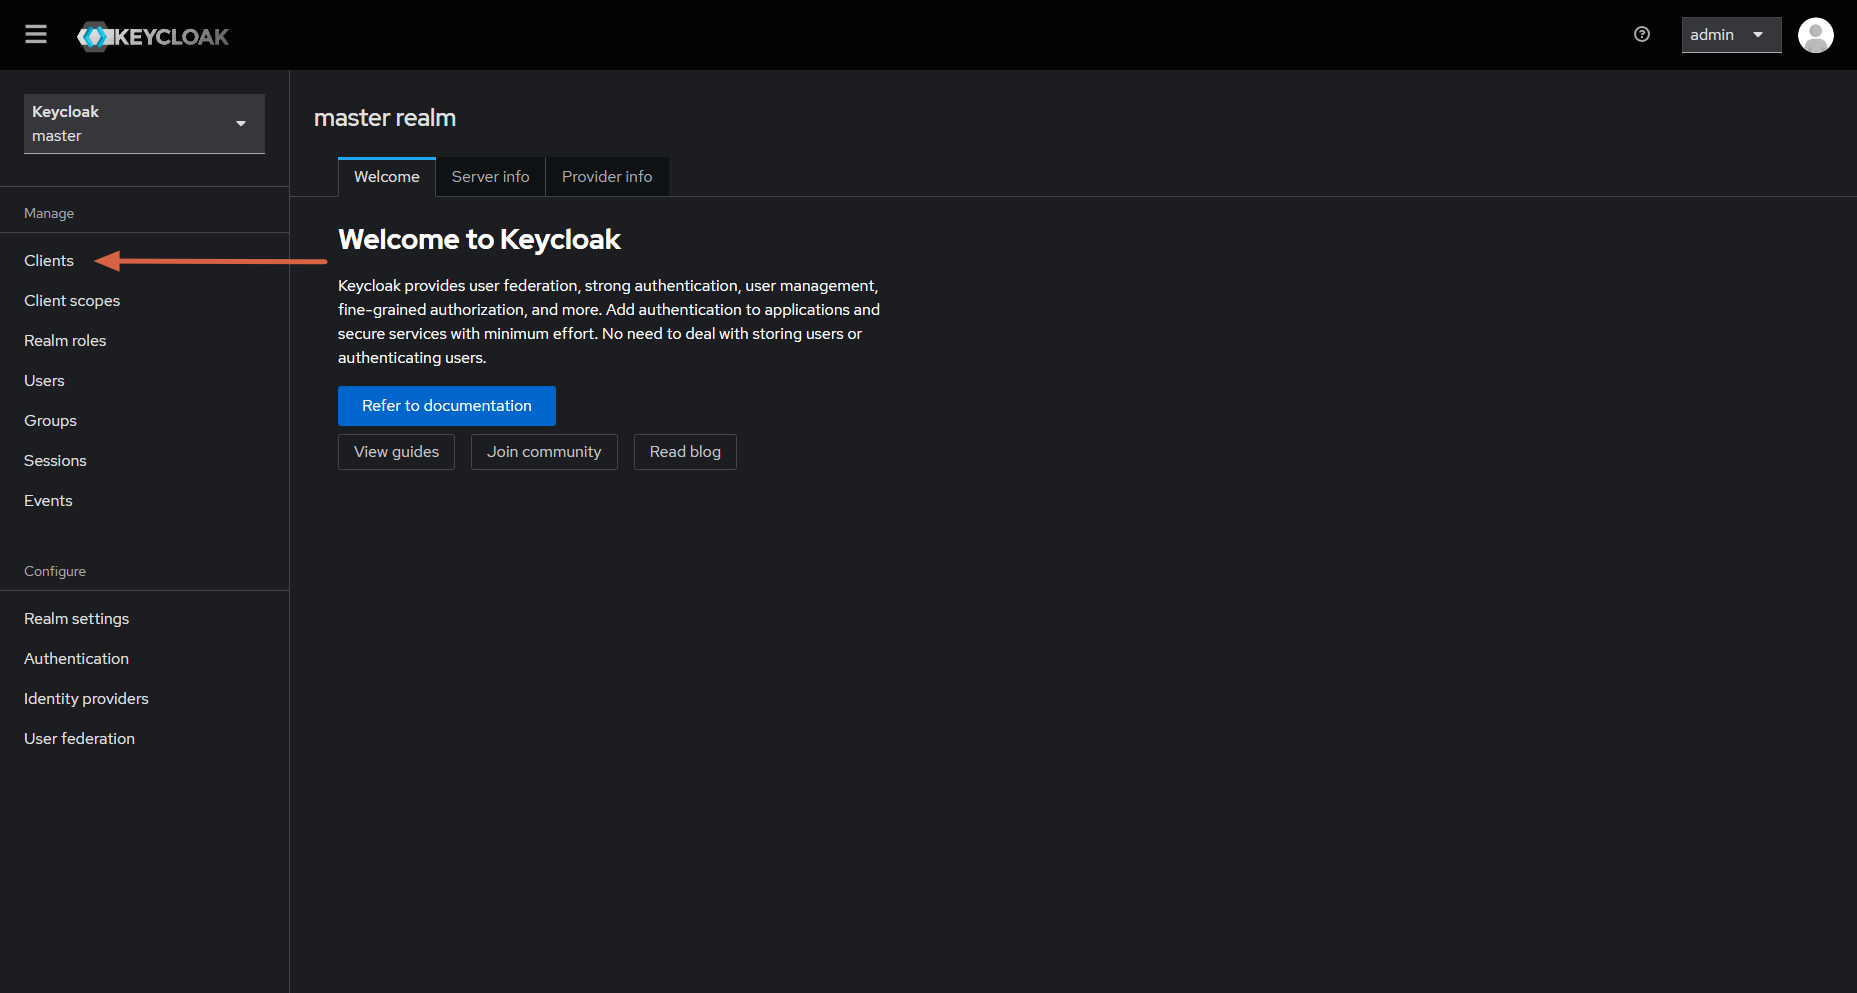
- Click Create client
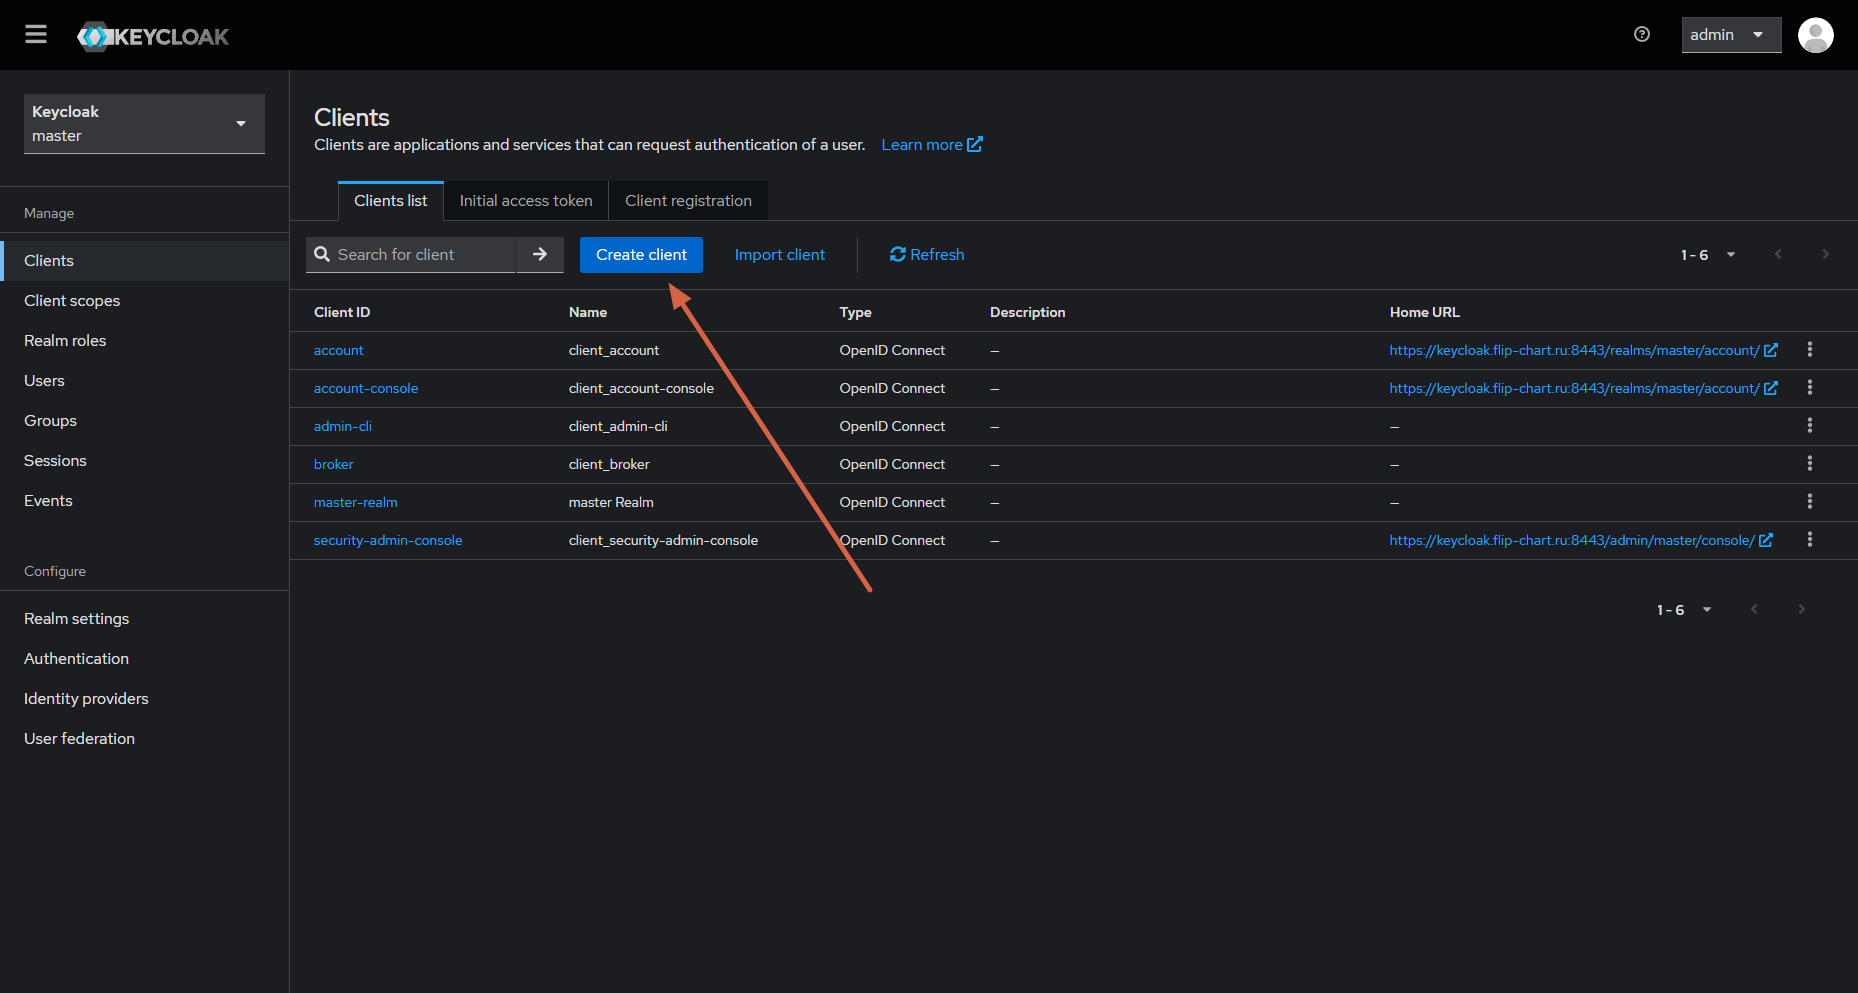
- Fill in the fields:
- Client type — select the SAML protocol;
- Client ID — enter the client identifier.
Note
The Client ID must contain the domain name on which the flip app runs.
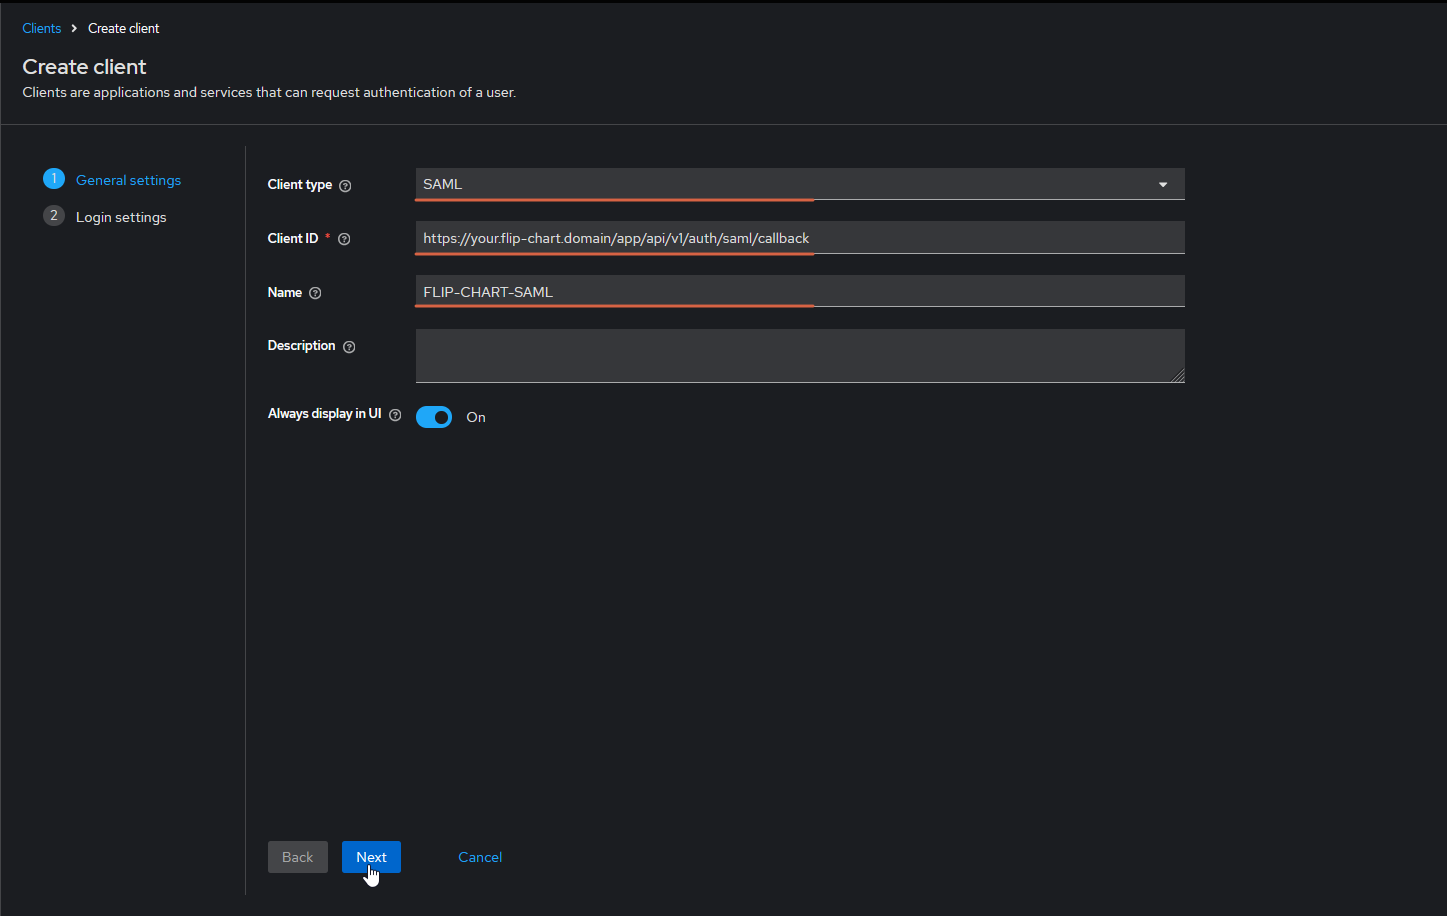
- Specify Valid redirect URIs — the addresses to redirect to after authentication (multiple values are allowed).
Note
Valid redirect URIs must contain the domain name on which the flip app runs.
Step 2. Configuring the SAML client
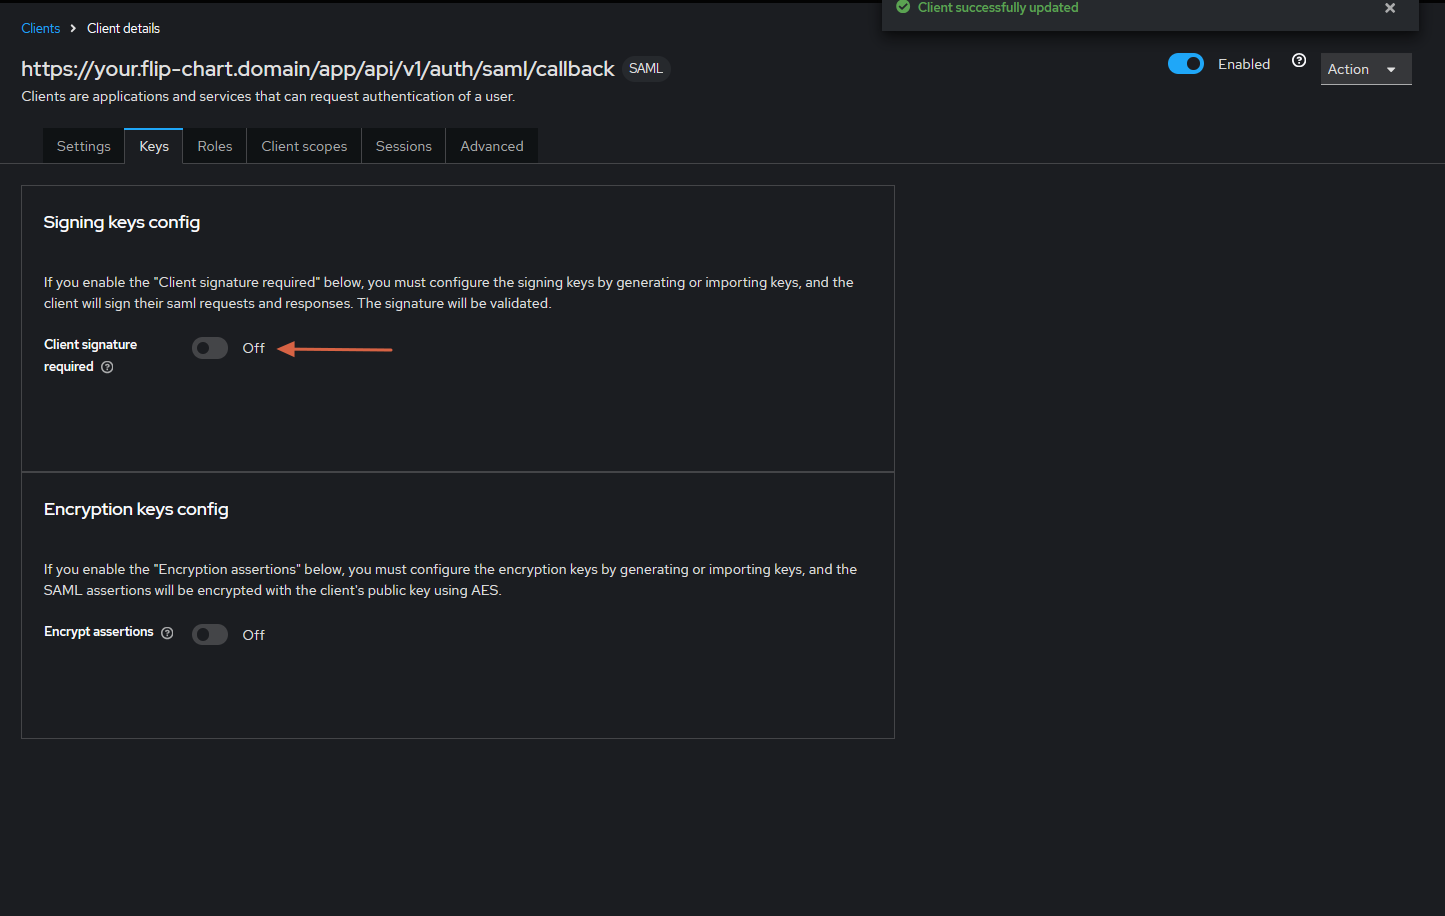
- Go to the "Keys" tab
- Turn off request signing ("Client signature required") in the SAML client settings
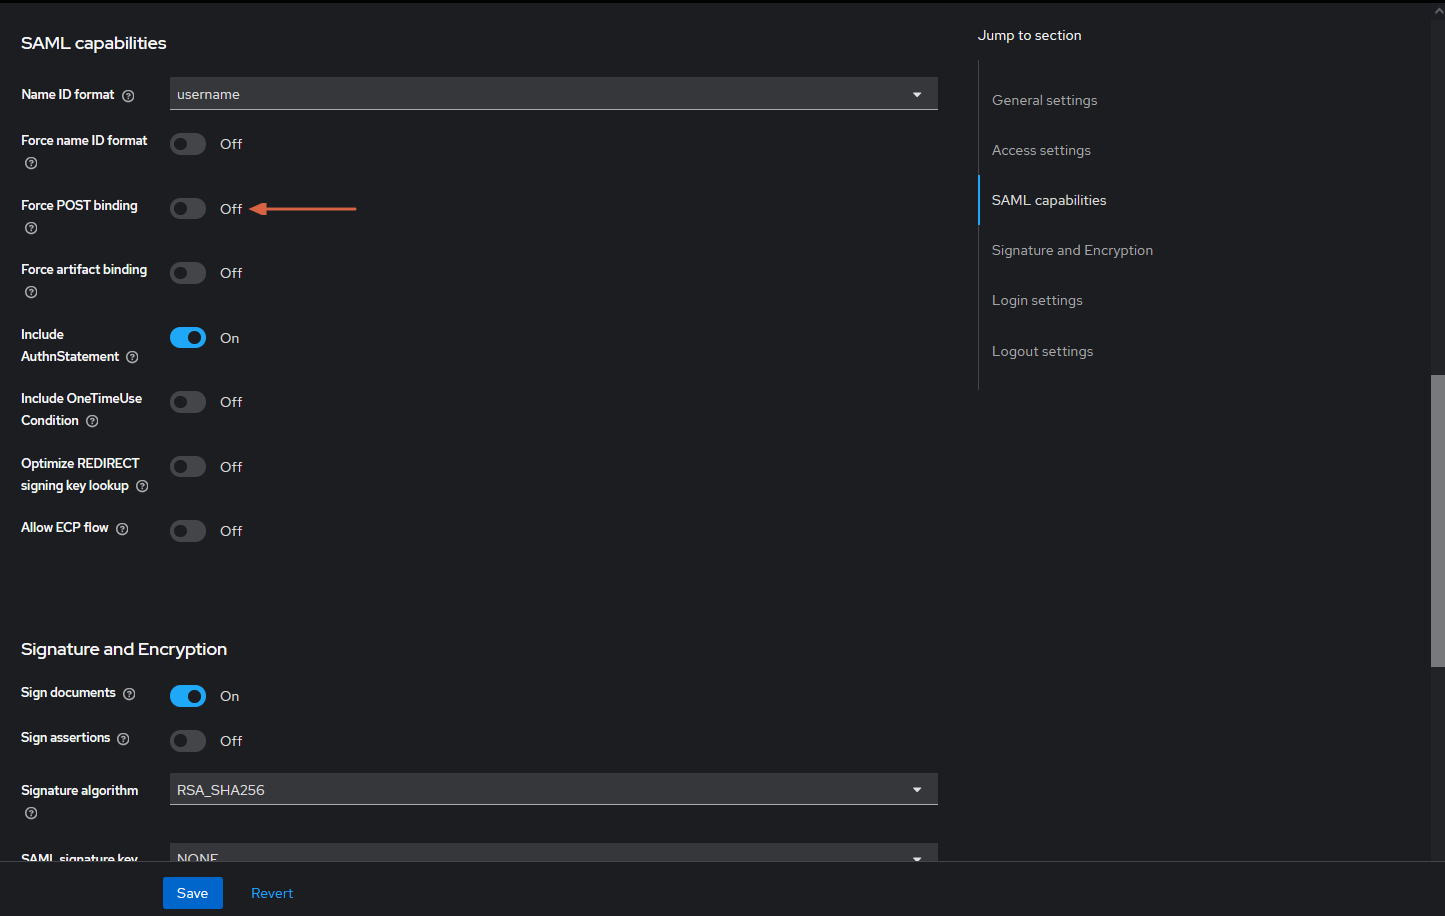
- Go to the SAML capabilities settings on the Settings tab
- Turn off "Force POST binding"
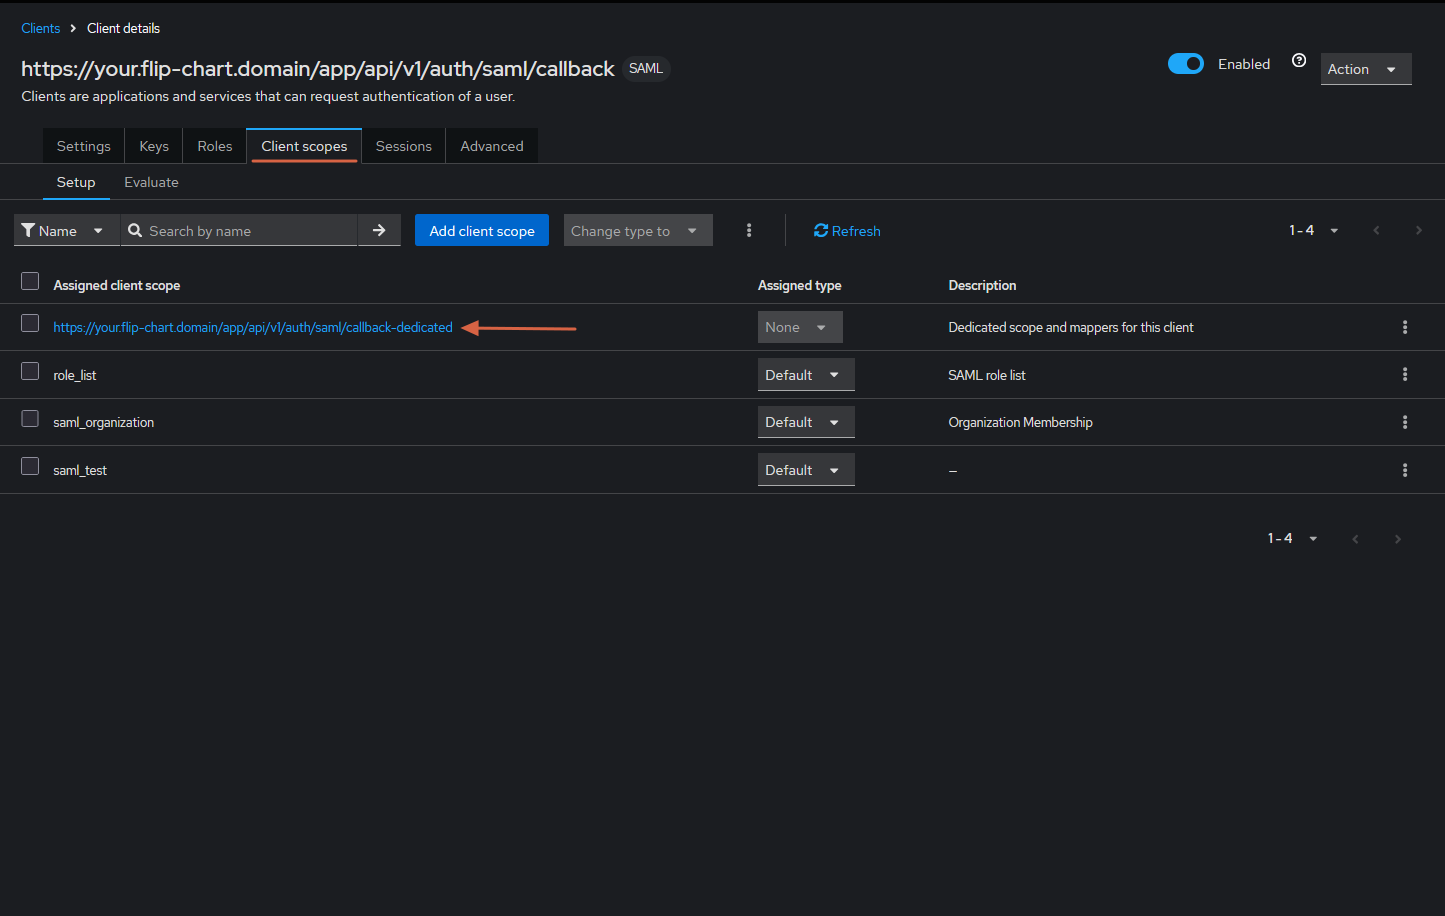
- Configuring the client scope
- Go to the "Client scopes" tab and select the client scope in use
- Select "Add predefined mapper"
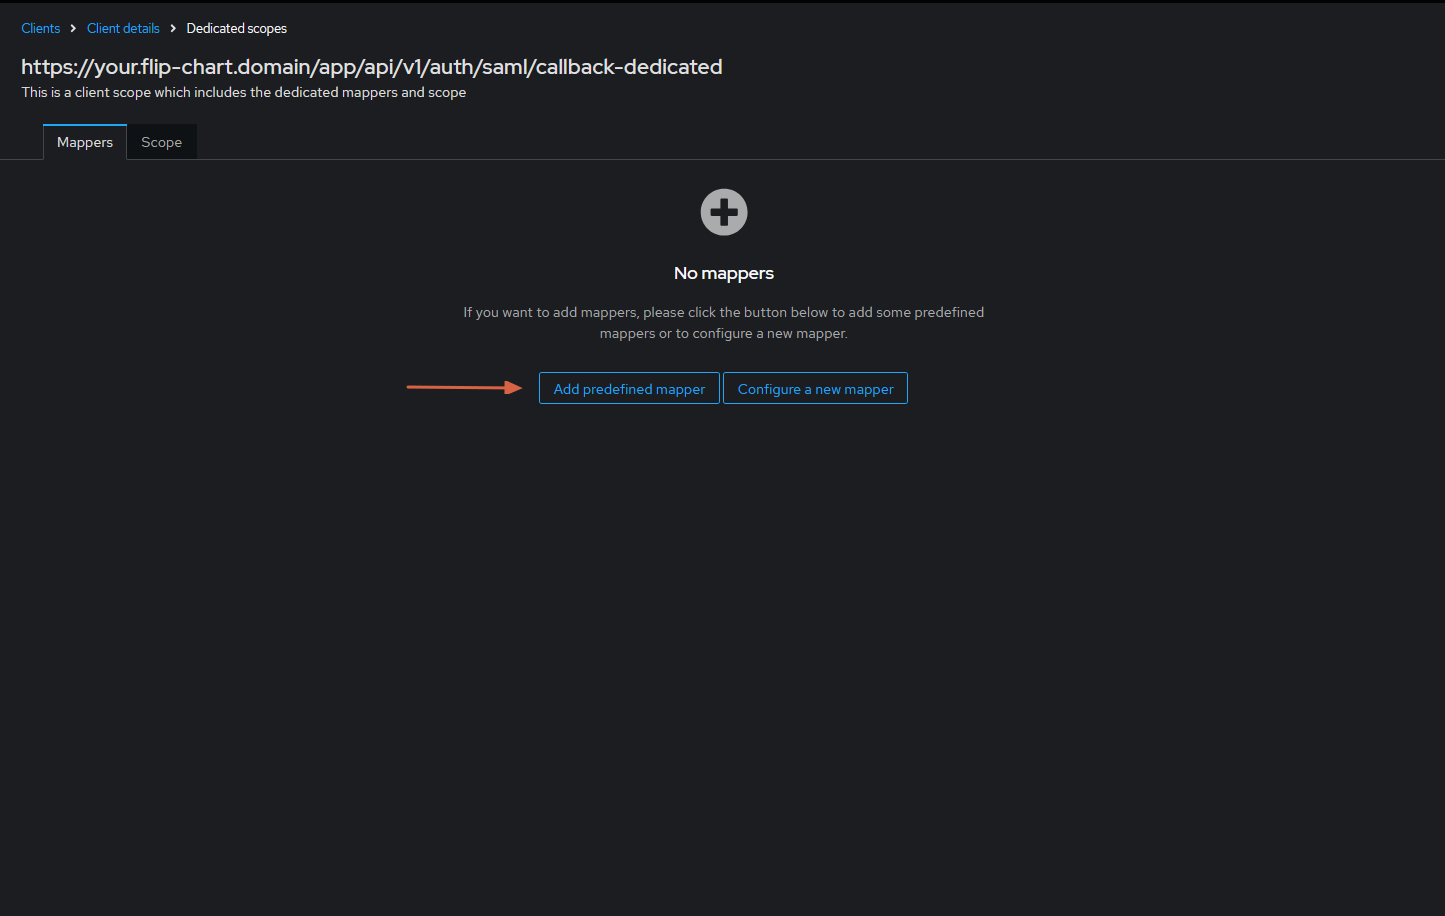
- In the window that opens, select the mappers to use (X500 email, X500 givenName, X500 surname) and click "Add" to add them
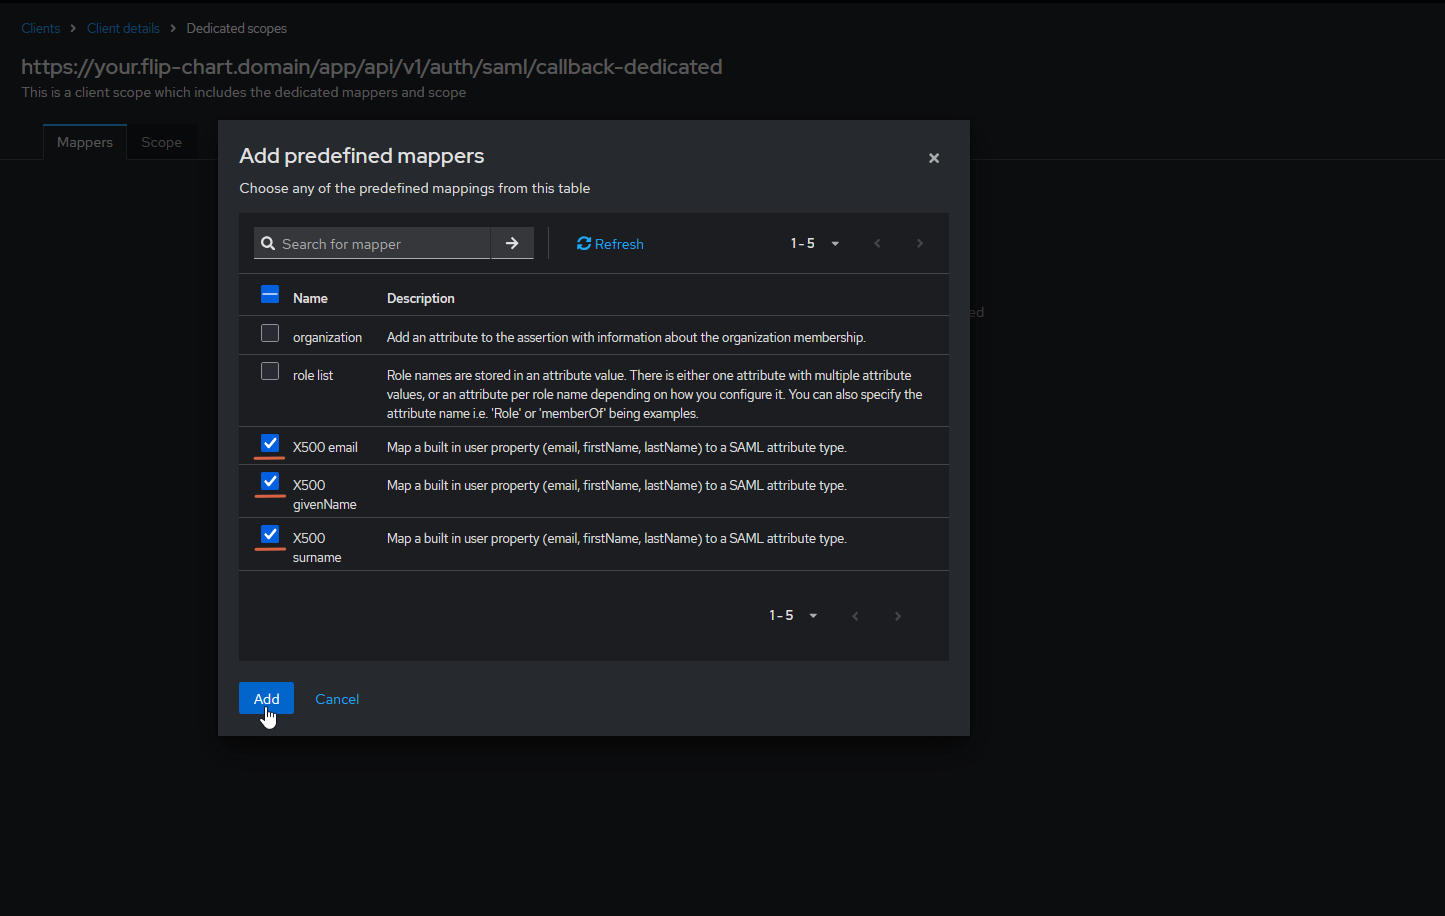
- Add one more mapper with the Add mapper → By configuration button
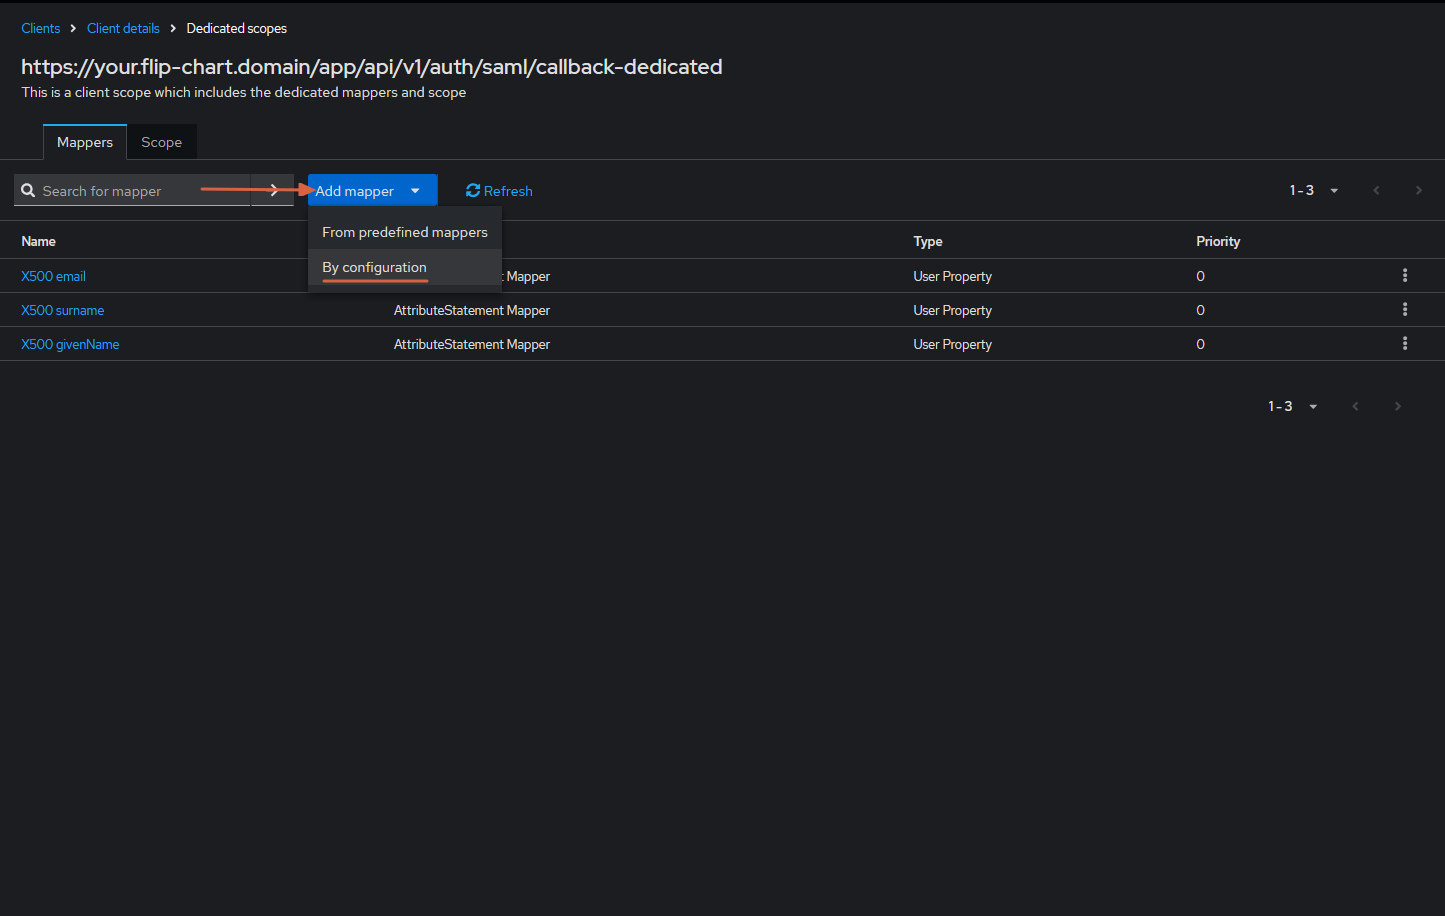
- In the window that opens, select "User Attribute"
- Set the Name, User Attribute, Friendly Name and SAML Attribute Name fields to "username".
- Set the SAML Attribute NameFormat field to Unspecified
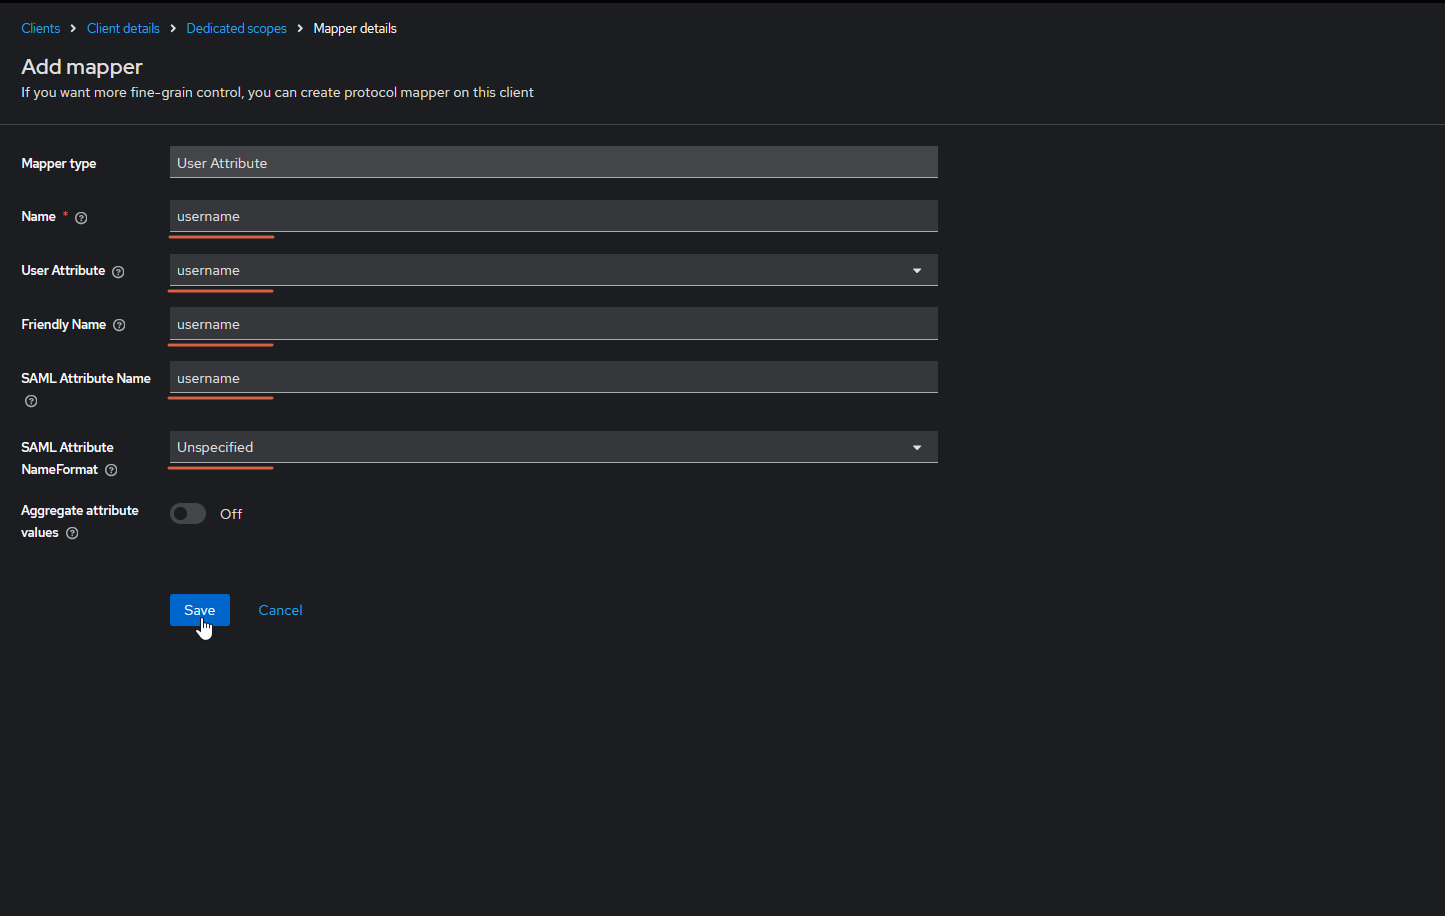
Step 3. Getting the IdP metadata and the verification certificate
- Go to Realm settings.
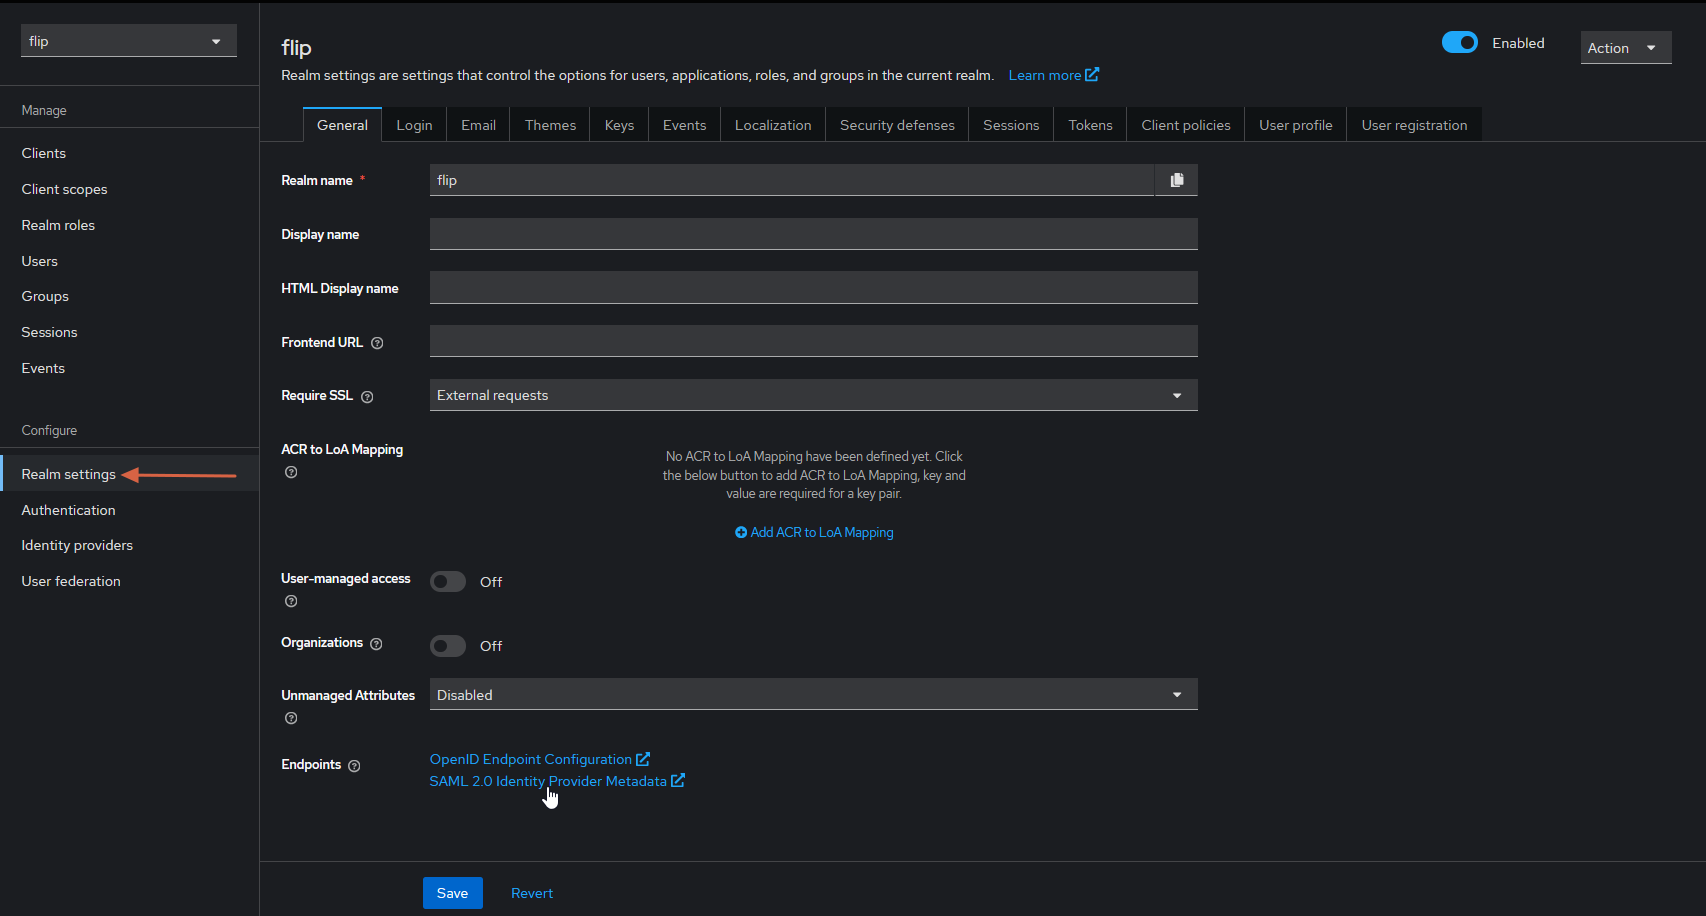
- Click the SAML 2.0 Identity Provider Metadata link. In the XML file that opens, find the following values:
- the contents of the verification certificate.
- save the page URL (this link is the "Identity provider metadata URL" that you enter when configuring SAML in flip).
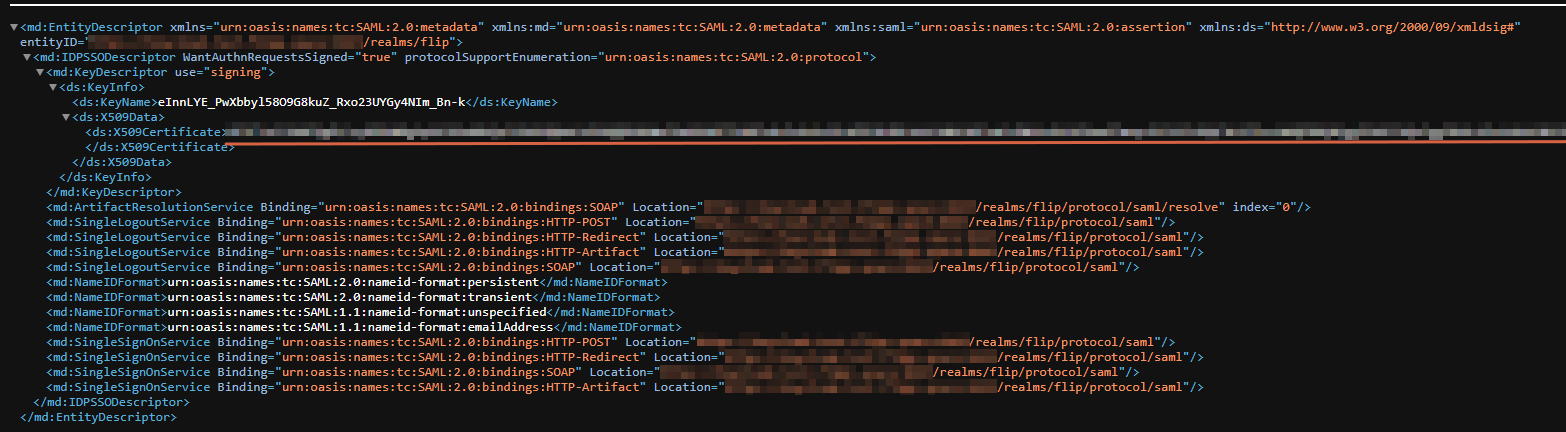
Completing the setup
Enter the data you obtained as described in the SSO setup guide.