

OpenID Connect integration with Keycloak
Step 1. Creating Client Scopes
- Sign in to the Keycloak admin console.
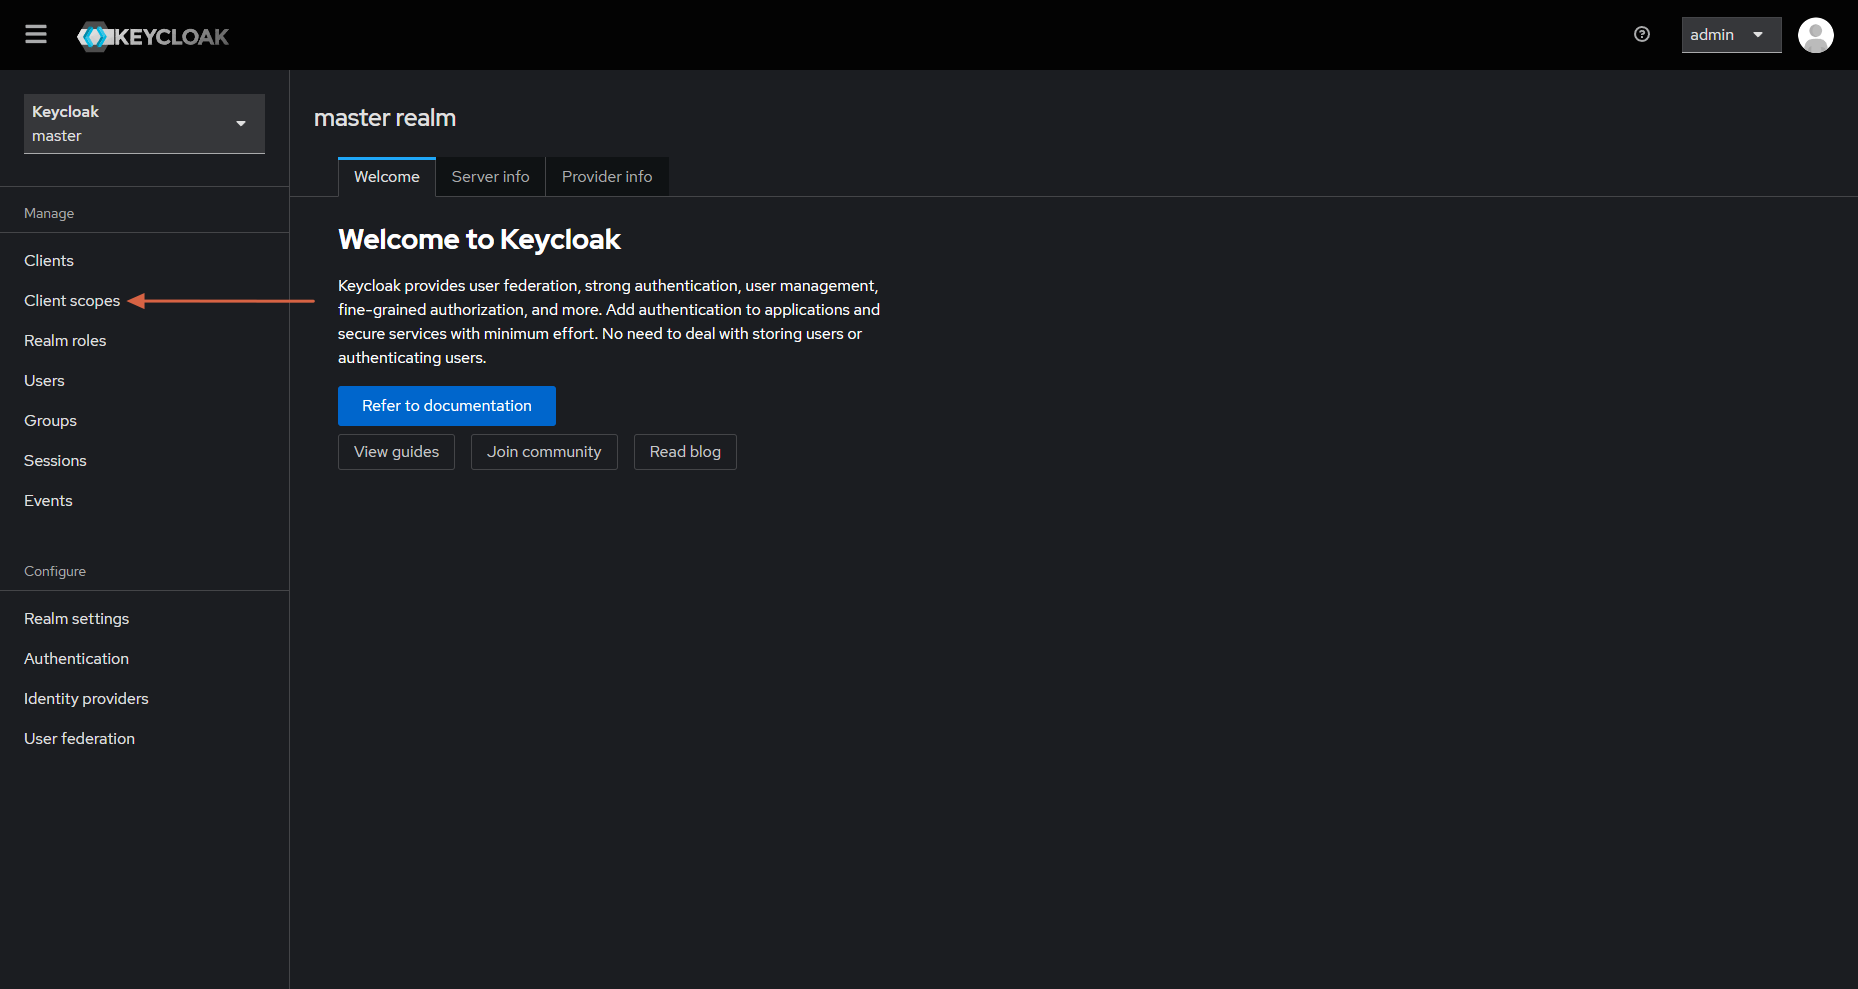
- Go to Client scopes.
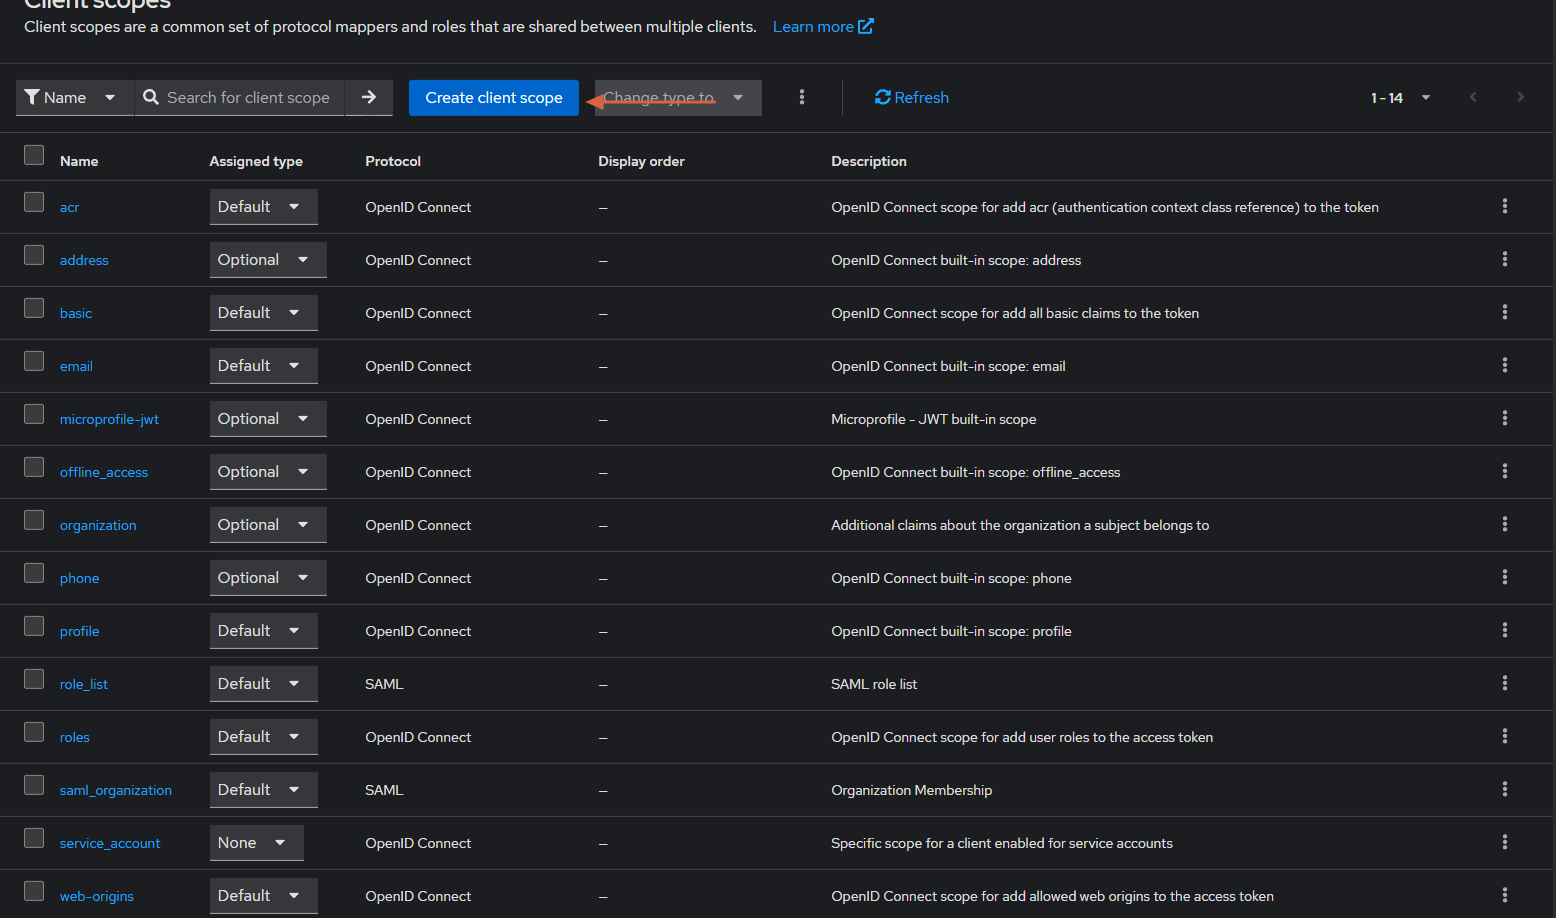
- Click Create client scope
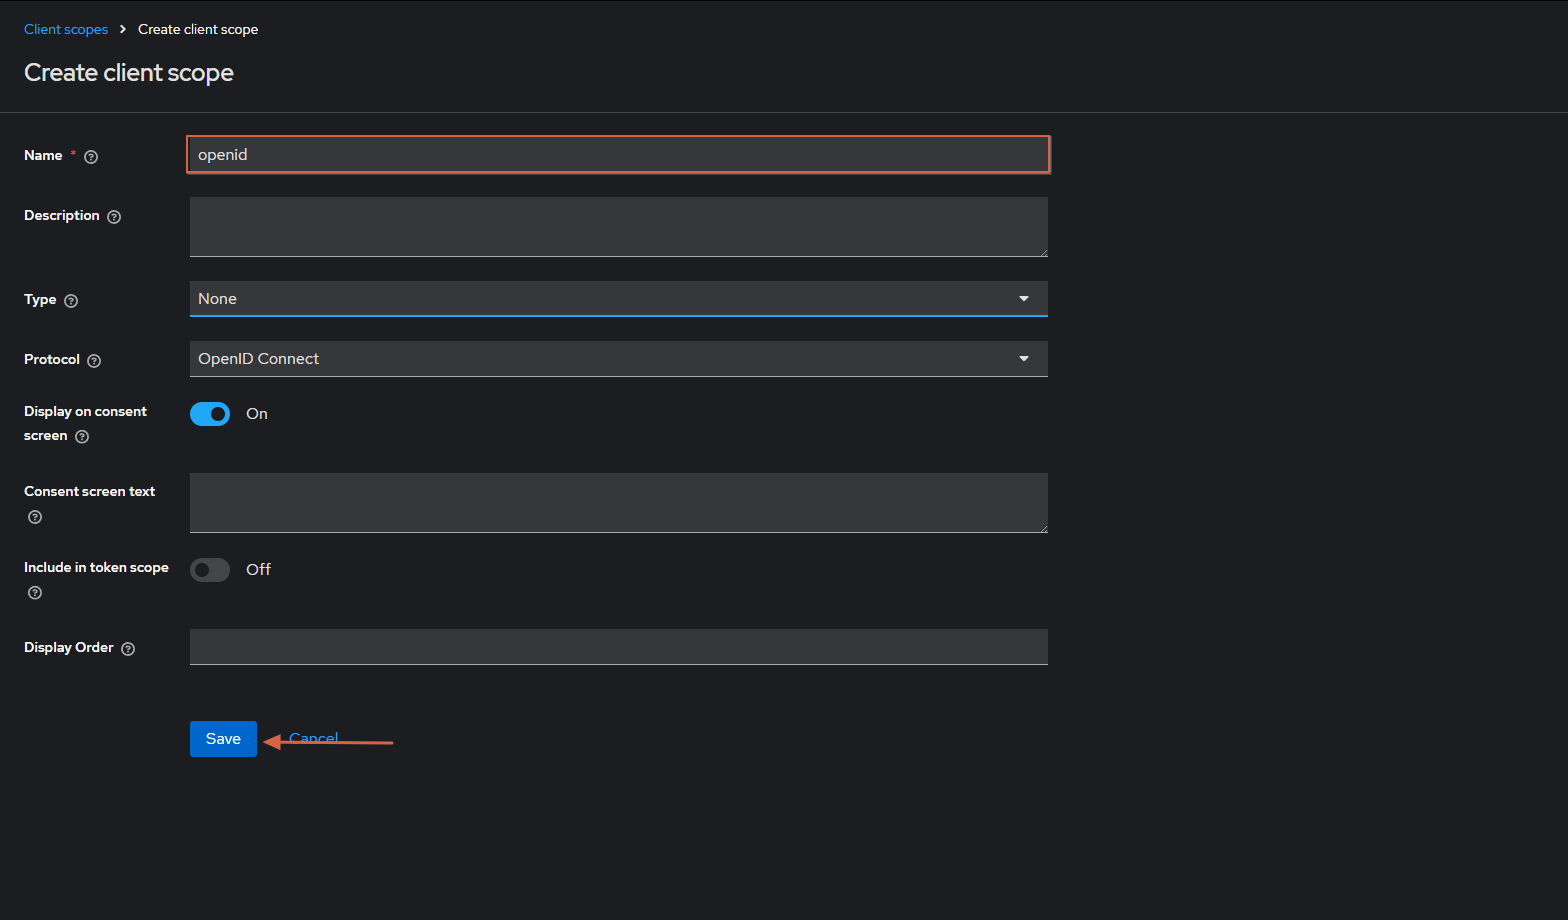
- Fill in the required fields, select the OpenID Connect protocol and save.
Step 2. Creating a Client
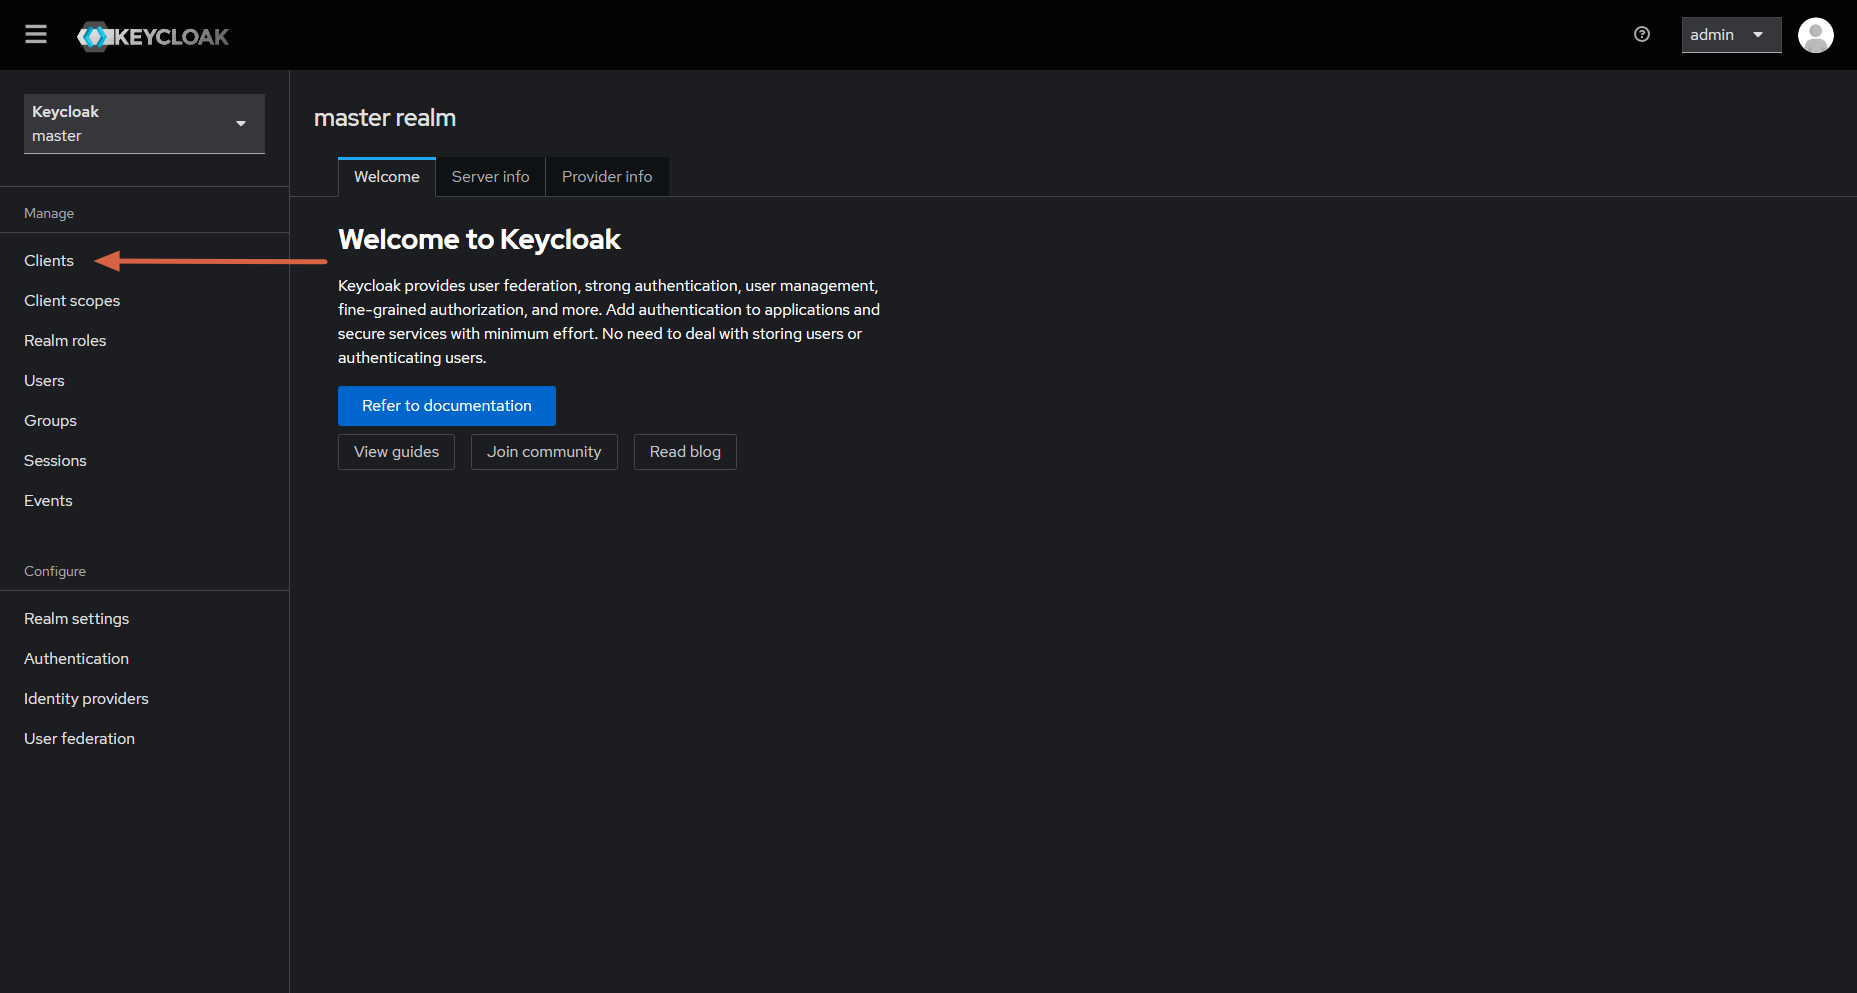
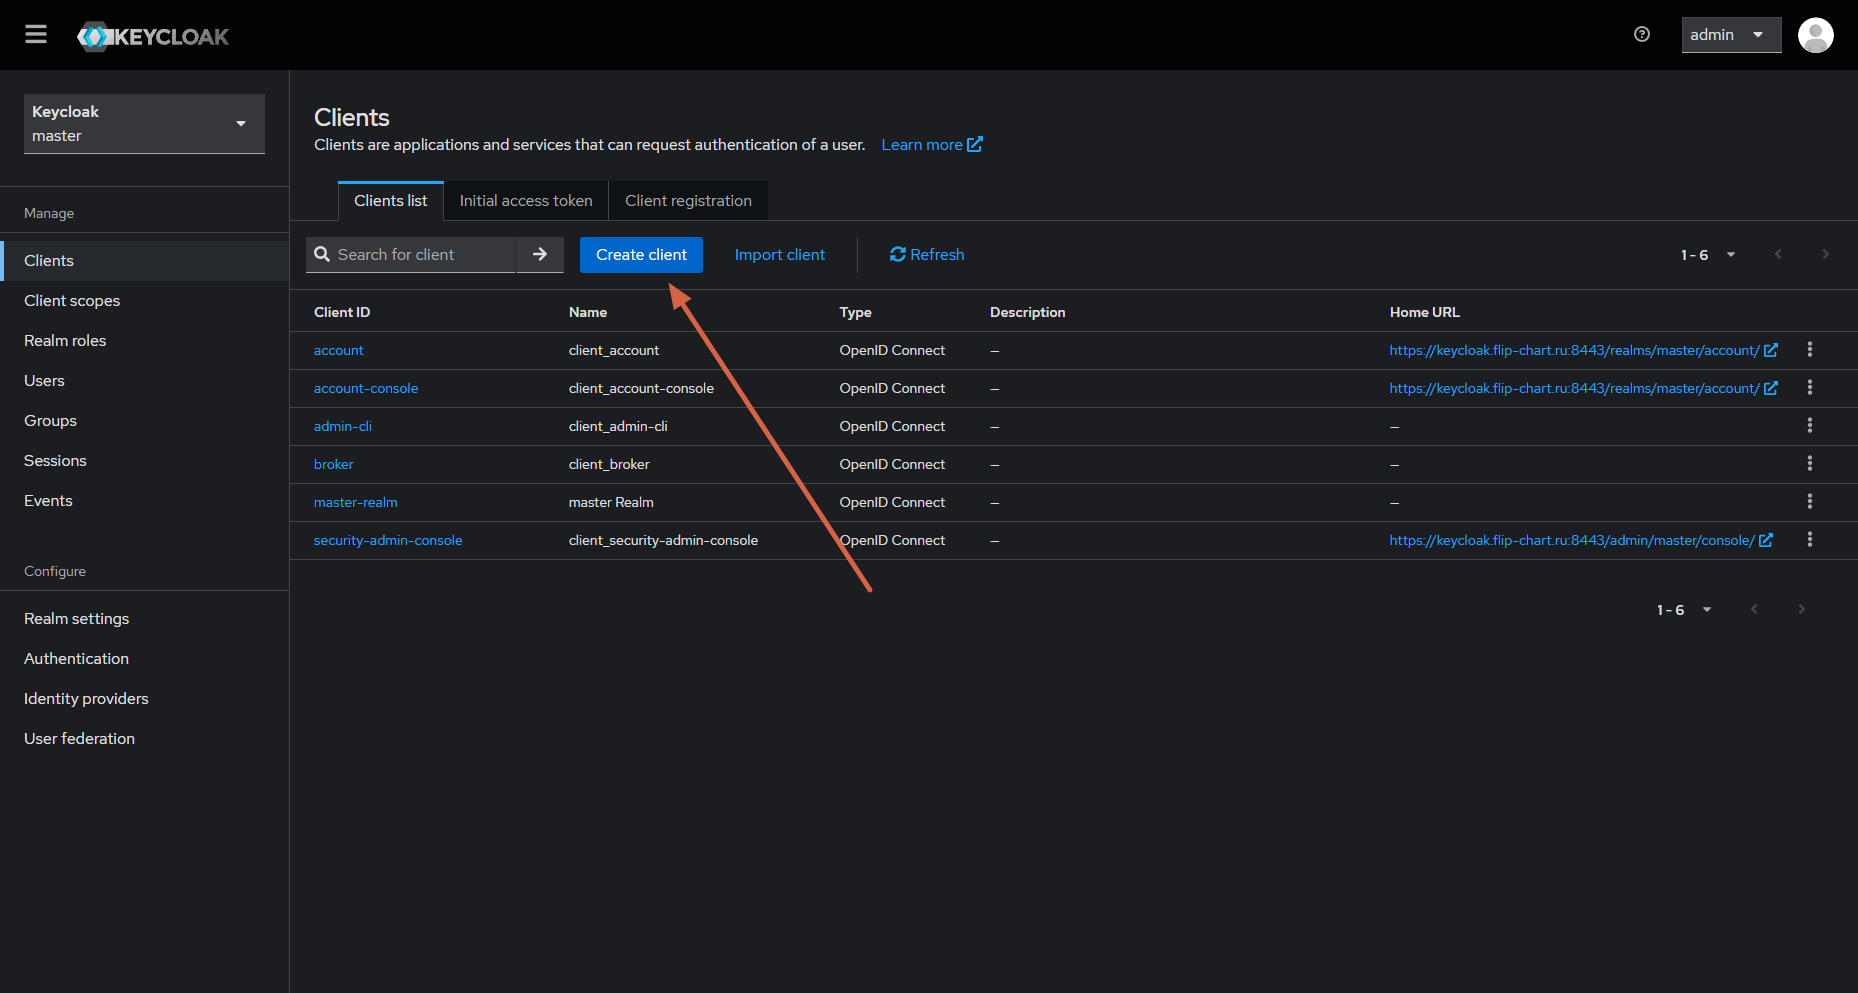
- Go to Clients.
- Click Create client.
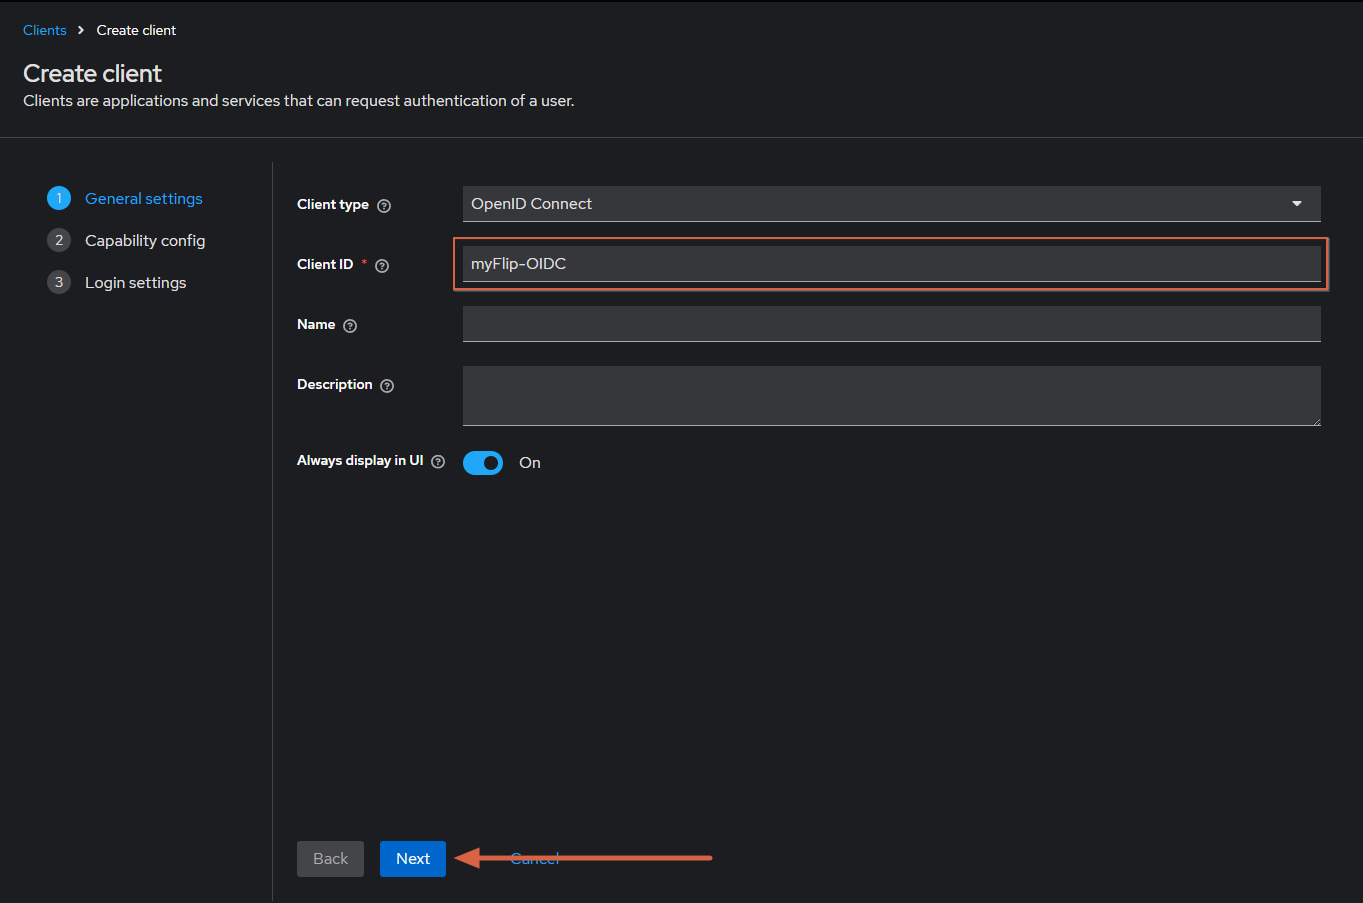
- Fill in Client type by selecting the OpenID Connect protocol, and fill in Client ID.
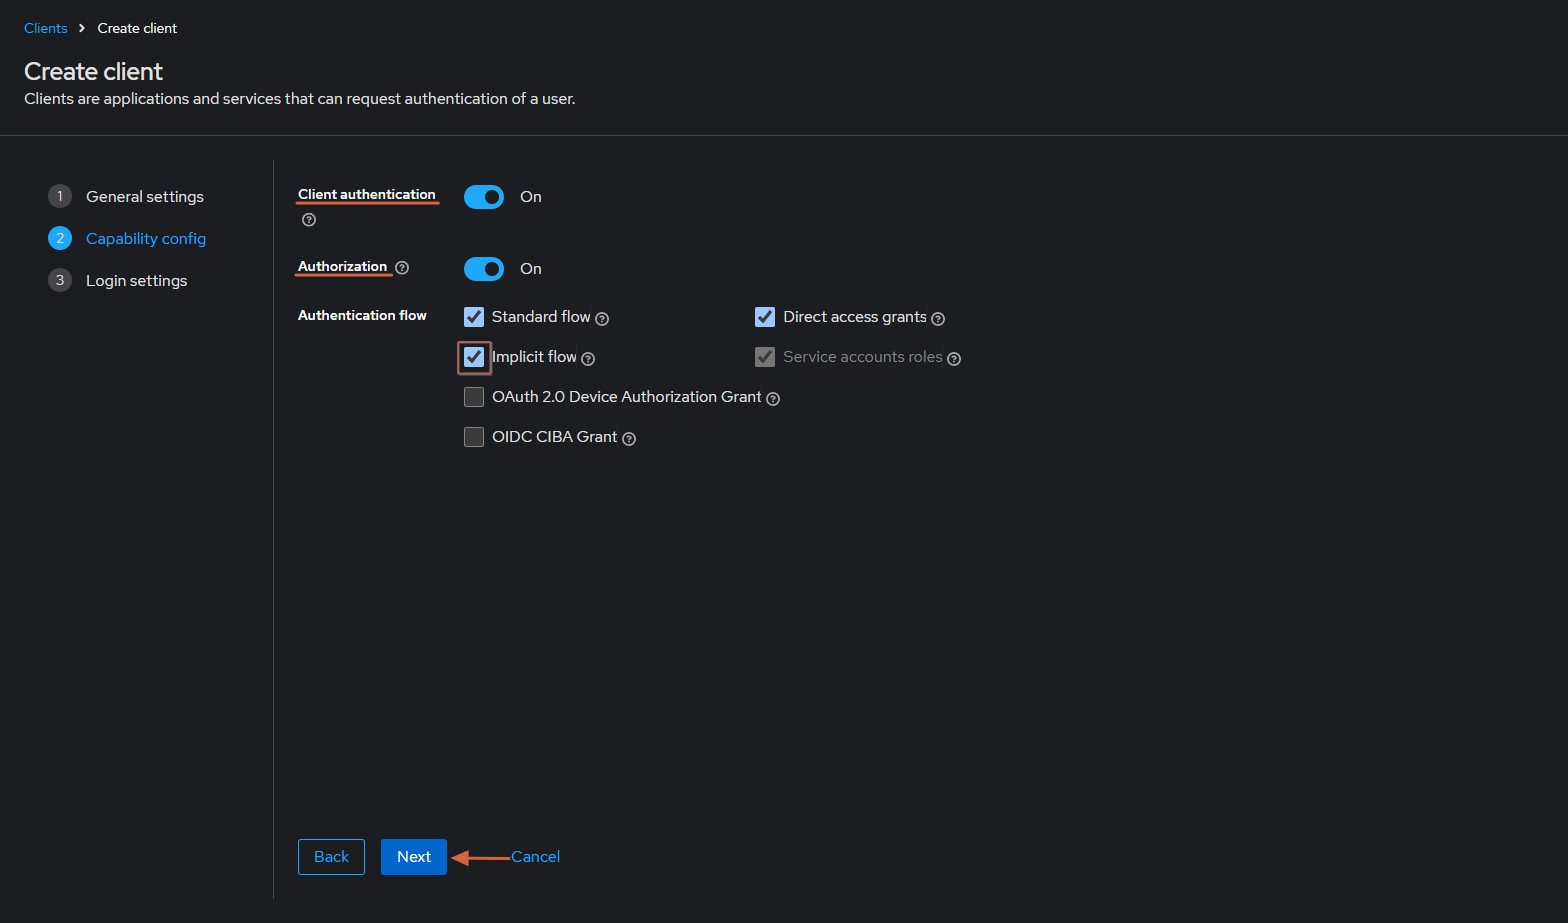
- Turn on Authorization and select Implicit flow.
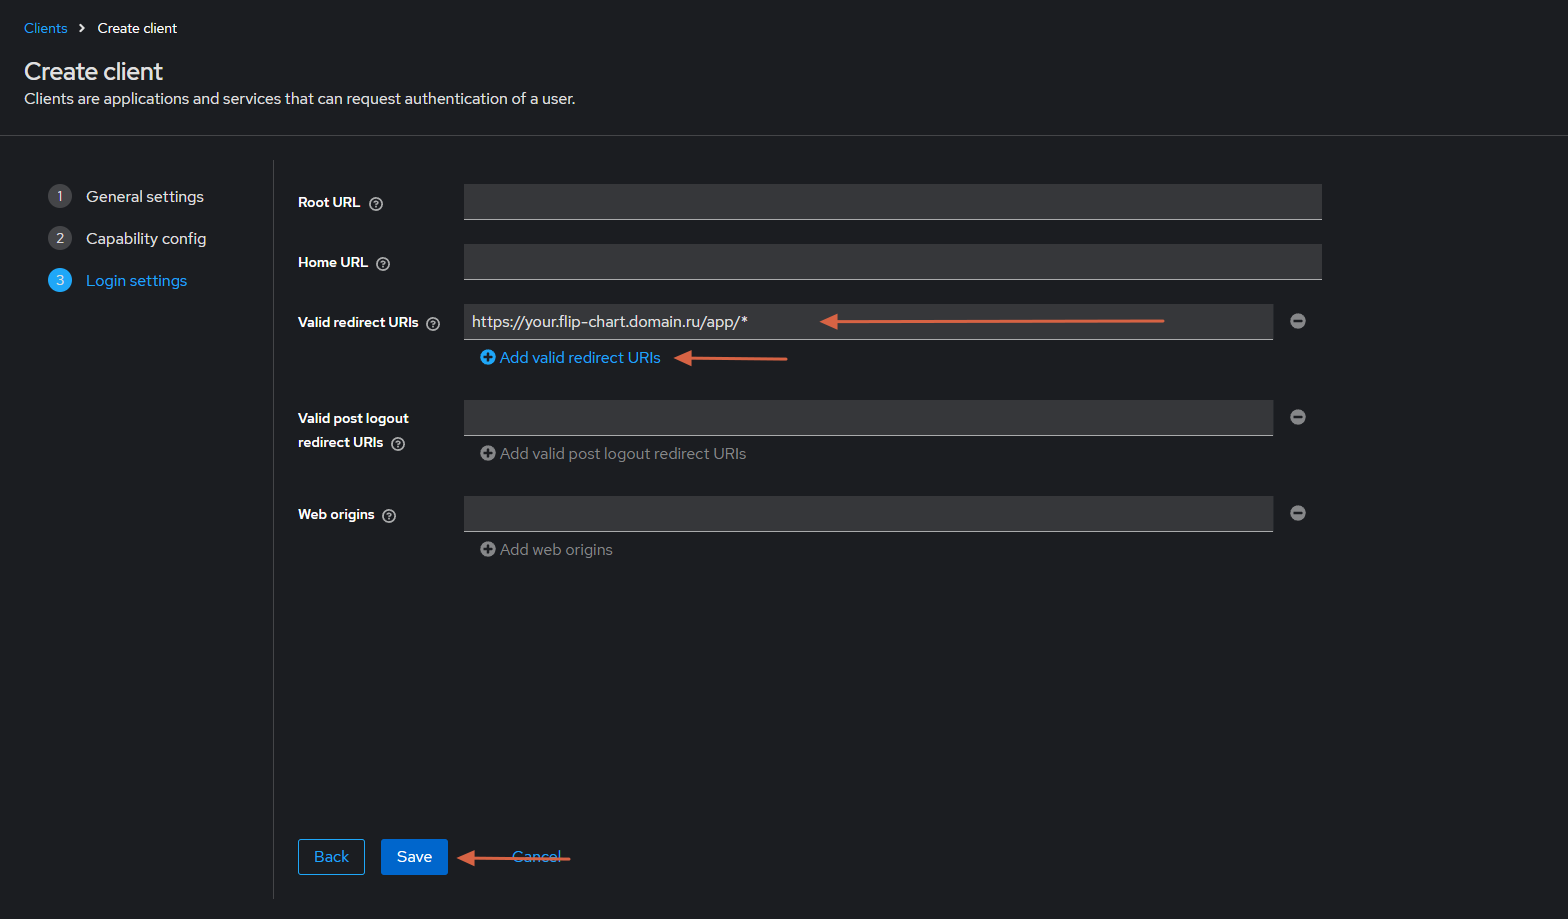
- Specify Valid redirect URIs (multiple values are allowed).
Note
The redirect URI must contain the domain name on which the flip app runs.
Step 3. Additional client configuration
- Review the client settings and adjust them if needed.
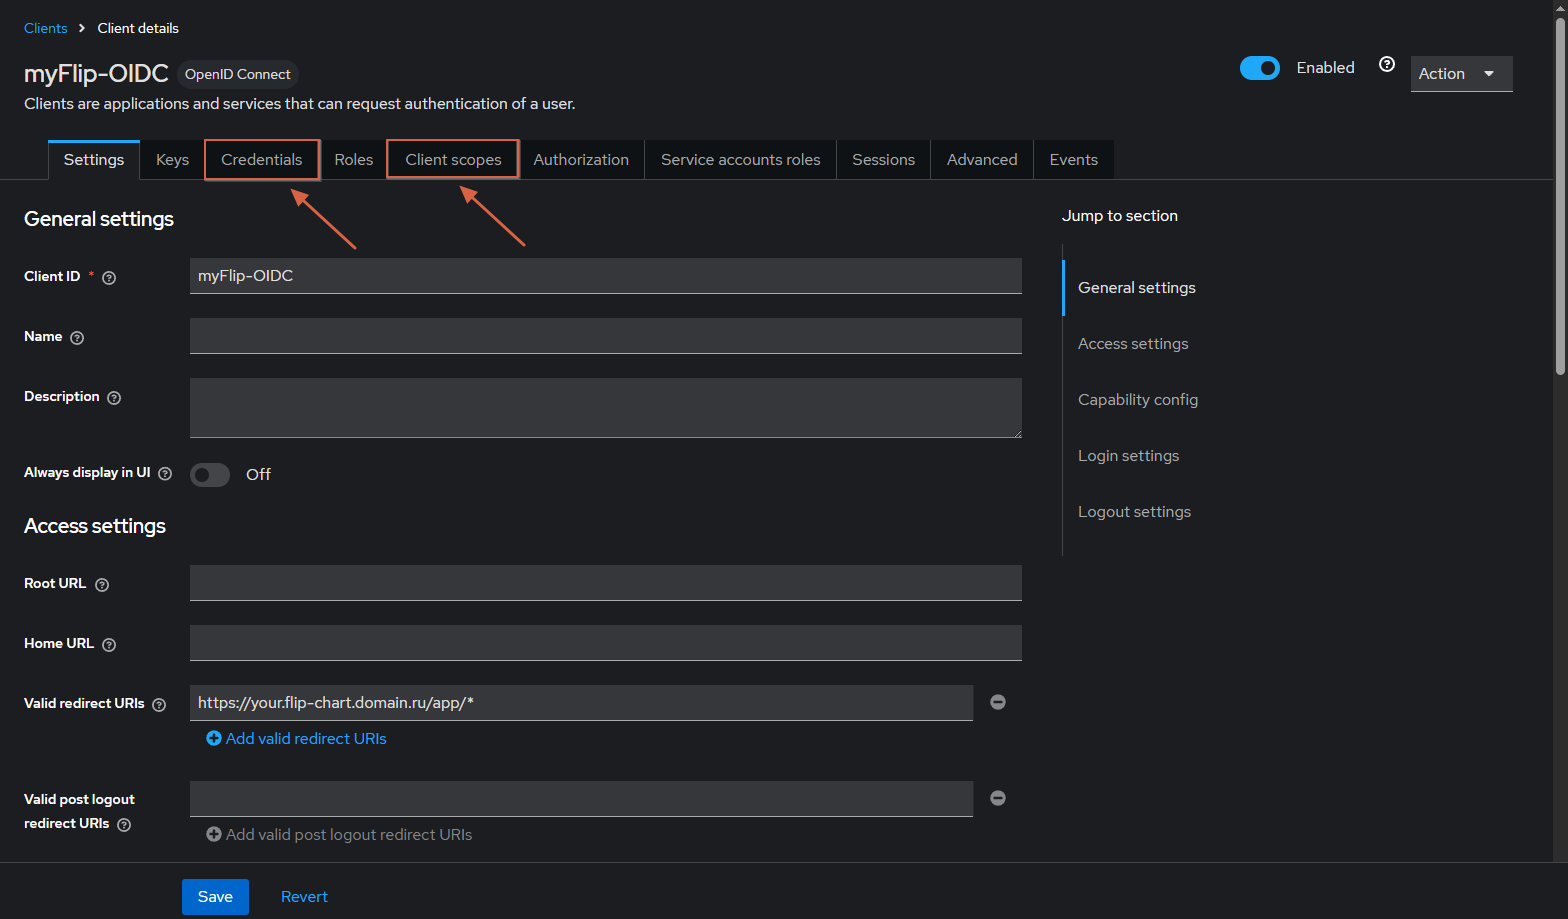
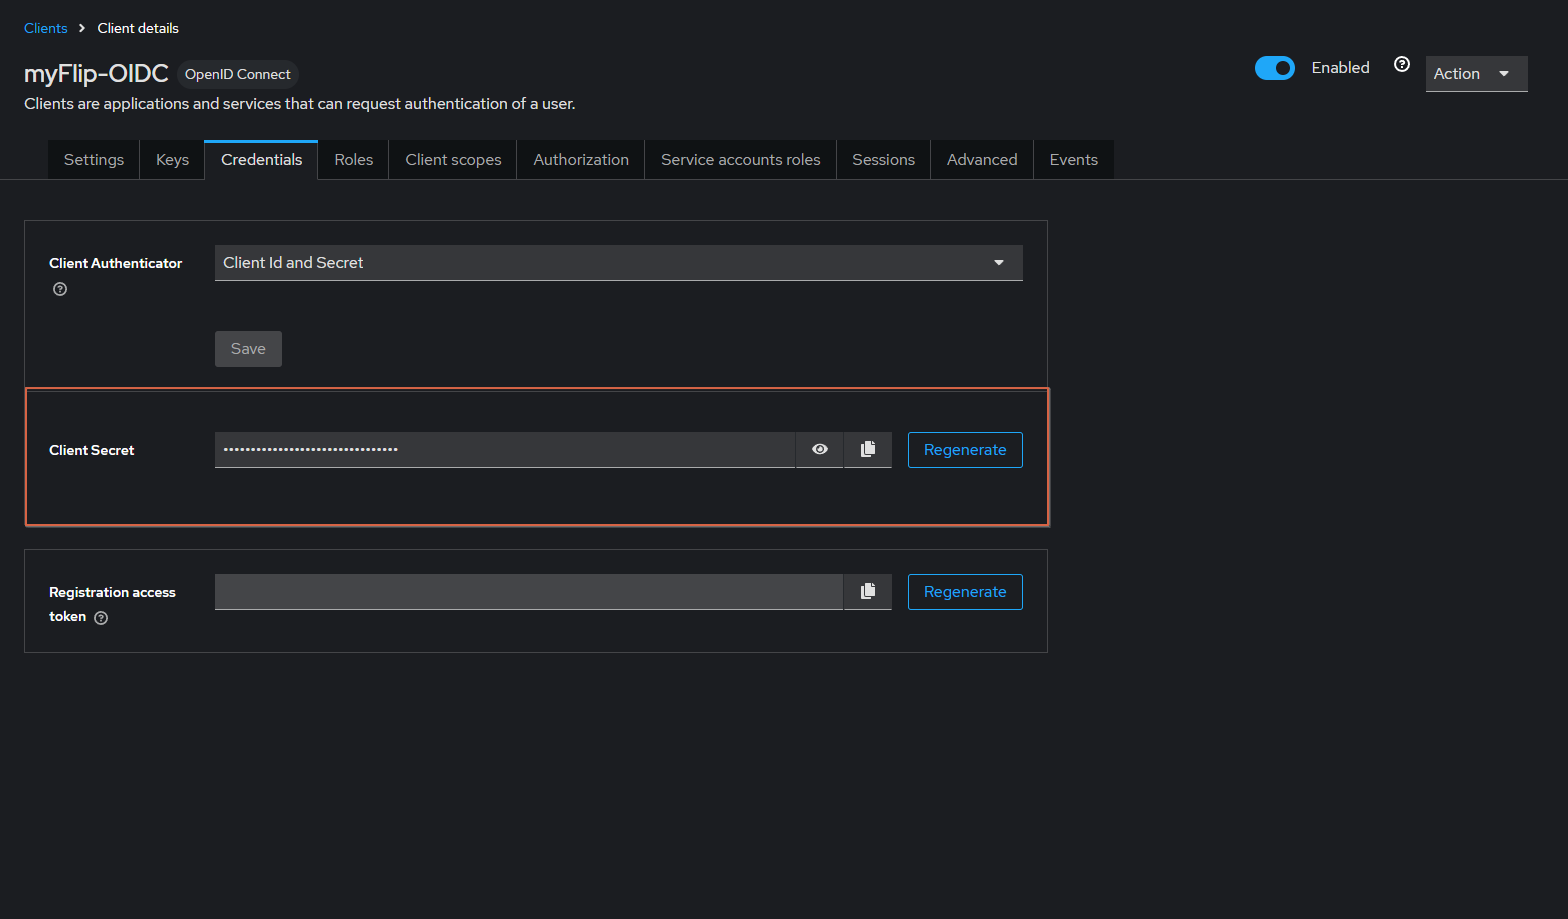
- Get the Client Secret on the Credentials tab.
Important
The Client ID and Client Secret are entered when you configure SSO in the flip interface; they are not added to the backend configuration file.
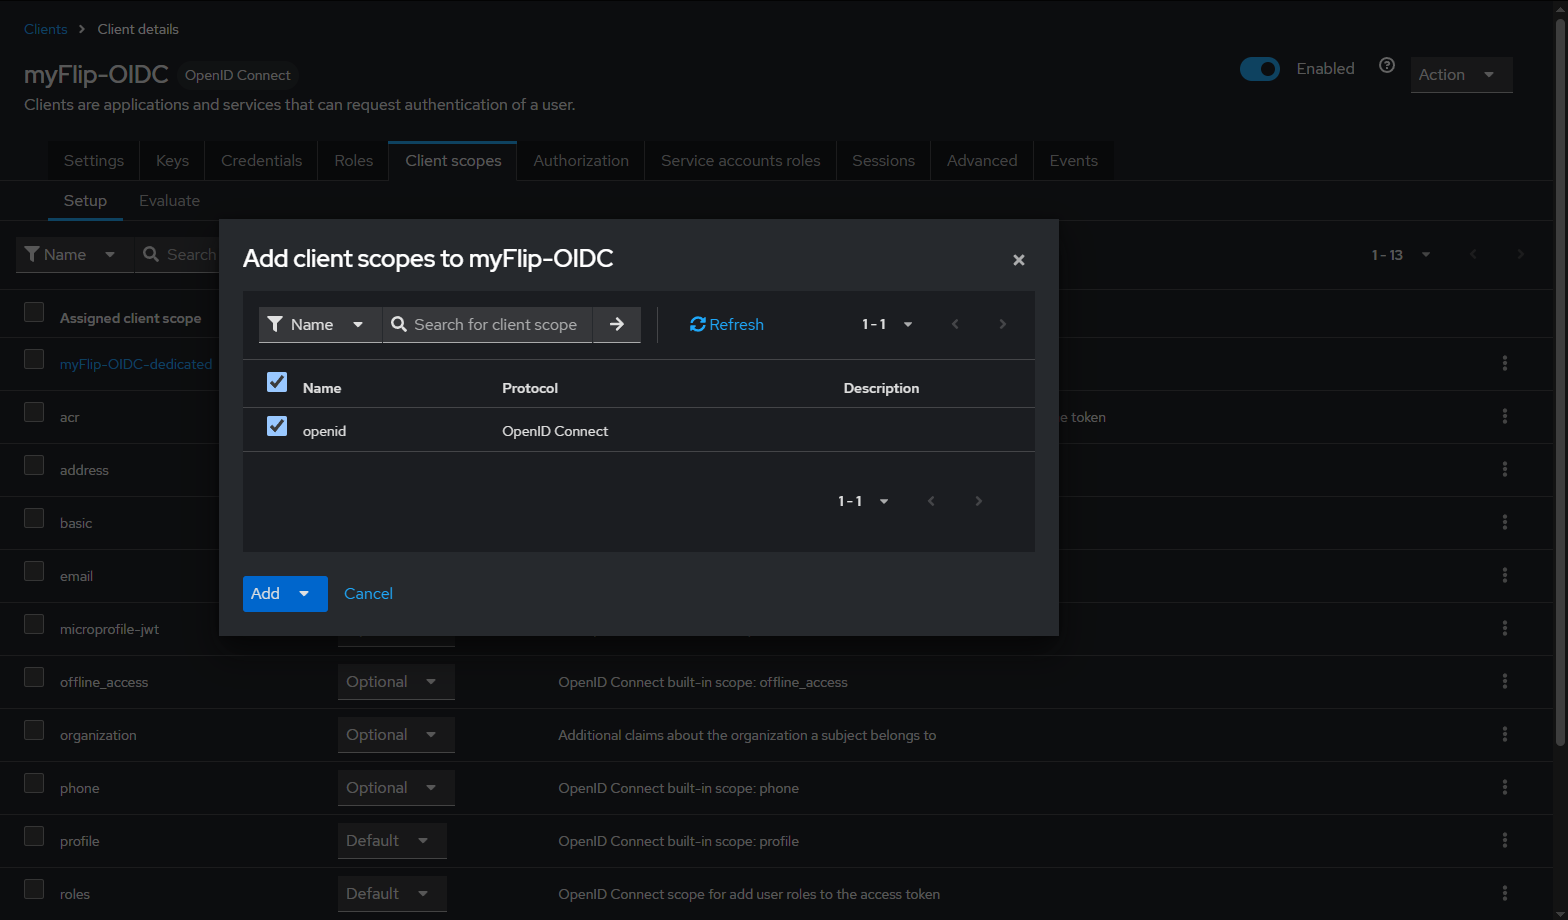
- Add the previously created Client Scope to this client.
Note
Enter the data you obtained as described in the SSO setup guide.