flip MCP — connect an AI agent to your board
Updated October 2, 2026
An AI agent does the work for you
Connect an AI agent to your flip with flip MCP and use it for scenarios like these:
- Analyzing a flip
- Generating text
- Creating tables and mind maps and filling them with data
- Building diagrams and charts in the notation of your choice
- Recognizing objects in images
- And much more
Supported AI agents
flip MCP works with AI agents that support MCP (Model Context Protocol). Below are step-by-step instructions for each of them:
- Claude — the claude.ai web app and the Claude Desktop app
- Claude Code — an AI agent for software development in the terminal
- ChatGPT — in developer mode
- Cursor — a code editor with an AI agent
- VS Code with GitHub Copilot
- Gemini CLI — Google's AI agent for the terminal
- And other AI agents that support MCP

flip MCP server URL
Connecting takes a couple of minutes: you add the flip MCP server to your AI agent, log in to your flip account and allow access to your flips. The server URL is the same for all AI agents:
https://mcp.flip-chart.ru/mcpThe server uses the Streamable HTTP protocol, and you sign in via OAuth: the AI agent gets access to flip but never learns your password.
Choose your AI agent:
How to connect Claude
Works with the claude.ai web app and the Claude Desktop app. You can add a custom connector on any Claude plan; on the free plan, only one.
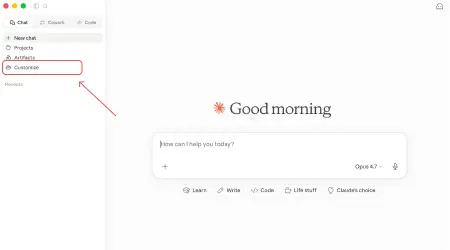
- Open Claude and go to the Customize tab
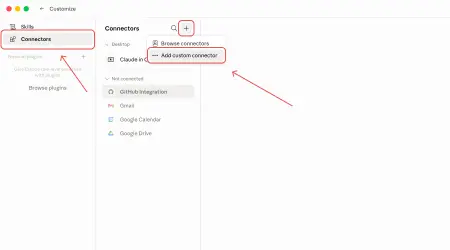
- Select Connectors, click + Add and choose Add custom connector
- Name the connector, for example flip-mcp, paste the server URL and click Continue
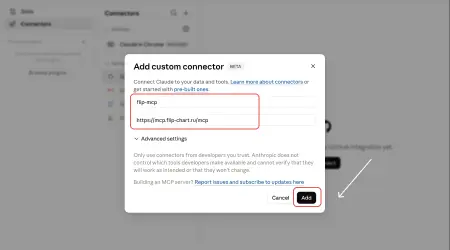
- In the Authentication section, choose Sign in now, and in the OAuth client section, choose Register automatically: this way, Claude registers itself on the flip server. Click Add
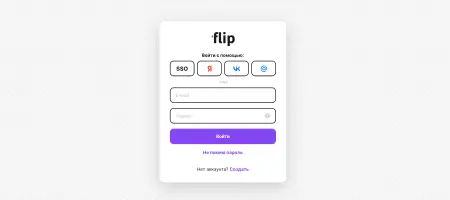
- Log in to your flip account. If the login window doesn't open, find flip-mcp in Customize → Connectors and click Connect
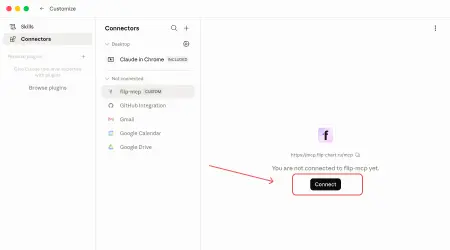
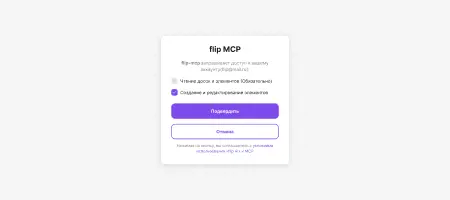
- Grant access to your account. Without it, the AI agent can't work with your flip
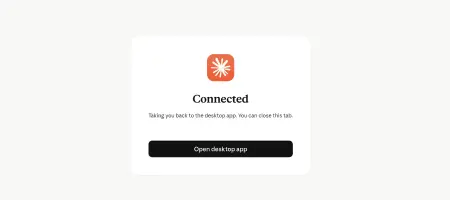
- In a new chat, click + → Connectors and make sure flip-mcp is turned on. Send a link to your flip and describe the task
Claude Team and Enterprise plans. The organization owner adds the connector first: Organization settings → Connectors → Add → Custom → Web. Then each member connects it for themselves: Customize → Connectors → Connect.
How to connect Claude Code
Add flip MCP with a single command in the terminal:
claude mcp add --transport http flip-mcp https://mcp.flip-chart.ru/mcpThe server will be connected in the current project. To make flip available in all your projects, add the --scope user flag to the command.
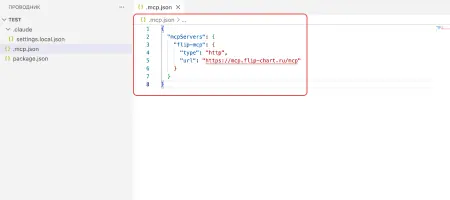
Instead of running the command, you can create a .mcp.json file in the project root — then flip will be connected for everyone who works on the project:
{
  "mcpServers": {
    "flip-mcp": {
      "type": "http",
      "url": "https://mcp.flip-chart.ru/mcp"
    }
  }
}
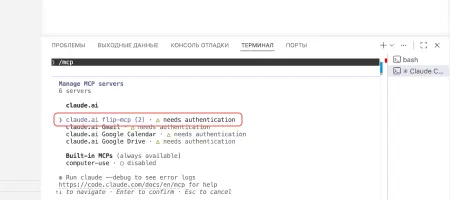
- Start Claude Code and open the list of MCP servers with the command
- Select the flip-mcp server — it is waiting for authorization — and choose Authenticate
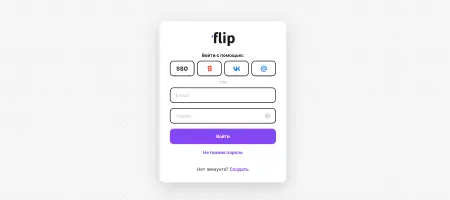
- Log in to your flip account in the browser
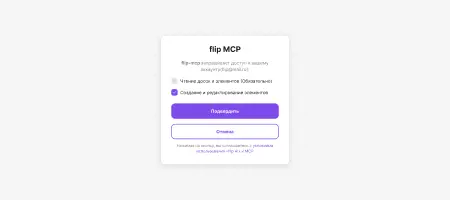
- Grant access to your account. Without it, the AI agent can't work with your flip
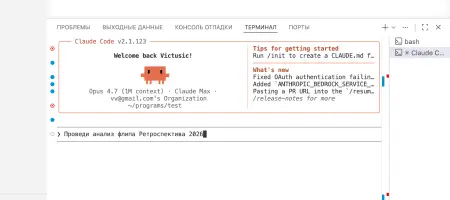
- Done! Ask Claude Code to work with your flip
How to connect ChatGPT (developer mode)
ChatGPT connects custom MCP servers in developer mode. It is available in the chatgpt.com web app on the Plus, Pro, Business, Enterprise and Edu plans. In workspaces, developer mode is turned on by an admin.
- Open Settings → Security and login and turn on Developer mode
- Go to the Plugins page, click + and create an MCP app (Create MCP App)
- Enter the name flip-mcp and a description, for example “flip online whiteboard”. In the Connection section, paste the server URL , and in the Authentication section, choose OAuth
- Confirm the creation, log in to your flip account and grant access
- In a new chat, open the tools menu (+) and select flip-mcp. Send a link to your flip and describe the task. ChatGPT will ask you to confirm any actions that change the flip
How to connect Cursor
In Cursor, MCP servers are configured in the mcp.json file: ~/.cursor/mcp.json applies to all projects, and .cursor/mcp.json in the project root applies only to that project.
- Add flip MCP to mcp.json. If the file already contains other servers, add flip-mcp inside mcpServers next to them
{ "mcpServers": { "flip-mcp": { "url": "https://mcp.flip-chart.ru/mcp" } } } - Open the list of MCP servers in the Cursor settings. Next to the flip-mcp server, click Connect or the Needs authentication label
- Log in to your flip account in the browser and grant access
- In the chat with the agent (Agent), ask it to work with your flip and send a link to it — Cursor will call the flip MCP tools on its own
How to connect VS Code and GitHub Copilot
In VS Code, the flip MCP tools work in GitHub Copilot Chat in agent mode. Add the server to your VS Code profile with a command in the terminal:
code --add-mcp "{\"name\":\"flip-mcp\",\"type\":\"http\",\"url\":\"https://mcp.flip-chart.ru/mcp\"}"Or use the Command Palette — MCP: Add Server. To connect flip in a single project only, create a .vscode/mcp.json file in it:
{
  "servers": {
    "flip-mcp": {
      "type": "http",
      "url": "https://mcp.flip-chart.ru/mcp"
    }
  }
}- In the Command Palette, select MCP: List Servers → flip-mcp and start the server (Start Server)
- VS Code will prompt you to sign in — confirm, log in to your flip account and grant access
- Open Copilot Chat in Agent mode. The Configure Tools button in the input field shows the flip MCP tools
How to connect Gemini
Gemini works with flip MCP through Gemini CLI, Google's AI agent for the terminal. Add the server with this command:
gemini mcp add --transport http --scope user flip-mcp https://mcp.flip-chart.ru/mcpThe --scope user flag connects flip in all projects; without it, the server is added to the current project only. The setting is saved to ~/.gemini/settings.json — you can also add it there manually:
{
  "mcpServers": {
    "flip-mcp": {
      "httpUrl": "https://mcp.flip-chart.ru/mcp"
    }
  }
}- Start Gemini CLI and run the command
- Log in to your flip account in the browser and grant access
- Check the connection with the command — the flip MCP tools will appear in the list
In the Gemini web app, custom MCP servers can currently be connected only in the US, with a personal Google account and the English interface, so use Gemini CLI.
Other AI agents
flip MCP works with any AI agent that can connect to remote MCP servers. In the agent settings, specify:
- Server URL:
- Transport: Streamable HTTP — in settings, it is often called simply HTTP
- Authorization: OAuth — the agent will register automatically and open the flip login window
How to get started
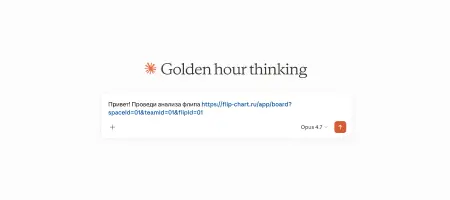
Once flip MCP is connected, send your AI agent a link to your flip in the chat and describe the task
Important
The AI agent acts on your behalf. Token usage depends on the tasks and can be unpredictable. The more complex the request, the higher the usage
The AI agent can make mistakes, so we recommend checking the results of its work
The AI agent acts on your behalf. Token usage depends on the tasks and can be unpredictable. The more complex the request, the higher the usage
The AI agent can make mistakes, so we recommend checking the results of its work
More helpful articles
Where to find invoices and receipts in flip
Working with flips: the basics
Team profile settings in flip
What flip is and how to use it