

The audit log is a space settings section that records user actions: who did what, when and from which IP address. The log helps you sort out a disputed situation, check what members did and prepare a report for your security team
Plan limits
The audit log is available on the Enterprise plan. The section is visible to the space owner and admins. On other plans, the section shows the message “This section is available on the Enterprise plan” and the “Contact us” button
How to open the audit log
- In the left sidebar, click “Space settings” next to the space name. If you have several spaces, open the list of spaces and click the settings icon in the row of the current space
- Select the “Audit log” section
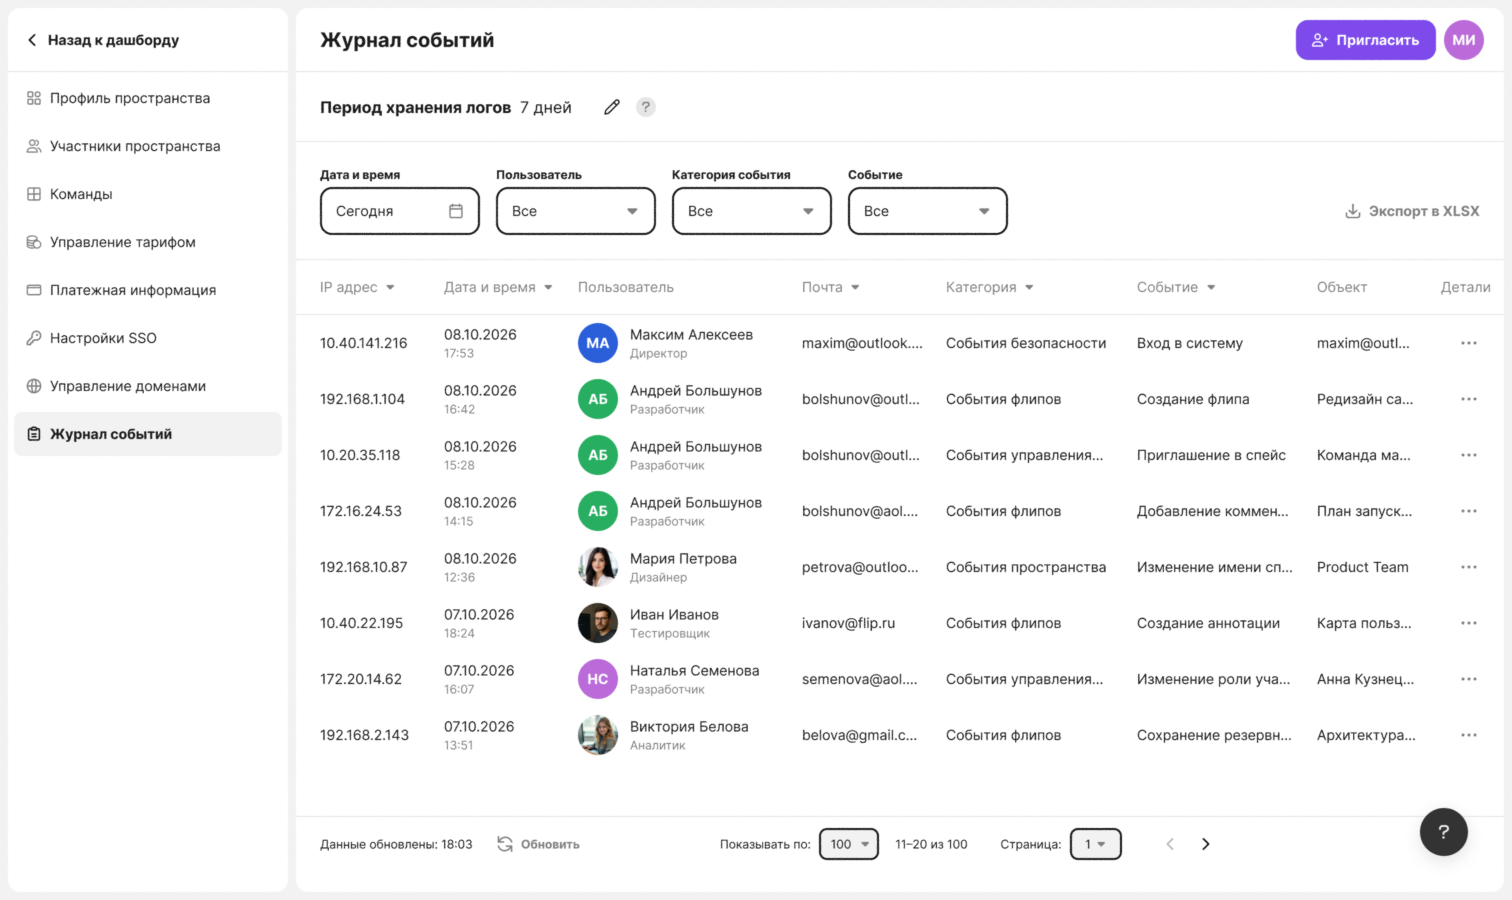
When opened, the log shows today's events, newest first
What an event contains
Each row of the log is one event. The table has the following columns:
- “IP address” — the address the action was performed from
- “Date and time” — when the event happened
- “User” — who performed the action
- “Email” — the user's email. Click it to copy
- “Category” — the group the event belongs to
- “Event” — what exactly happened
- “Object” — what the action was performed on
- “Details” — the “Open details” button
To sort the log, click the “IP address”, “Date and time”, “Email”, “Category” or “Event” column header
The time of the last data update is shown below the table. Click “Refresh” to load new events. Here you can also choose the number of rows per page — 10, 20, 50 or 100 — and the page you need
How to find the events you need
The filters are located above the table:
- “Date and time” — the period the events are shown for
- “Users” — one or several space members. You can find a member by name, and “Select all” checks the whole list. The “Unknown” item selects the actions of users not registered in the system
- “Event categories” — groups of events
- “Event” — individual event types. If categories are selected, the events of those categories are checked in this filter and the rest are unavailable
In the user, category and event filters, leave the items you need checked and click “Apply”. To return the log to its initial state, click “Reset”
If no events match the conditions, the “Nothing found 😦” message appears — change the filters and try again
How to choose a period
Click the “Date and time” filter
Choose a ready-made option in the “Presets” block — “Today”, “Yesterday”, “15 min”, “30 min”, “1 hour” — or in the “Last” block — 7, 30, 90, 180 or 365 days
Or set the period manually: pick the start and end dates in the calendar and enter the start and end time. The “All day” checkbox selects the whole day
Click “Apply”
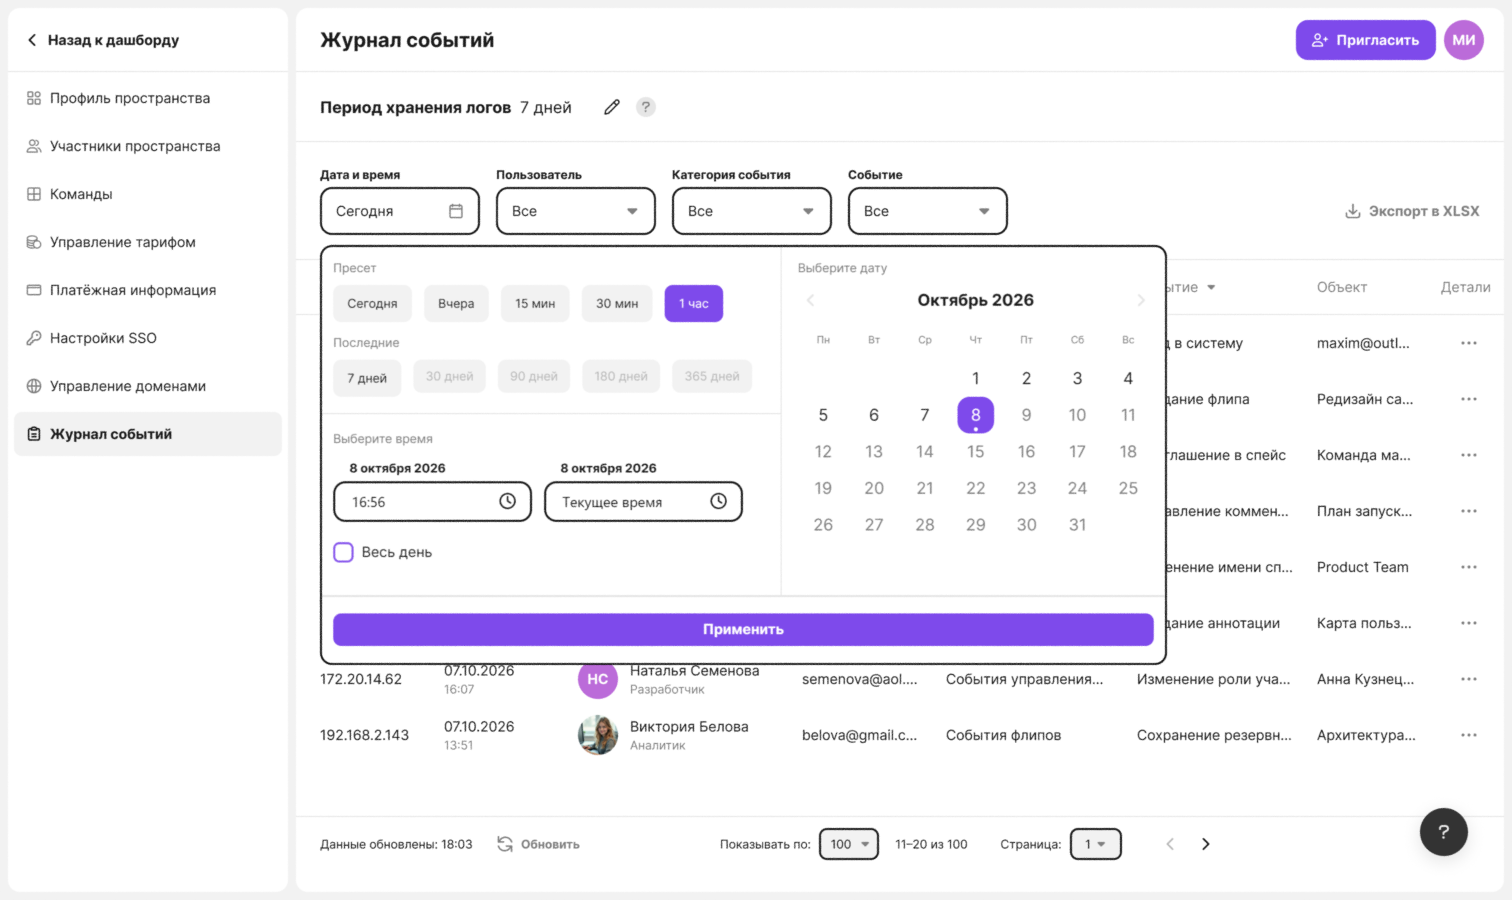
Options that go beyond the log retention period are unavailable. Hover over such an option to see a tooltip with the current retention period
How to view event details
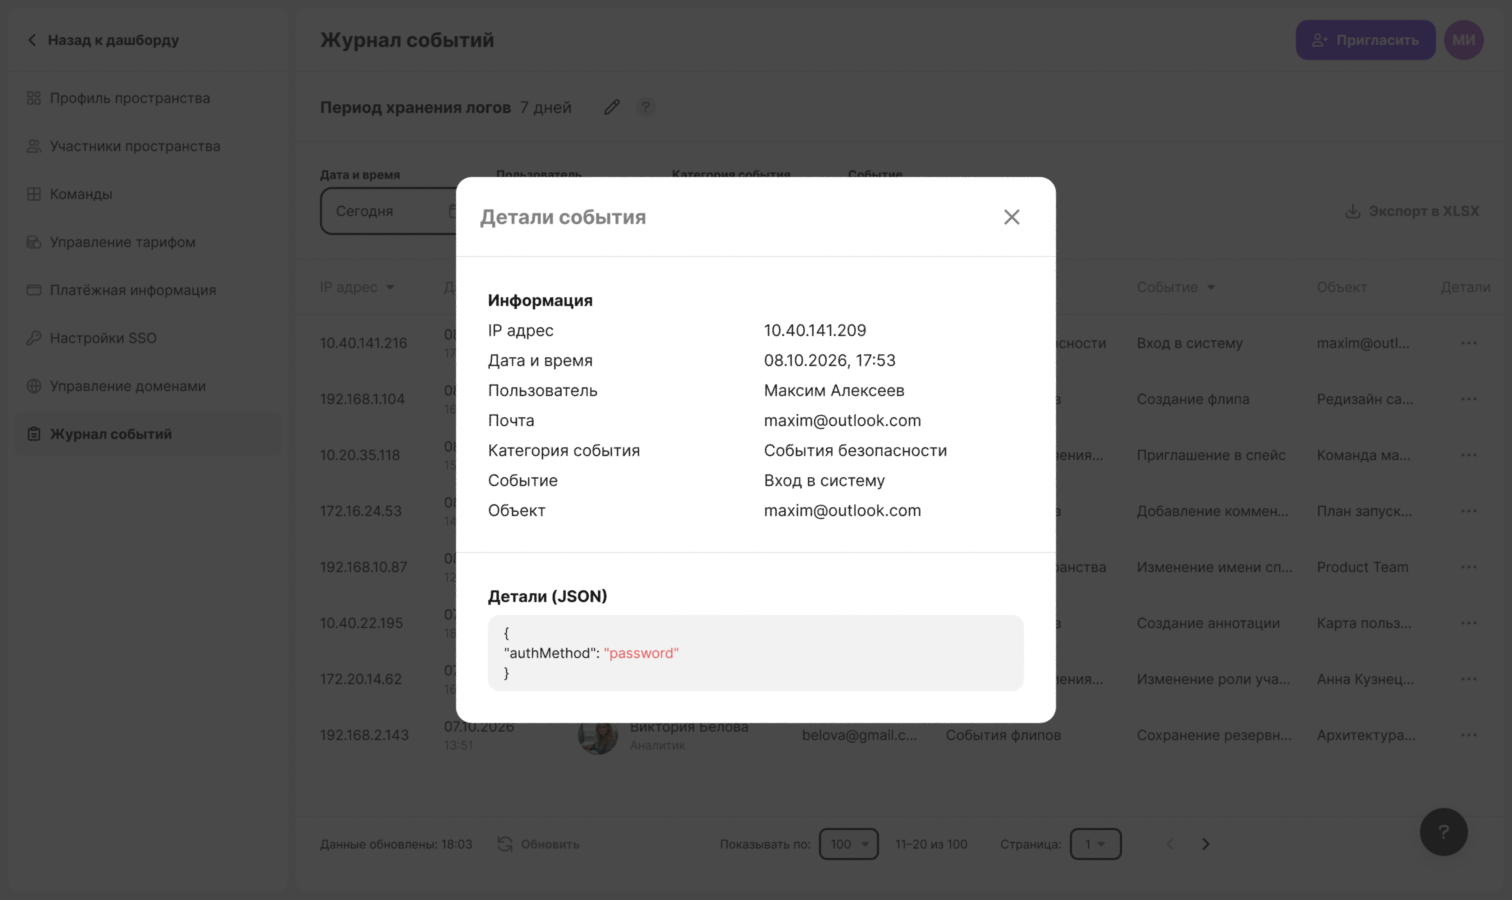
- In the event row, click “Open details” in the “Details” column
- The “Event details” window opens
The “Information” block contains the same data as the table row: IP address, date and time, user, email, event category, event and object. The “Details (JSON)” block contains the full event data in JSON format
How to change the log retention period
The current period is shown in the “Log retention” line above the filters. Events older than this period are not kept in the log
- Click the “Edit” pencil icon next to the retention period
- In the “Change log retention period” window, select a period: 7, 30, 90, 180 or 365 days
- Click “Save”
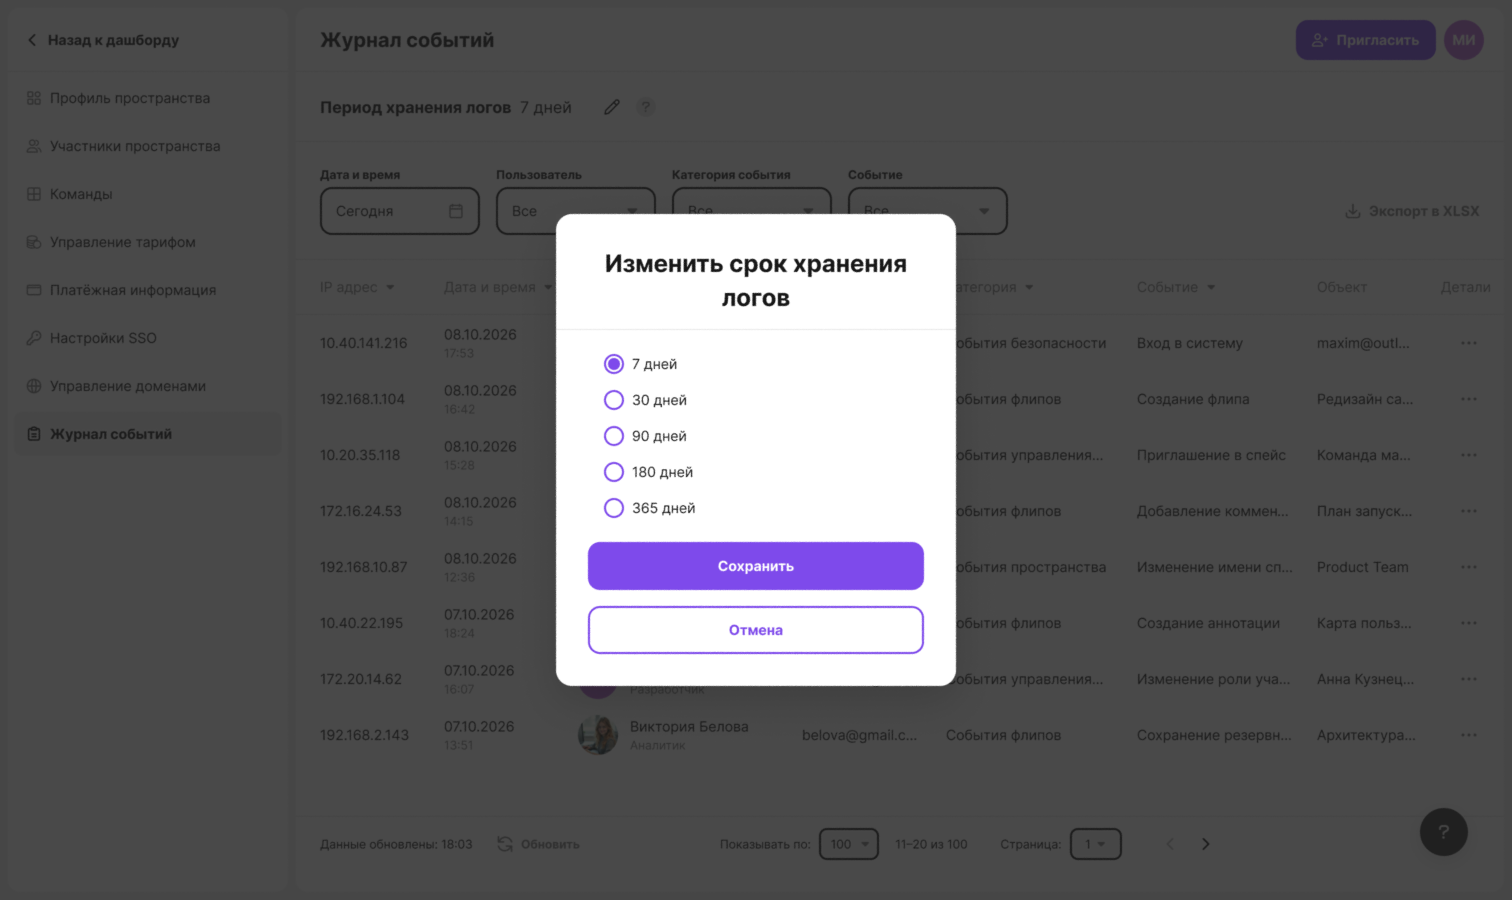
After saving, the period filter returns to its default value — today's events
How to export the log
- Set up the filters and sorting — only the selected events will get into the file
- Click “Export to XLSX” to the right of the filters
An XLSX file will be saved to your computer. If the export fails, the “Export failed. Please try again” message appears
For the roles that have access to the log, see Space member roles. For signing in through a corporate identity provider, see SSO and domain management