

A frame is an area on a flip that gathers elements into one block: a slide, a section of a diagram or a mockup screen. Elements inside a frame move and are copied together with it, and the frames themselves can be ordered, saved to a file and shown as presentation slides
How to create a frame
On the toolbar, select “Frame” or press the F key. If the tool is not on the toolbar, open “All tools”
Pick a format in the list that opens:
- “Custom” — a frame of any size
- “A4”, “1:1”, “4:3”, “16:9” — frames with fixed proportions
- “Mobile”, “Tablet”, “Browser” — frames with a device bezel for mockups
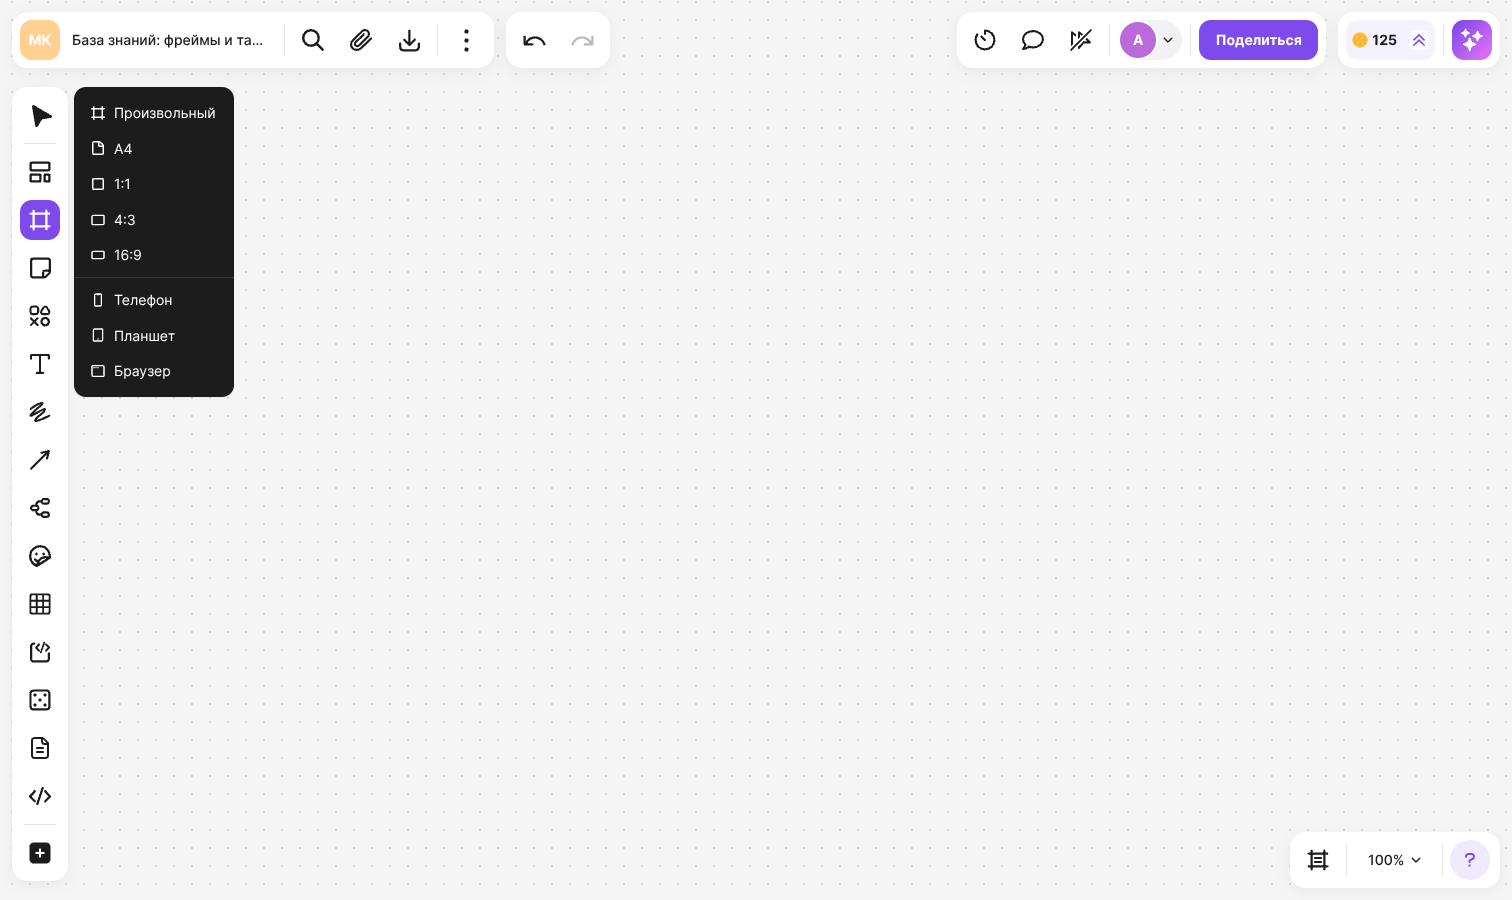
Click the flip — a frame of the selected format appears. To set the size right away, hold the mouse button and drag the frame to the size you need
If no format is selected, a “Custom” frame is created
To change the format of an existing frame, select it and click the format name in the panel above the frame. “Mobile” and “Tablet” frames have an “Orientation” button in the panel — it switches between portrait and landscape. To resize a frame, drag the corners and sides of the selection box; to change the background color, use the “Fill” button
How to name a frame
A new frame is named “Frame 1”, “Frame 2” and so on, and a frame with a device bezel gets the name of its format. There are two ways to change the name:
- Click the frame name and edit the text
- Select the frame and start typing — the new text replaces the previous name
Press Enter or click outside the frame to save the name. It can't be empty: if you erase the text, the default name comes back. A long name is shortened with an ellipsis, and when you zoom far out, frame names are hidden
How to work with frame content
- Drag an element onto a frame or create it right on the frame — the element is attached and moves together with the frame
- Draw or resize a frame over existing elements — they are attached to it as well
- To detach an element, move it out of the frame. An element stays attached while at least half of its area is inside the frame
- When you copy or duplicate a frame, all of its content is copied
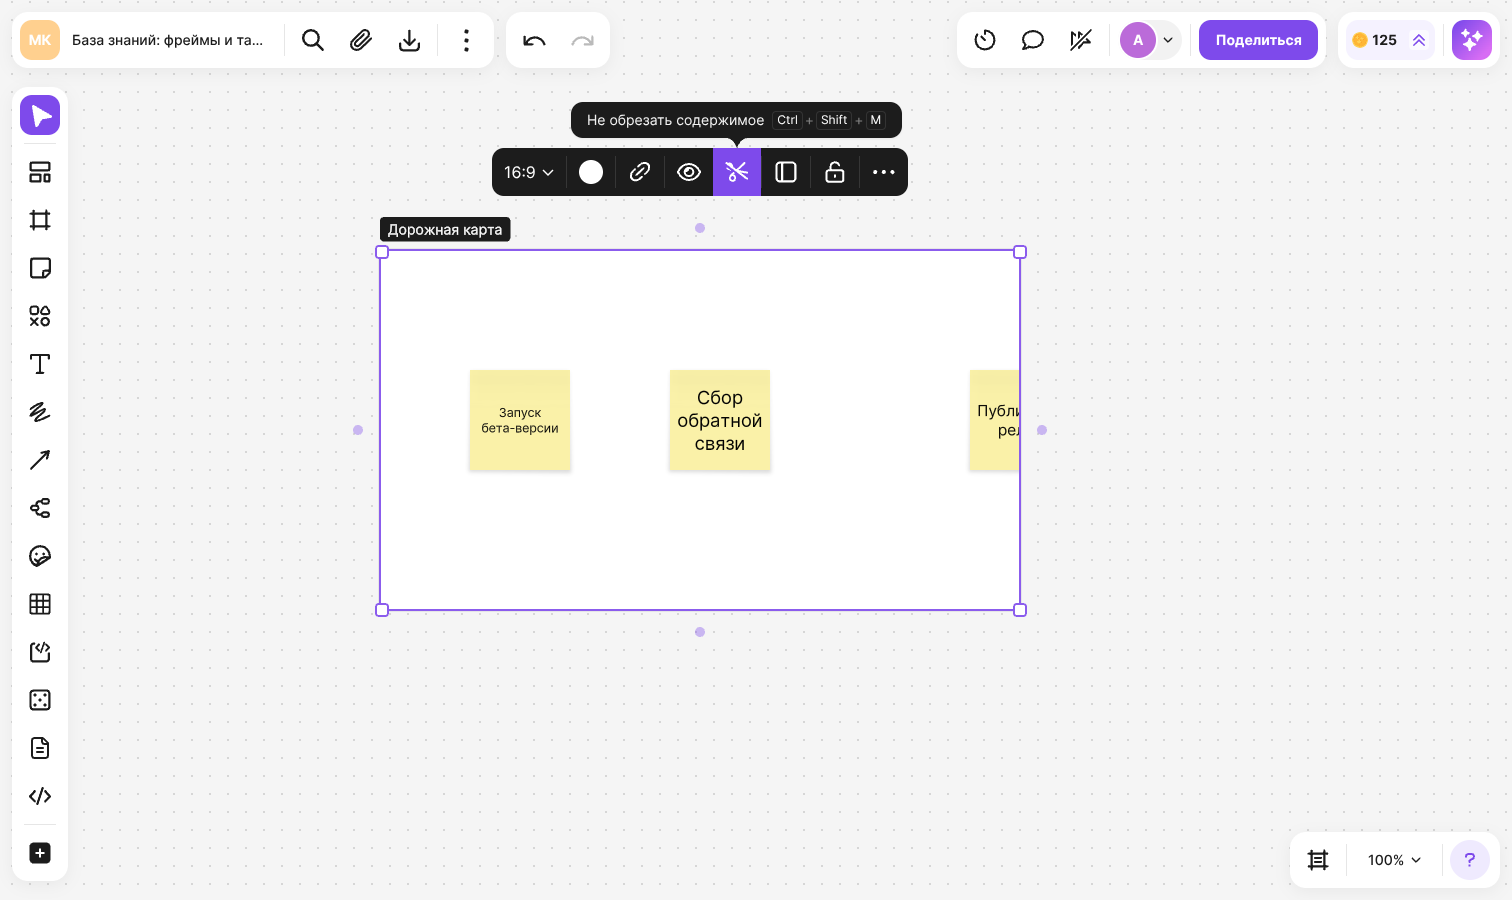
If elements stick out of a frame, you can hide the overflowing parts: select the frame and click “Clip content” in the panel above it or press Ctrl + M (⌘ + M on macOS). To show the elements in full again, click “Show overflow” or press Ctrl + Shift + M (⌘ + Shift + M on macOS)
How to manage frames in the “Frames” panel
Click “Frames” in the bottom right corner of the flip — a panel opens with all frames of the flip and their previews. You can also open the panel from a frame itself: select it and click “Show in list”. Clicking a card in the panel moves the flip to that frame
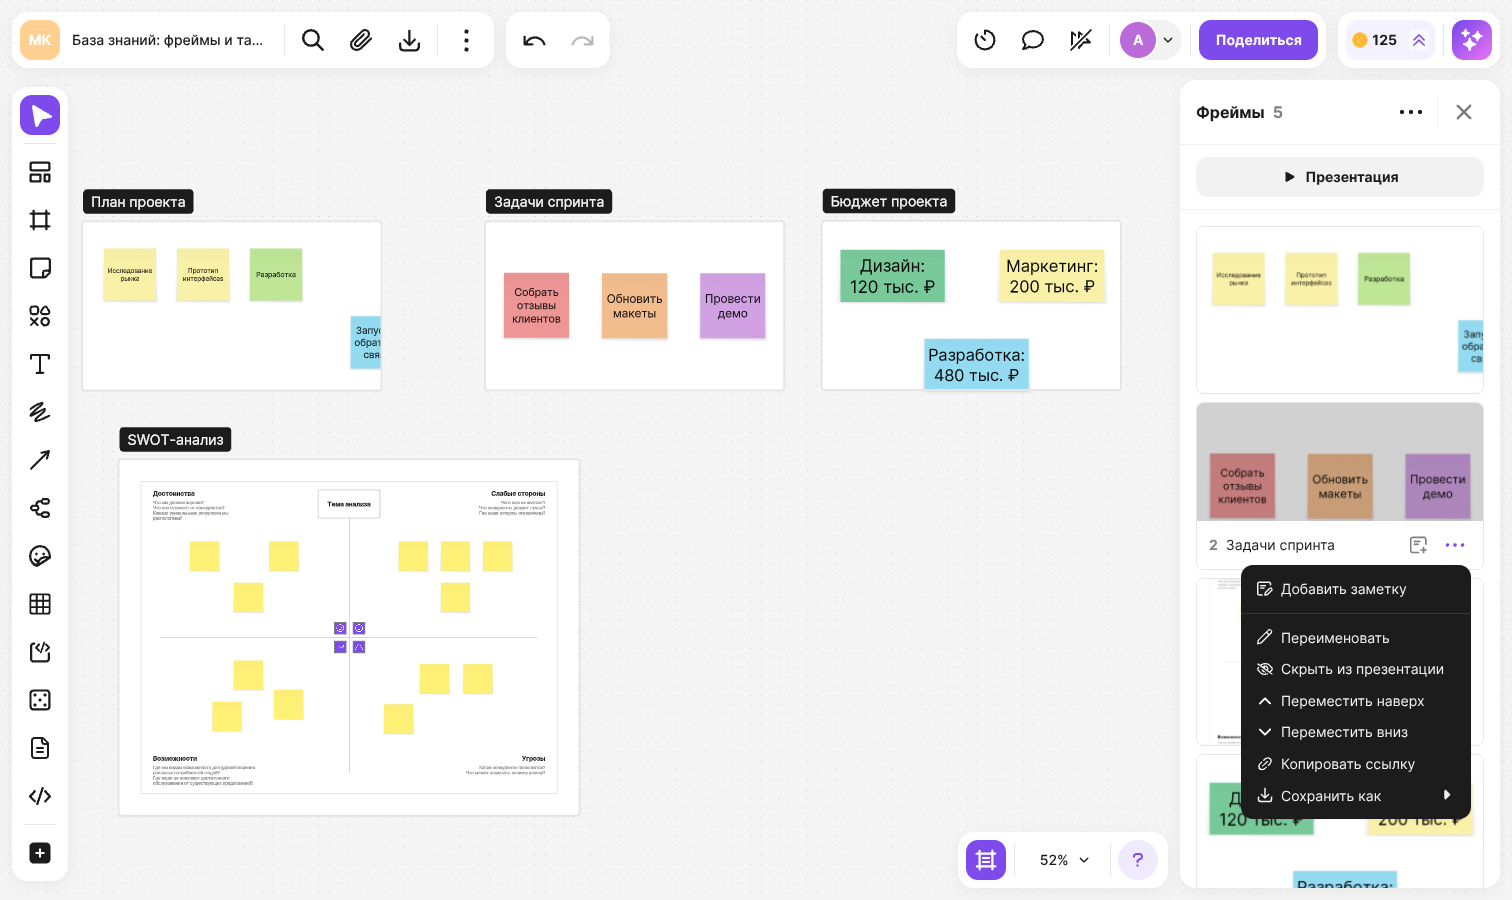
The name, the number and the “Add note” and “More” buttons are shown on a card when you hover over it. The “More” menu on a frame card offers these actions:
- “Rename” — change the frame name
- “Move up” and “Move down” — change the order of frames. You can also drag a card to the place you need
- “Hide from presentation” — exclude the frame from the slide show; it stays on the flip. The counter in the panel header still counts such a frame
- “Add note” — write a note for the slide that only you can see
- “Copy link” — copy a link to the frame
- “Save as” — save the frame as PNG, PDF or CSV
The “More” menu in the panel header switches the view — “Preview” or “List”, turns on “Alphabetically (A-Z)” sorting and saves all frames to a single file with “Save to PDF”. While alphabetical sorting is on, the order of frames can't be changed manually
The order of frames in the panel is the order of slides. To show frames as slides, click “Present” at the top of the panel. Learn more in the article How to run a presentation on a flip
How to hide frame content
You can hide a frame from participants — for example, to reveal a prepared block at the right moment of a meeting
Select the frame
Click “Hide” in the panel above the frame or press Ctrl + H (⌘ + H on macOS)
The content is hidden for all participants of the flip, and a gray area with an eye icon stays in place of the frame
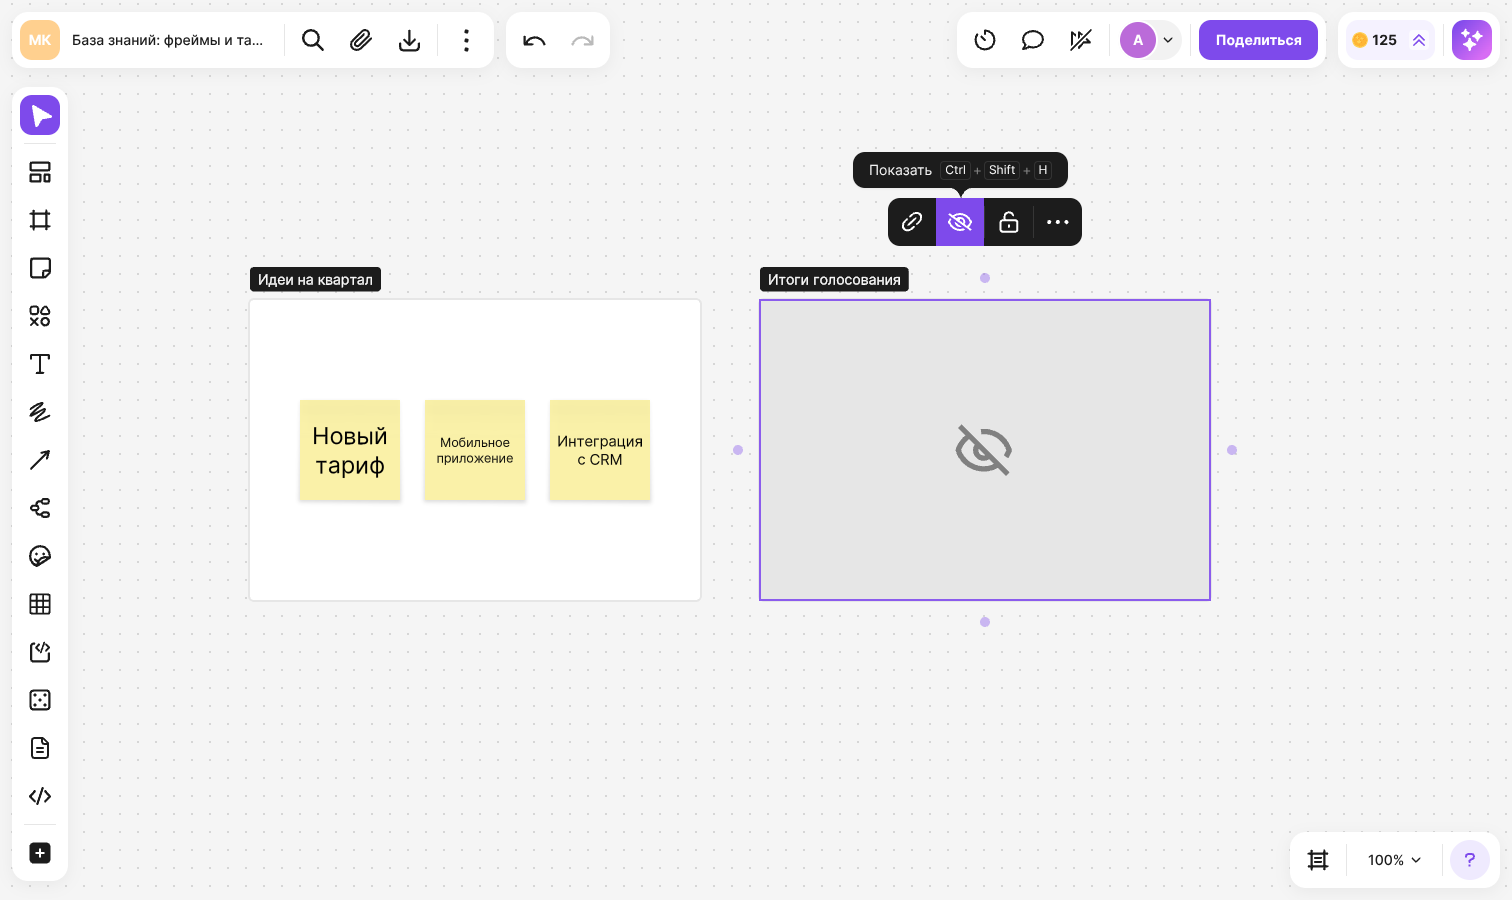
To bring the content back, select the frame and click “Show” or press Ctrl + Shift + H (⌘ + Shift + H on macOS)
A hidden frame can be locked, copied and given a link — the copy is hidden too. A hidden frame can't be saved to a file or copied as an image. Hidden frames are not shown in the “Frames” panel or in a presentation
Plan limits
Hiding frames is included in paid plans
How to create a template in a frame
A ready-made template can be added to a flip right inside a frame. Open “Templates” on the toolbar and check “Create template in a frame” at the top of the window — the template appears on the flip in a separate frame. Learn more in the article about templates
How to save a frame to a file
Right-click a frame, select “Save as...” and a format — PNG, PDF or CSV. A CSV file contains the text data of the frame and the elements inside it
If you select several frames, PDF is saved as a single file where each frame takes a separate page, and PNG as an archive with a separate image for each frame. “Copy as image” copies the frame to the clipboard as a picture. Other ways to save your work are described in the article about export
Limitations
- The “Hide” and “Clip content” buttons are available to the flip owner, the team owner and space administrators
- You can hide and clip the content of “Custom”, “A4”, “1:1”, “4:3” and “16:9” frames. “Mobile”, “Tablet” and “Browser” frames don't have these actions
- The “Orientation” button is available only for “Mobile” and “Tablet” frames