

A sticker is a colored note for ideas, tasks and comments on a flip. Stickers work well for brainstorms and retrospectives: they are quick to create and easy to group by color and tags, and members can vote for them with reactions
How to add a sticker
Select “Stickers” on the toolbar or press the S key
If you need another color, choose it in the menu that opens
Click the flip — a square sticker appears. To set the size right away, hold the mouse button and drag out an area
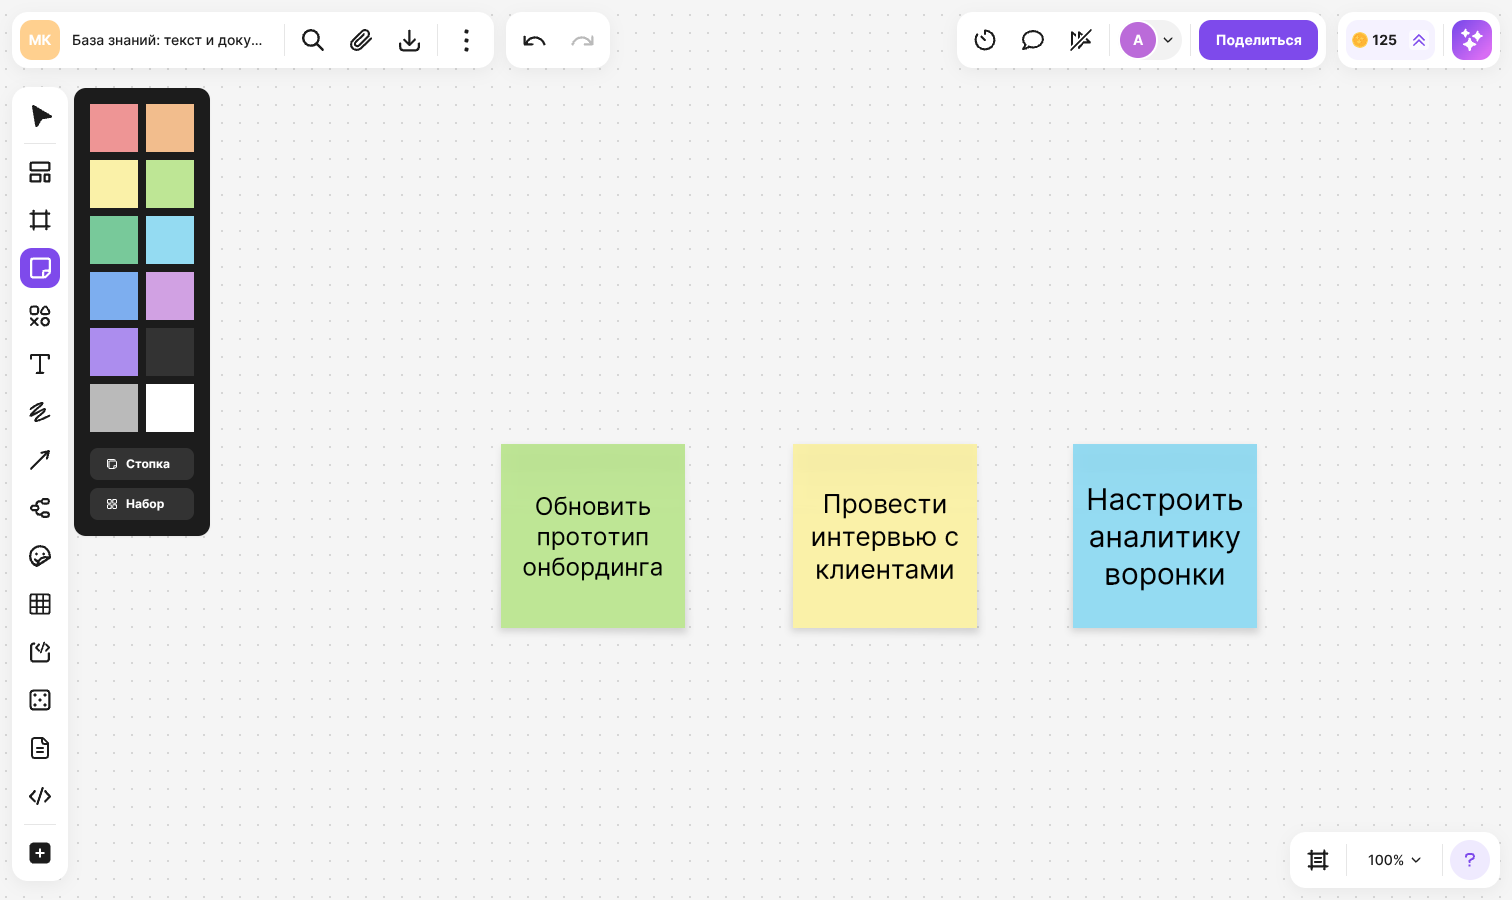
The fastest way is to double-click an empty spot on the flip: a sticker appears right away
Double-click the sticker and type your text. The font size is chosen automatically: the more text there is, the smaller it gets, so the text always stays inside the sticker
How to change color, shape and formatting
Select a sticker — a panel appears above it
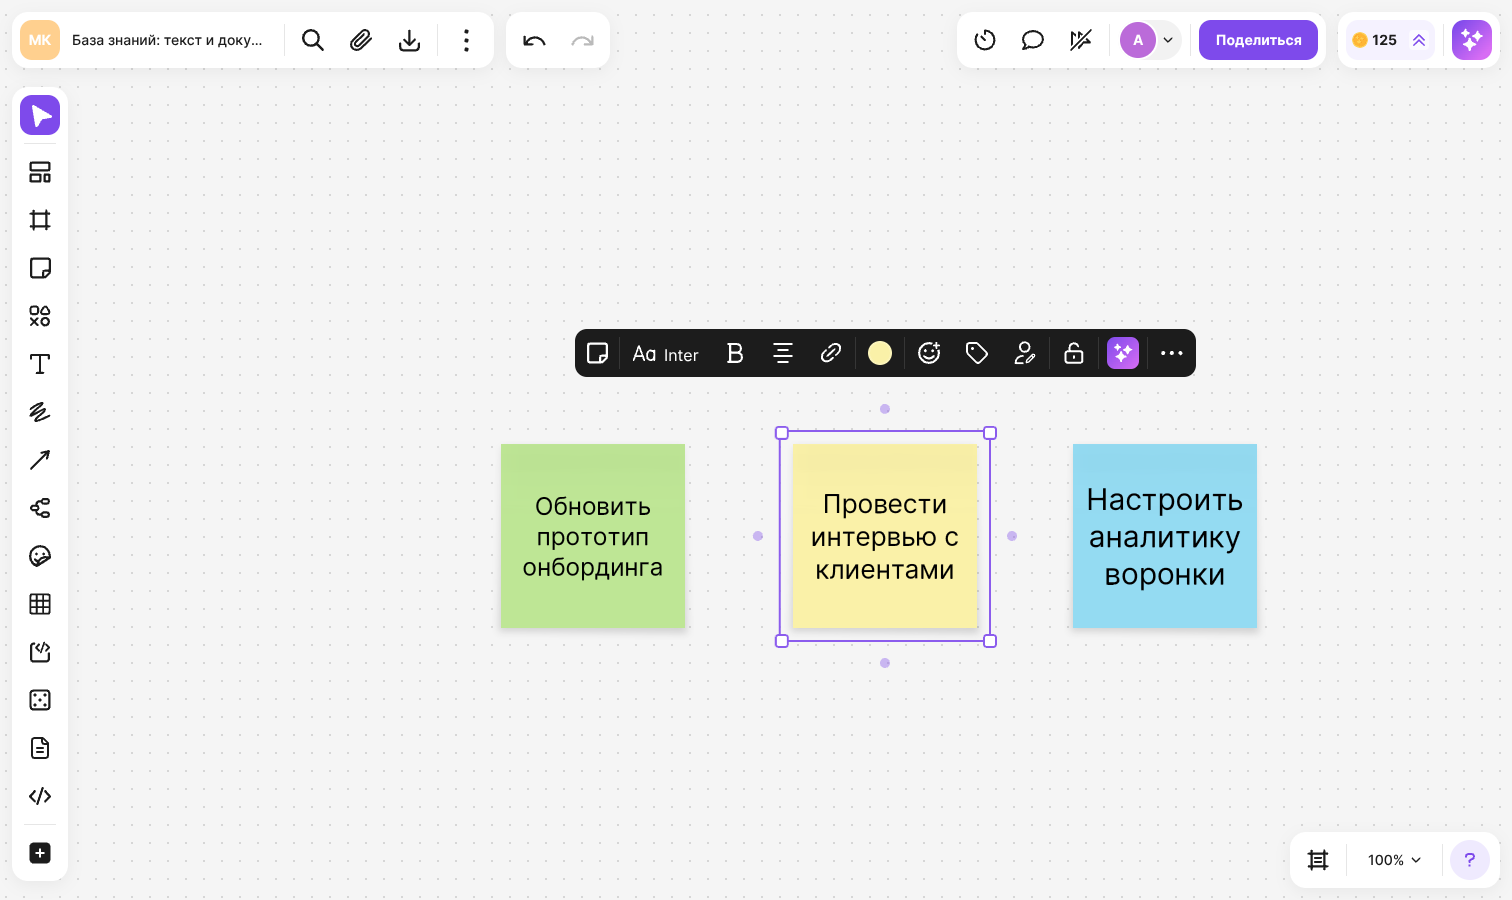
- “Fill” — the color of the sticker. Pick a color from the palette or set your own. The text color adjusts to the fill automatically so that the text stays readable
- “Font”, “Text style” and “Alignment” — text formatting. A style can also be applied to an individual fragment. A sticker has no settings for font size, text color or lists
- “Insert link” — a hyperlink or a link to an object on the flip
- “Change item type” — turn a square sticker into a wide one and back, or into text or a shape. The text is kept
Resize a sticker with the corner handles or the top or bottom edge of the frame — the proportions are kept. If you drag the left or right edge, a square sticker becomes wide, and a wide one becomes square
Sticker kit
A kit is nine stickers at once, arranged in a 3 × 3 grid
- Click “Stickers” on the toolbar and select “Kit”
- Click the flip or drag out an area of the size you need
The stickers of a kit are not linked to each other: each one can be moved, recolored and deleted separately
Sticker pack
A pack is a source of identical stickers that never runs out. It is handy when members need to quickly grab stickers of the same color and size
Click “Stickers” on the toolbar and select “Pack”
Click the flip — a pack named “Sticker pack” appears
Hold the top sticker of the pack and drag it to an empty spot — a new empty sticker appears on the flip
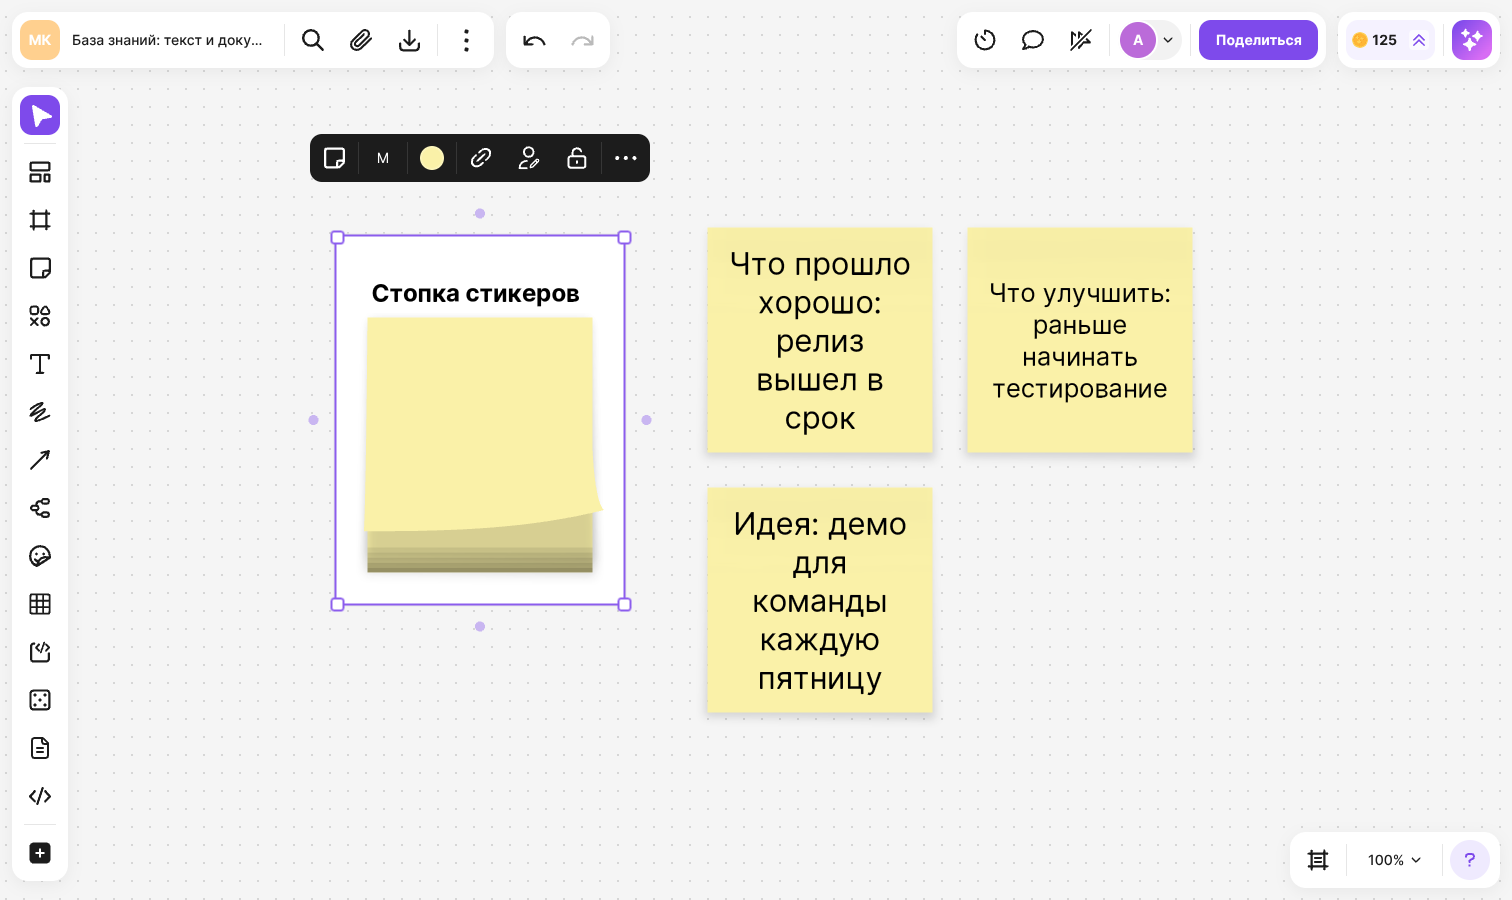
Select the pack to set up the stickers pulled from it:
- Color
- “Sticker type” — “Square” or “Wide”
- “Sticker size” — S, M or L
- “Show author” — each new sticker is signed with the name of the member who pulled it
New settings apply to the next stickers; the ones already created don't change. The “Insert link” button in the pack panel adds a link to the pack itself. To rename the pack, click its name. The name can be up to 100 characters long
Tags
Tags help you mark stickers by topic, status or team
Select one or several stickers and click “Tags” in the panel
Click a tag in the list — it appears at the bottom of the sticker. To find a tag, start typing its name
If the tag you need doesn't exist, type a name and click “Create”, then click the new tag
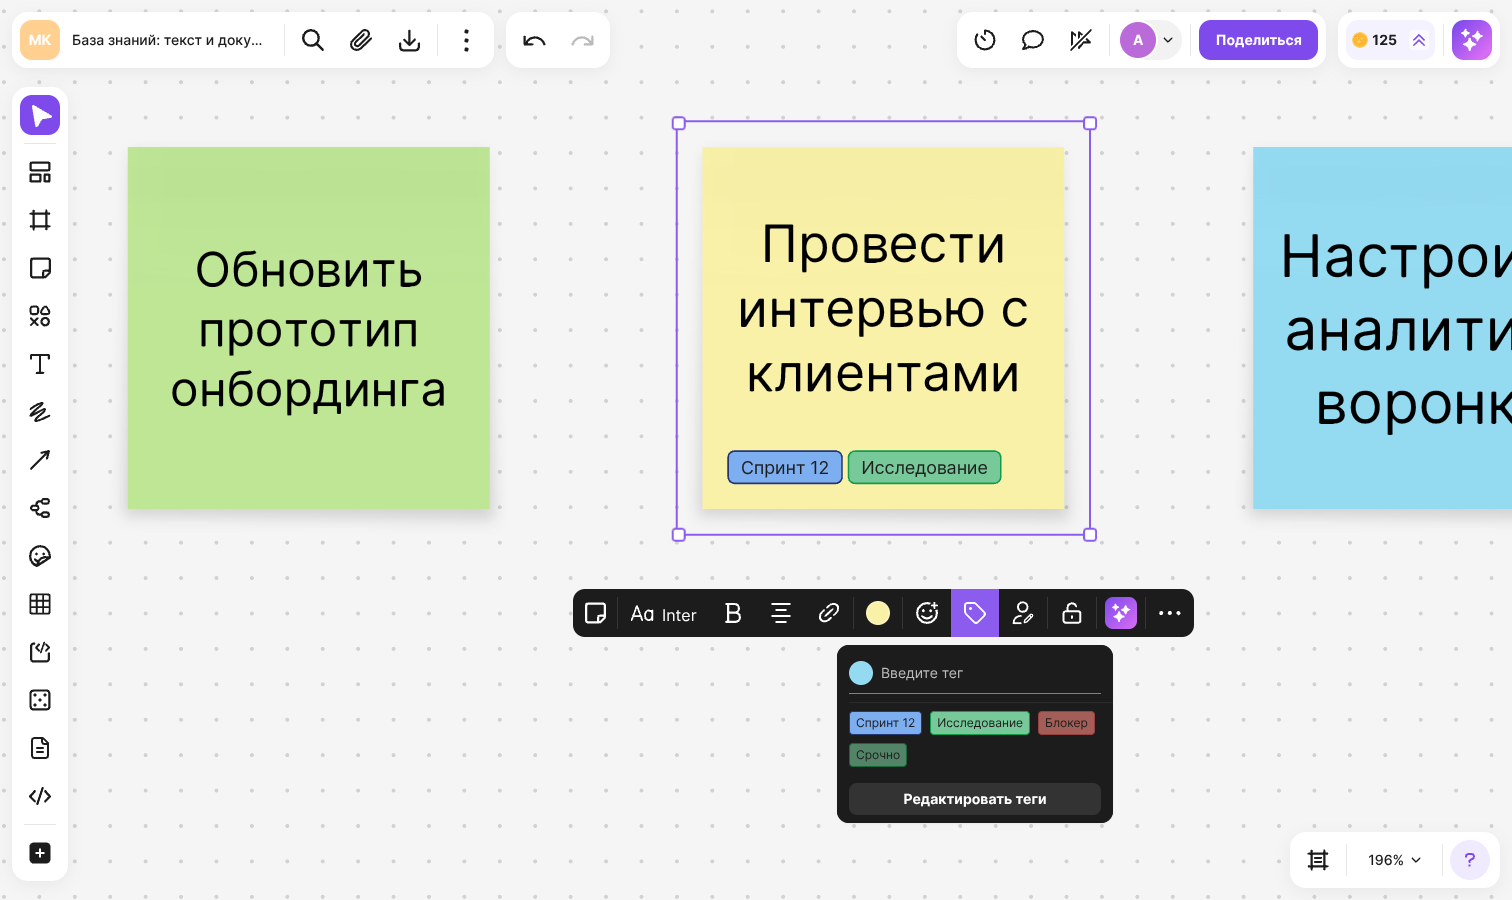
To remove a tag from a sticker, click it in the list once more
The “Edit tags” button opens a window where you can rename tags, change their color, reorder them, and add or delete tags. The changes are applied after you click “Save”. If you delete a tag, it disappears from all stickers on the flip — within 15 seconds you can undo this with the “Undo” button in the notification
When you copy a sticker to another flip, its tags are carried over with it
Reactions
Reactions are emoji that members put on stickers, for example when voting
Select a sticker and click “Add reactions”
Choose an emoji — the reaction appears at the bottom of the sticker
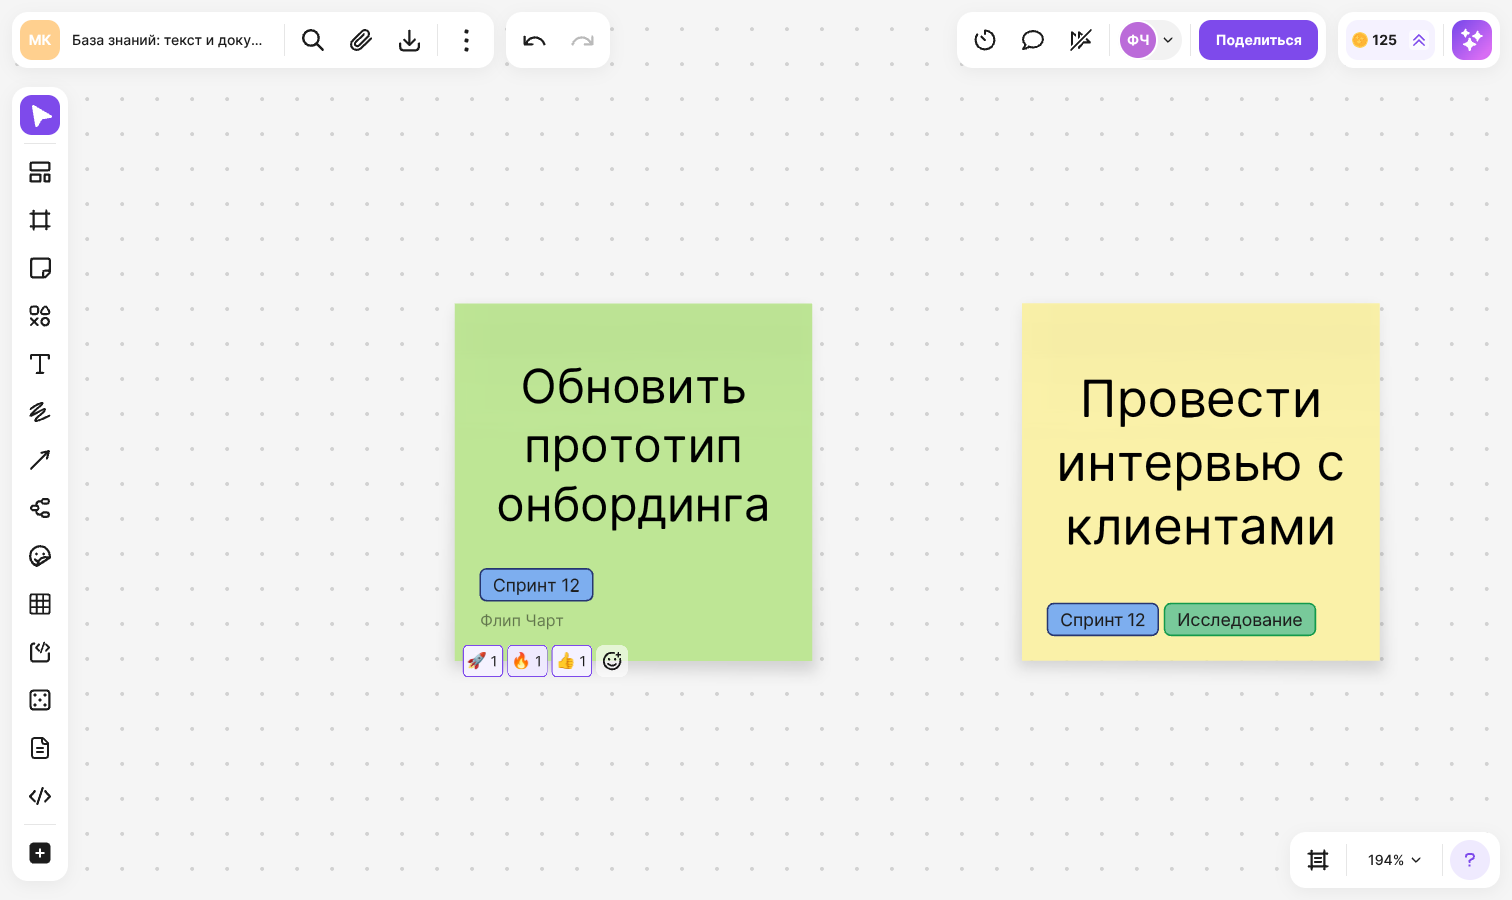
Identical reactions from different members are merged, and their number is shown next to them. To remove your reaction, click it. You can also add a reaction on the sticker itself: hover over the reactions already there and click the add button
When you copy or duplicate a sticker, reactions are not carried over to the copy
Sticker author
Click “Show author” in the sticker panel — the name of the member who created the sticker appears at its bottom. The name doesn't change if other members edit the sticker. To remove the name, click “Hide author”
Limits
- One sticker can have no more than 4 tags and no more than 8 reactions
- One flip can have no more than 50 tags, and a tag name can be up to 27 characters long
- Tags are available to members of the space. Users who are not in the space or are not signed in don't have the “Tags” button
- Only stickers have tags and the author's name: they are not kept when you change the element to text or a shape
Plan limits
Sticker reactions are included in paid plans. You can compare plans in Comparison of flip plans