

You can show a flip right on a web page, in a knowledge base or on a corporate portal. flip generates ready-made iframe code, and page visitors work with the flip in the mode set for public access via link
If you need the opposite — to place a website or a service on a flip — see How to embed an iFrame on a flip
How to get the embed code
Open the flip and click “Share” in the top right corner
Go to the “Embed” tab
The tab is only shown when the window is opened on a flip. If you open “Share flip” from the list of flips, it won't be there
Check the banner at the top of the tab to see in which mode the flip is available via link
In the “Start area” field, choose which part of the flip a visitor sees first
Click “Copy code” and paste the code into the HTML of your page
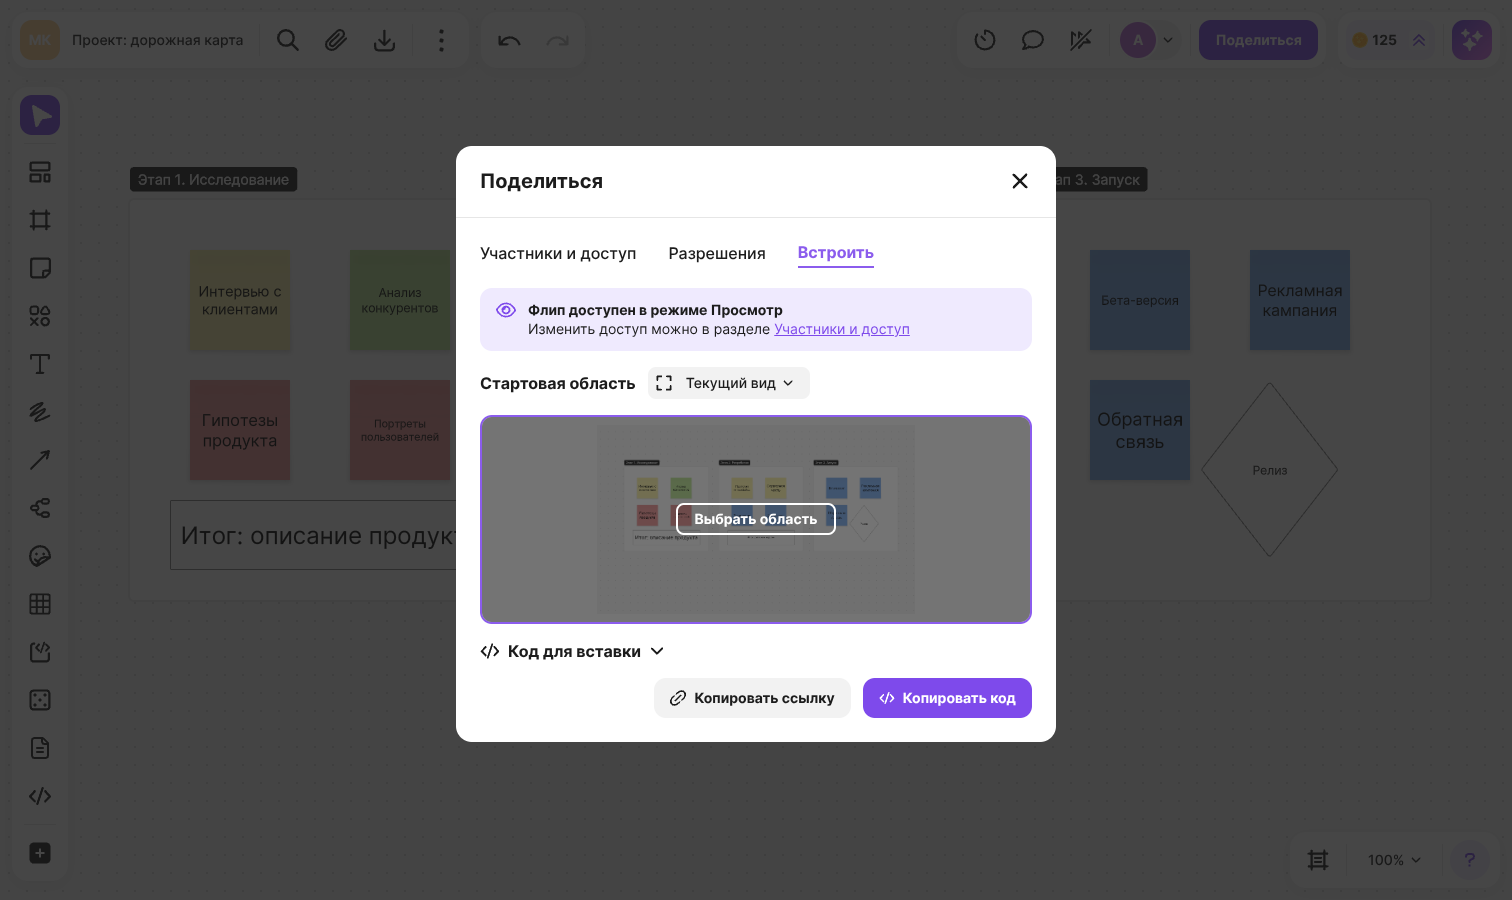
To look at the code before copying it, click “Embed code”. It is an iframe element of 768 × 432 pixels — you can change the width and height in the width and height attributes
The “Copy link” button copies the address of the embedded flip without the code — for services that embed content by link
How to set up access
An embedded flip inherits public access via link. The banner on the “Embed” tab shows the current level:
- “This flip is closed. Only invited space members will have access to it.” — website visitors won't see the flip
- “This flip is available in View mode”
- “This flip is available in Comment mode”
- “This flip is available in Edit mode”
To change the level, click “Members and access” in the banner — the tab with access settings opens. How they work is described in the article How to share a flip and set up access
Important
If public access via link is denied, a visitor sees the “No access to this flip” message and the “Open in Flip” button instead of the flip. If the flip has a password, the embedded flip asks for it first
How to choose the start area
The start area is the part of the flip a visitor sees right after the page loads. The “Start area” field offers:
- “Current view” — what is on your screen right now
- A frame from the list — the flip opens on the selected frame. You can filter the list with the “Search” field; frames without a name are shown as “Frame 1”, “Frame 2” and so on
To set a custom area:
Hover over the preview and click “Choose area”
The window closes and a selection box appears on the flip — move and resize it so that it covers the content you need
In the list above the box, “Custom area” is selected by default. If you select a frame in it, the box snaps to the frame's borders
Click “Confirm” — the “Share” window opens again with an updated preview. The “Start area” field still shows “Current view”, and the selected area goes into the embed code. The “Cancel” button brings back the previous area
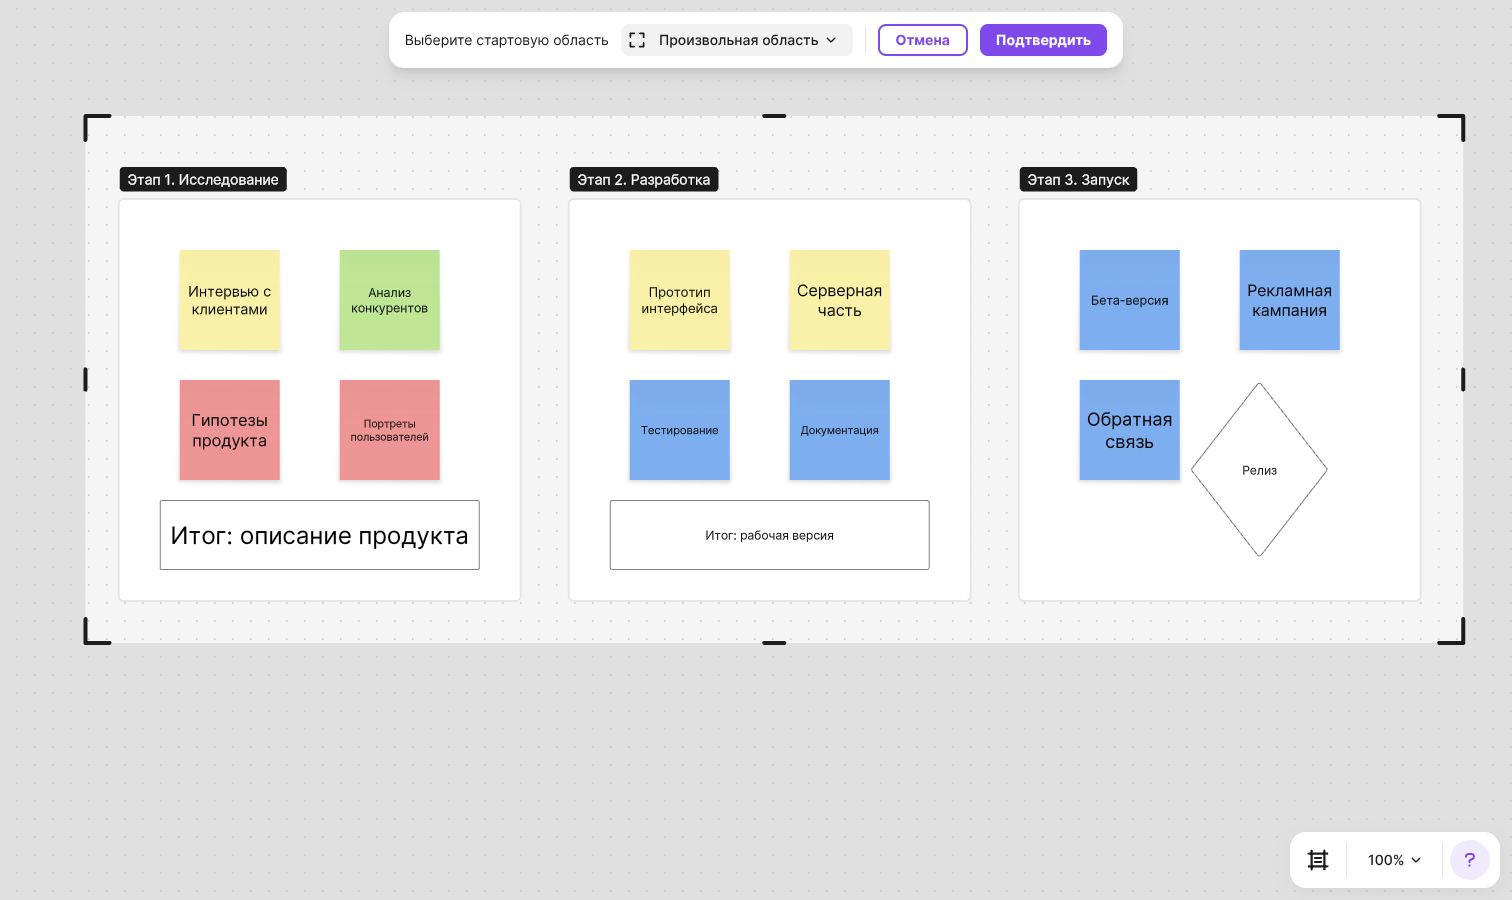
The area is remembered as a part of the flip, not as a link to a frame: if you later move or delete the frame, the embedded flip keeps opening at the same place. To change the start area, copy the code again and replace it on the page
What an embedded flip looks like
A visitor can move around the flip and zoom. A bar is located at the bottom of the embedded flip:
- The flip name and the time of the last change
- “Previous frame” and “Next frame” with a counter like “Frame 1 / 5” — if the flip has frames. Only the visitor sees the frames being switched
- “Open in Flip” — opens the flip in a new tab
- “Fullscreen” — expands the flip, “Exit fullscreen” brings back the regular size
Above the bar on the right are the “Zoom out” and “Zoom in” buttons, and with comment or edit access — the “Add comment” button

If the flip has been deleted or the link in the code is invalid, the “Flip unavailable” message is shown instead