

SSO (single sign-on) lets employees sign in to flip through the corporate authentication system, without a separate password. To enable SSO, first verify that the email domain belongs to your company: users whose email is on a verified domain will sign in through your identity provider (IdP)
Plan limits
The “SSO settings” and “Domain management” sections are available on the Business and Enterprise plans. The space owner and admins can open and configure them
Both sections are located in the space settings: in the left sidebar, click “Space settings” next to the space name
How to add and verify a domain
Open the “Domain management” section and click “Add domain”
Enter the domain in the “Domain name” field and click “Add” — it will appear in the “Your domains” list
In the “Status” column, click the domain status — the “Technical details” page with the verification code opens
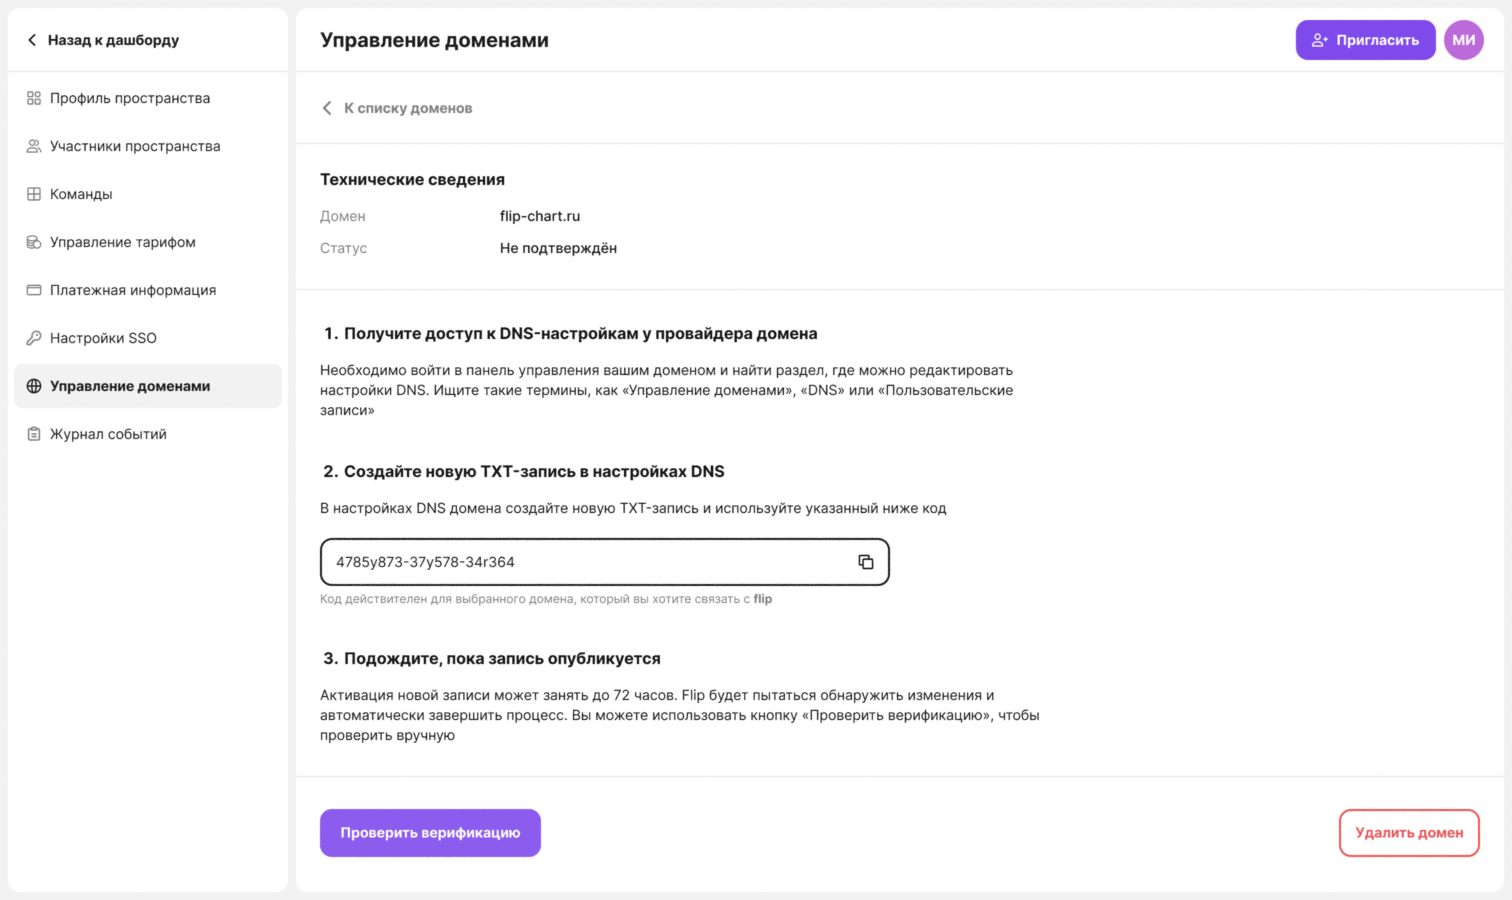
In the domain control panel at your provider, create a new TXT record and paste the copied code into it
Wait for the record to be published. Activation can take up to 72 hours: flip checks the record automatically, and the “Check verification” button starts the check manually
The domain status — “Not verified”, “Pending verification” or “Verified” — is shown in the list of domains and on the domain page. A domain can be used for SSO only after it gets the “Verified” status
Important
Deleting a domain turns off SSO for users with this domain and restricts their access to spaces
How to enable and configure SSO
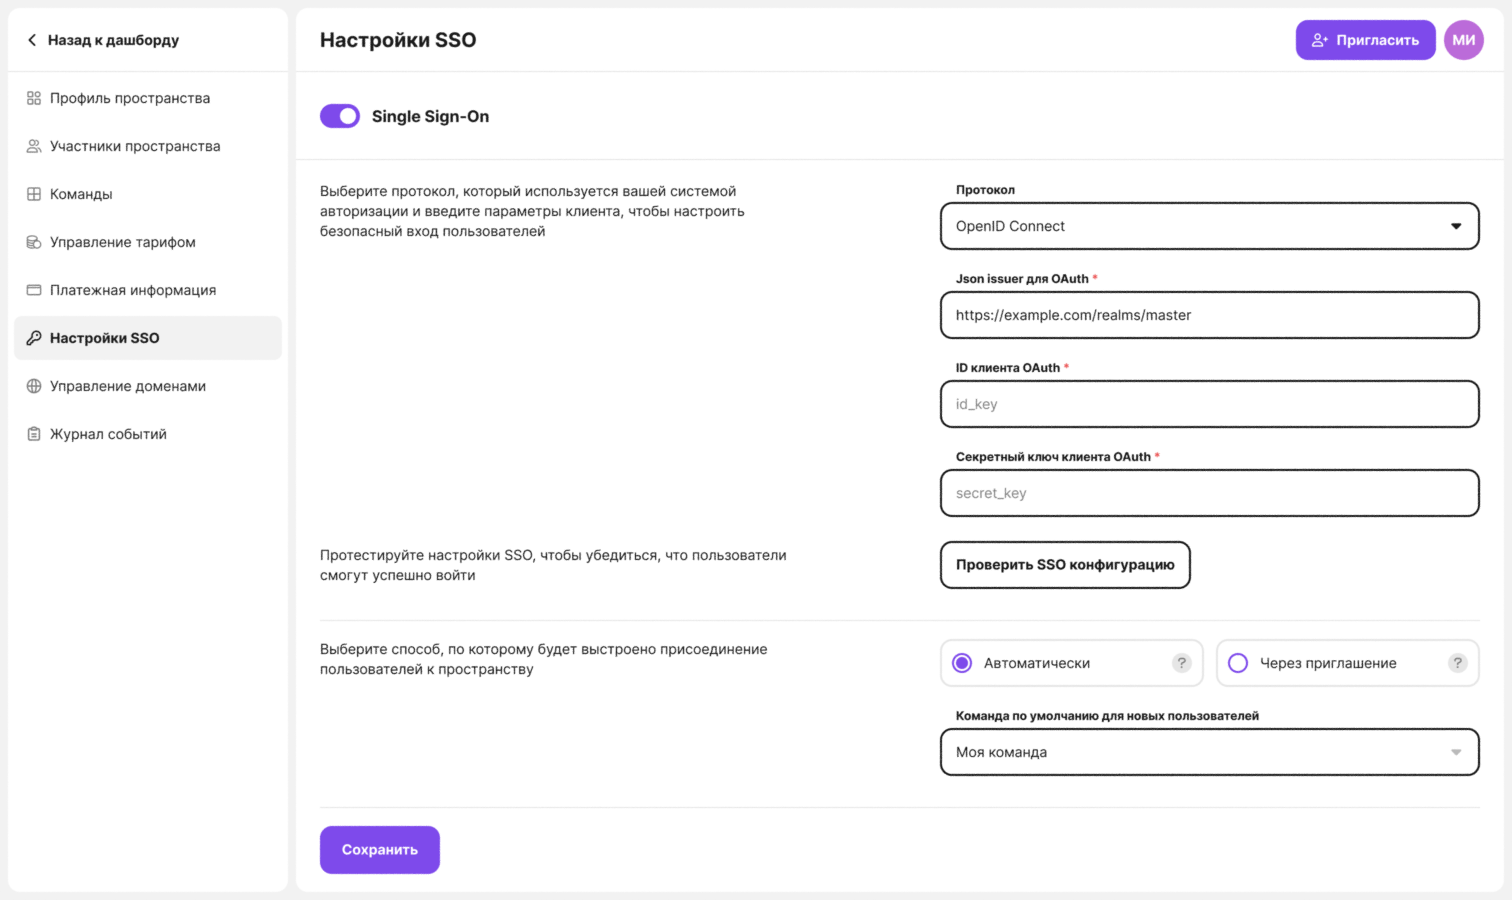
Open the “SSO settings” section and click “Enable SSO/SAML”
In the “Protocol” field, select the protocol your authentication system uses — OpenID Connect or SAML 2.0 — and fill in the connection parameters
Click “Test SSO configuration” and make sure the test passes
Check the list of domains: it shows only verified domains. Users from these domains will sign in with SSO
Choose how new users join the space:
- “Automatically” — all users who sign in via SSO are added to the space. In the “Default team for new users” field, select the team they will join
- “By invitation” — new users are added to the space only by admin invitation
Click “Save”
To turn SSO off, switch off the “Single Sign-On” toggle at the top of the section and confirm with the “Turn off” button
How users sign in with SSO
On the login page, the user chooses to sign in with SSO and enters their email address. flip redirects them to the sign-in page of your identity provider and, after a successful sign-in, brings them back to the space
If the space doesn't have enough licenses for a new user, they will see the “Not enough licenses” message when signing in. If the “By invitation” option is selected and the user has no invitation, they will see the “Access to the space is restricted” message
Detailed instructions
Step-by-step instructions with screenshots are published in the developer documentation:
For the roles that have access to these sections, see Space member roles. For the plan features, see Business plan overview