

You can save the contents of a flip to a file to paste it into a presentation, send it to colleagues or print it. An area of a flip is exported to a PNG or JPG image, frames — to PDF, the text of elements — to CSV. A single element or several selected elements are saved through the context menu
How to open the export menu
On the panel in the top left corner of the flip, click “Export”
Hover over “Export to” and select a format:
- PDF — “All frames, left to right”
- CSV — “A table of elements with text values”
- PNG or JPG — “Set up the export area”
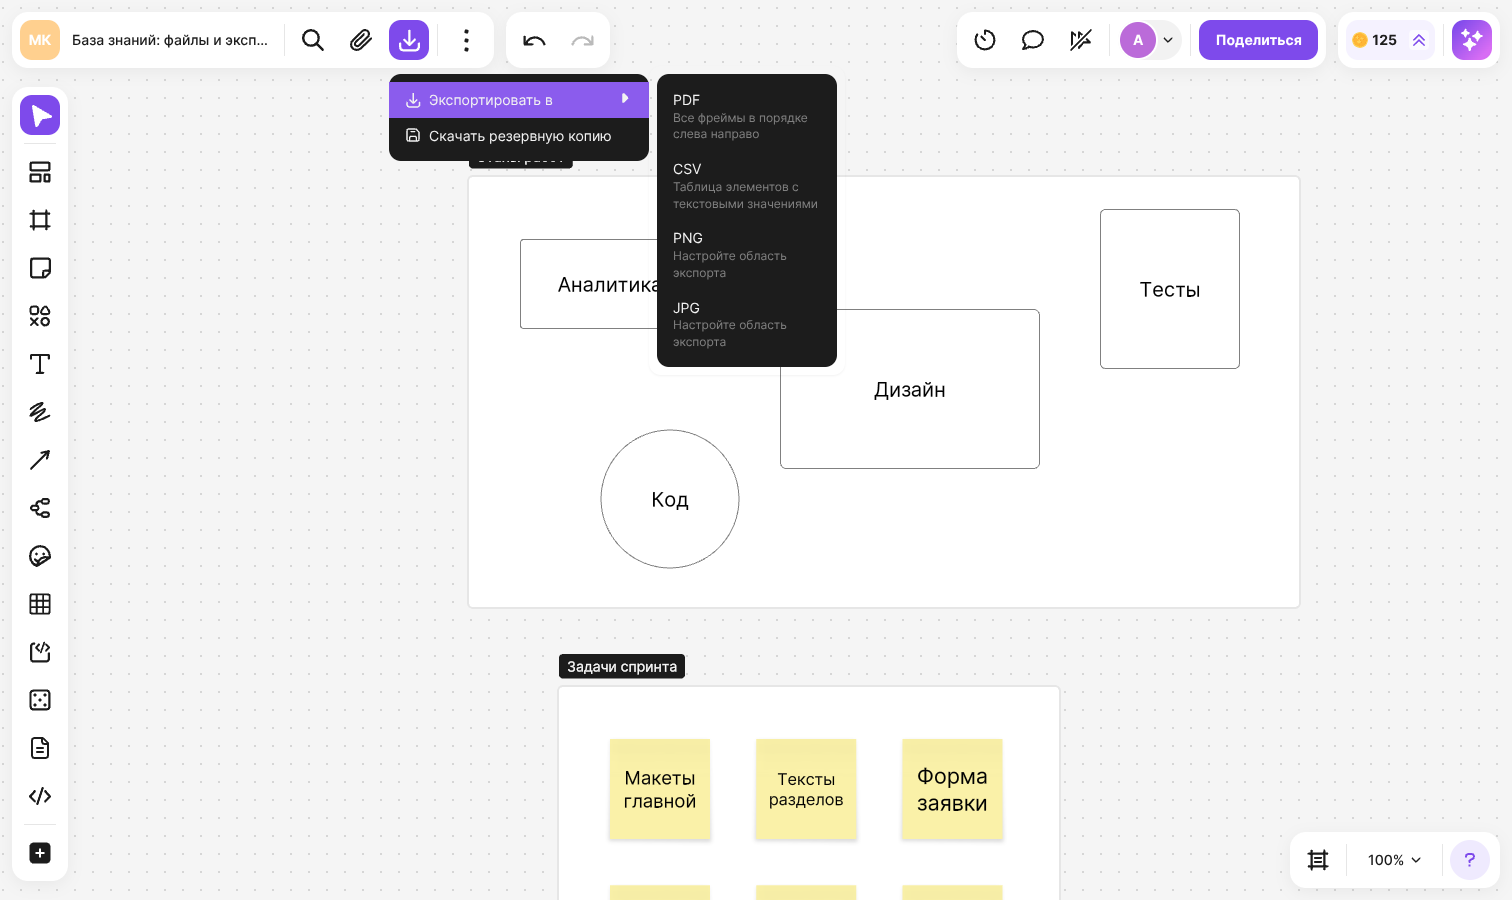
The same menu contains the “Download backup” item — it is covered in the article on importing from a backup
How to save an area of a flip to PNG or JPG
Click “Export”, then “Export to” and select PNG or JPG. Export to PNG is also opened with Ctrl + E (⌘ + E on macOS)
The toolbars collapse, except for the zoom panel in the bottom right corner. The export area box appears on the flip — everything outside it is dimmed. Drag the box to the right place and pull its corners or sides to resize it. You can still move and zoom the flip
On the panel at the top of the screen, choose the options:
- “Background” — “Current” keeps the background and grid of the flip, “White” replaces them with a white background, “Absent” makes the background transparent. The “Absent” option is available only for PNG
- “Export quality” — “Low”, “Standard” or “High”
Click “Export” — an image named after the flip is downloaded to your computer
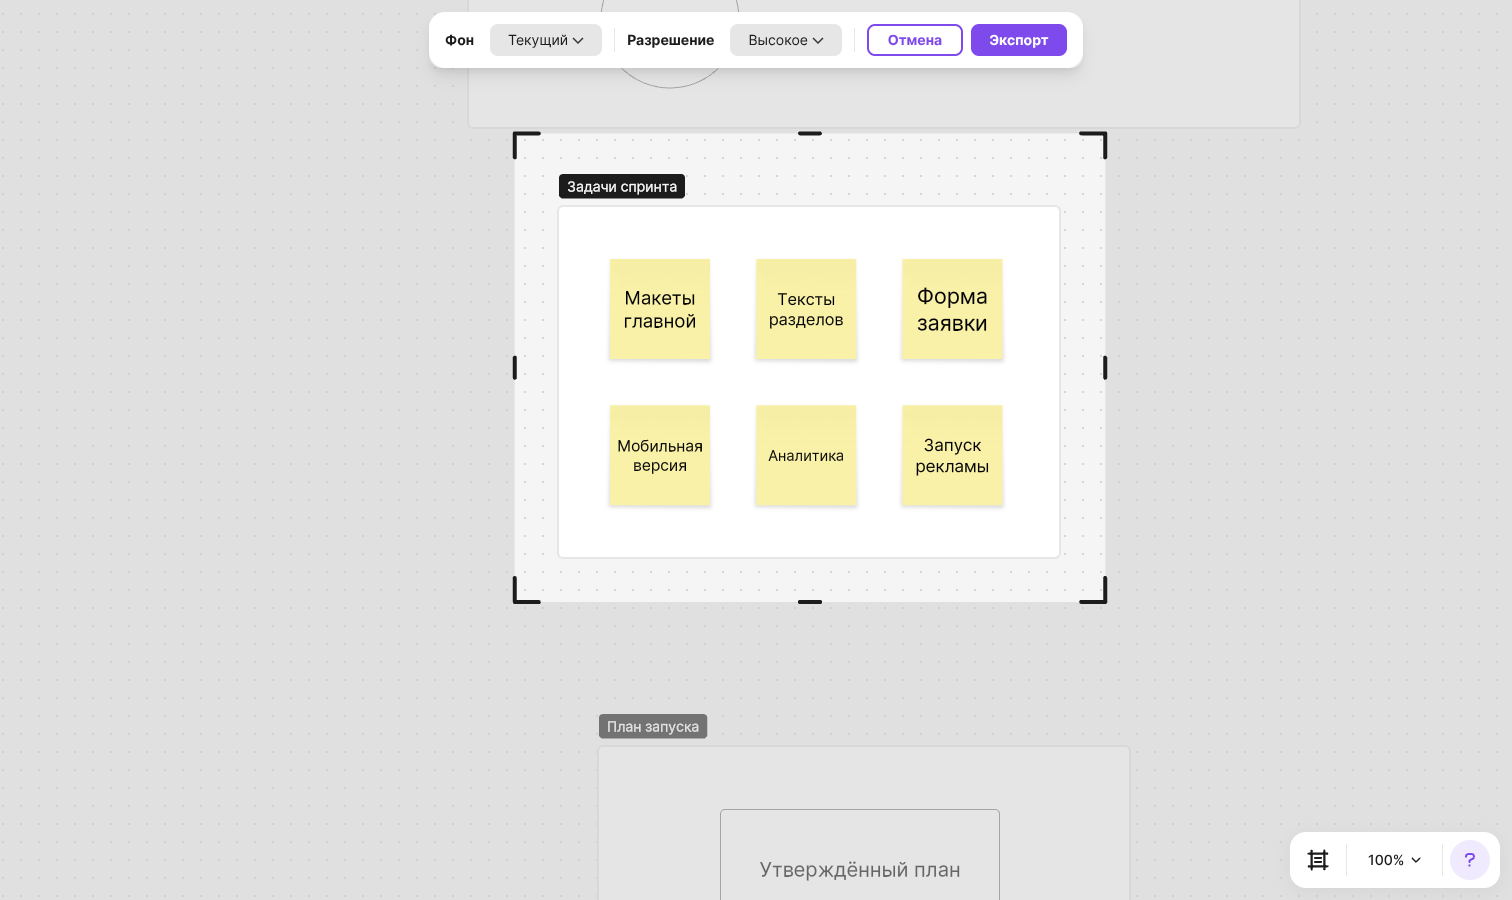
Only what is inside the box gets into the file: an element that crosses its border is cropped. The cursors of other participants and comments don't get into the image
To leave export mode without saving, click “Cancel” or press Esc
How to export frames to PDF
Click “Export”, then “Export to” and select PDF. Each frame of the flip becomes a separate page of the file, and the pages follow the order of the frames from left to right. While the file is being prepared, the “Exporting frames” progress is shown at the bottom of the screen — you can cancel it
If the flip has no frames, the message “No frames to export to PDF” appears. First add frames and place the content in them
You can also save frames to PDF from the frames list — with the “Save to PDF” item. Hidden frames don't get into such a file
How to export text to CSV
Click “Export”, then “Export to” and select CSV. A table with three columns is downloaded: Type — the element type, Text — its text, Created At — the date and time it was created. The rows follow the order in which the elements were created
The file contains the text of shapes, stickers and other elements, the values of table cells, the contents of code blocks and documents, and the names of images and uploaded files. If the flip has no elements with text, the message “No data to export. Add elements that contain text” appears
How to save individual elements
Select an element or several elements
Right-click the selection and hover over “Save as...”
Select a format
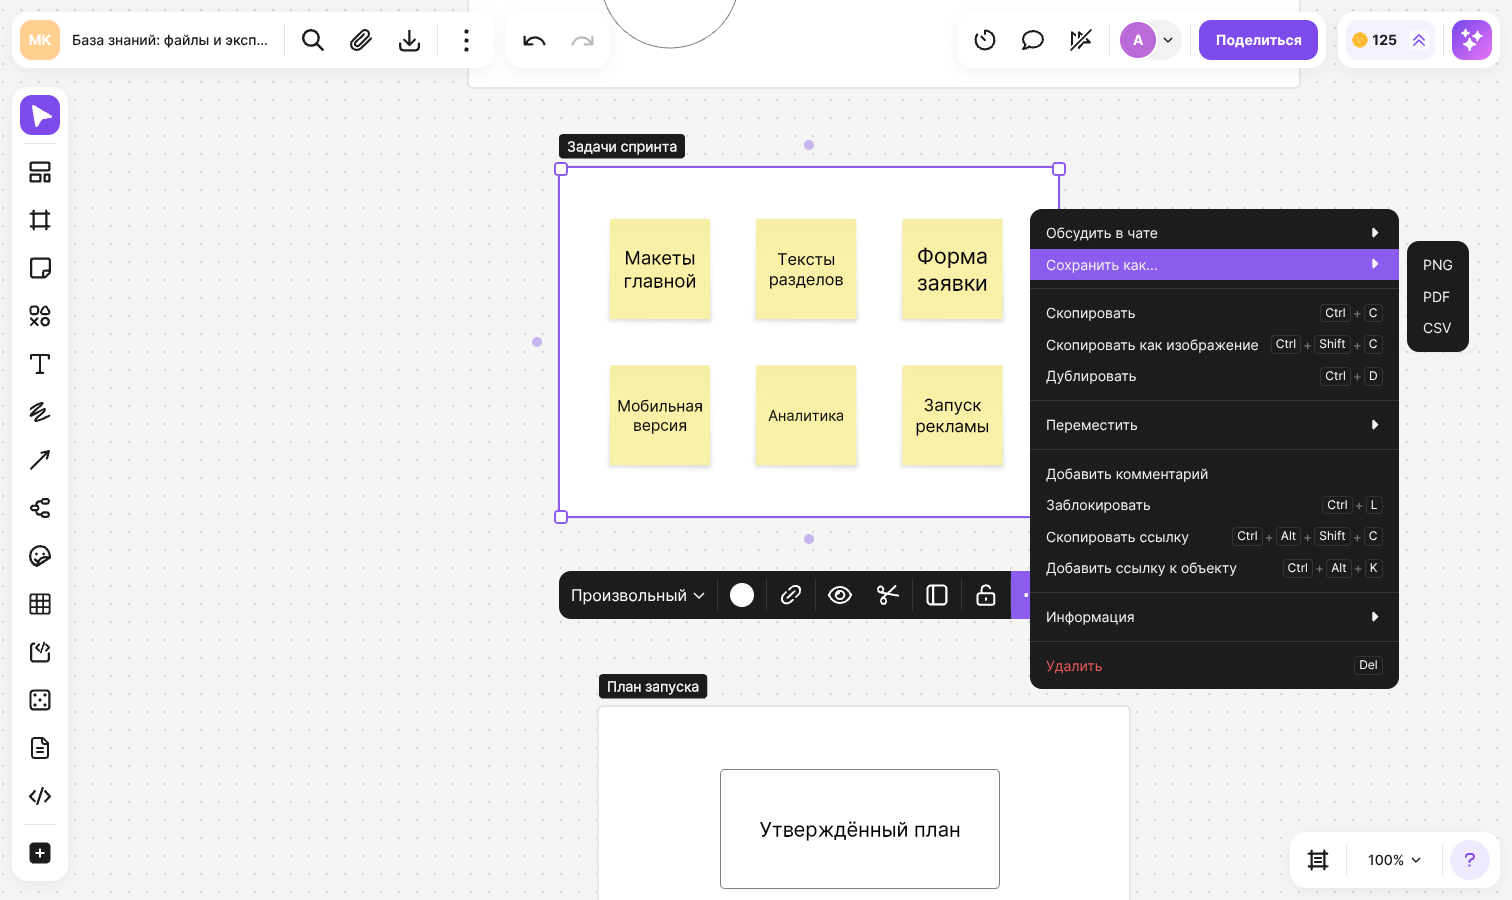
The set of formats depends on what is selected:
| What is selected | Formats |
|---|---|
| A frame | PNG, PDF, CSV |
| Several frames | PNG — a ZIP archive with a separate image for each frame, PDF, CSV |
| A table or several tables | XLS, CSV |
| A document | Markdown (.md), PDF (.pdf), CSV (.csv) |
| A chart | PNG, PDF |
| A shape, sticker, text, image and other elements | PNG, and also CSV if the element has text or a file name |
| Several different elements | CSV if there are elements with text among them, and PDF if there is a frame among them |
Arrows and dice don't have the “Save as...” item. A Mermaid diagram is downloaded with the “Download” button in the menu of the diagram itself. To paste a picture into another app right away instead of saving a file, select “Copy as image” in the context menu
Plan limits
On the Mini plan, images and PDFs are saved with a flip watermark. In the export options only the “Current” background and the “Low” export quality are available — the other options are marked with the “Upgrade” badge and open the plan selection. Elements saved through “Save as...” are also saved in low quality. On paid plans there is no watermark, and the “High” export quality is selected by default. Learn more in the comparison of plans
Limitations
- Export is available to logged-in users
- Export mode for PNG and JPG doesn't open on an empty flip — the message “No data to export. Add at least one element” appears
- The minimum size of the export area is 100 × 100 pixels at 100% zoom
- A frame with hidden content and an empty text element can't be saved through “Save as...”
- Only text gets into CSV: the formatting, images and position of elements are not saved