

To avoid entering your details every time you pay by invoice, save them in the organization profile. The profile is stored in the space settings, on the “Organization profile” tab. When you generate an invoice, the details from the profile are filled in automatically on the “Generating invoice” page. How to pay for a plan by invoice is described in Payment methods: card or invoice
How to open the organization profile
- In the left sidebar, click “Space settings” next to the space name. If you have several spaces, open the list of spaces and click the settings icon in the row of the current space
- In the “Space profile” section, open the “Organization profile” tab
Only the space owner sees the “Overview” and “Organization profile” tabs. Other members see only the space details in the “Space profile” section, without tabs
If the details fail to load, the tab shows the “Couldn't load organization details” message — click “Try again”
How to fill in your details
While the profile is empty, the tab shows a form with the hint “Fill in your organization details to generate invoices for our services”
Select who is paying: “Legal entity” or “Sole proprietor”. The form fields depend on your choice
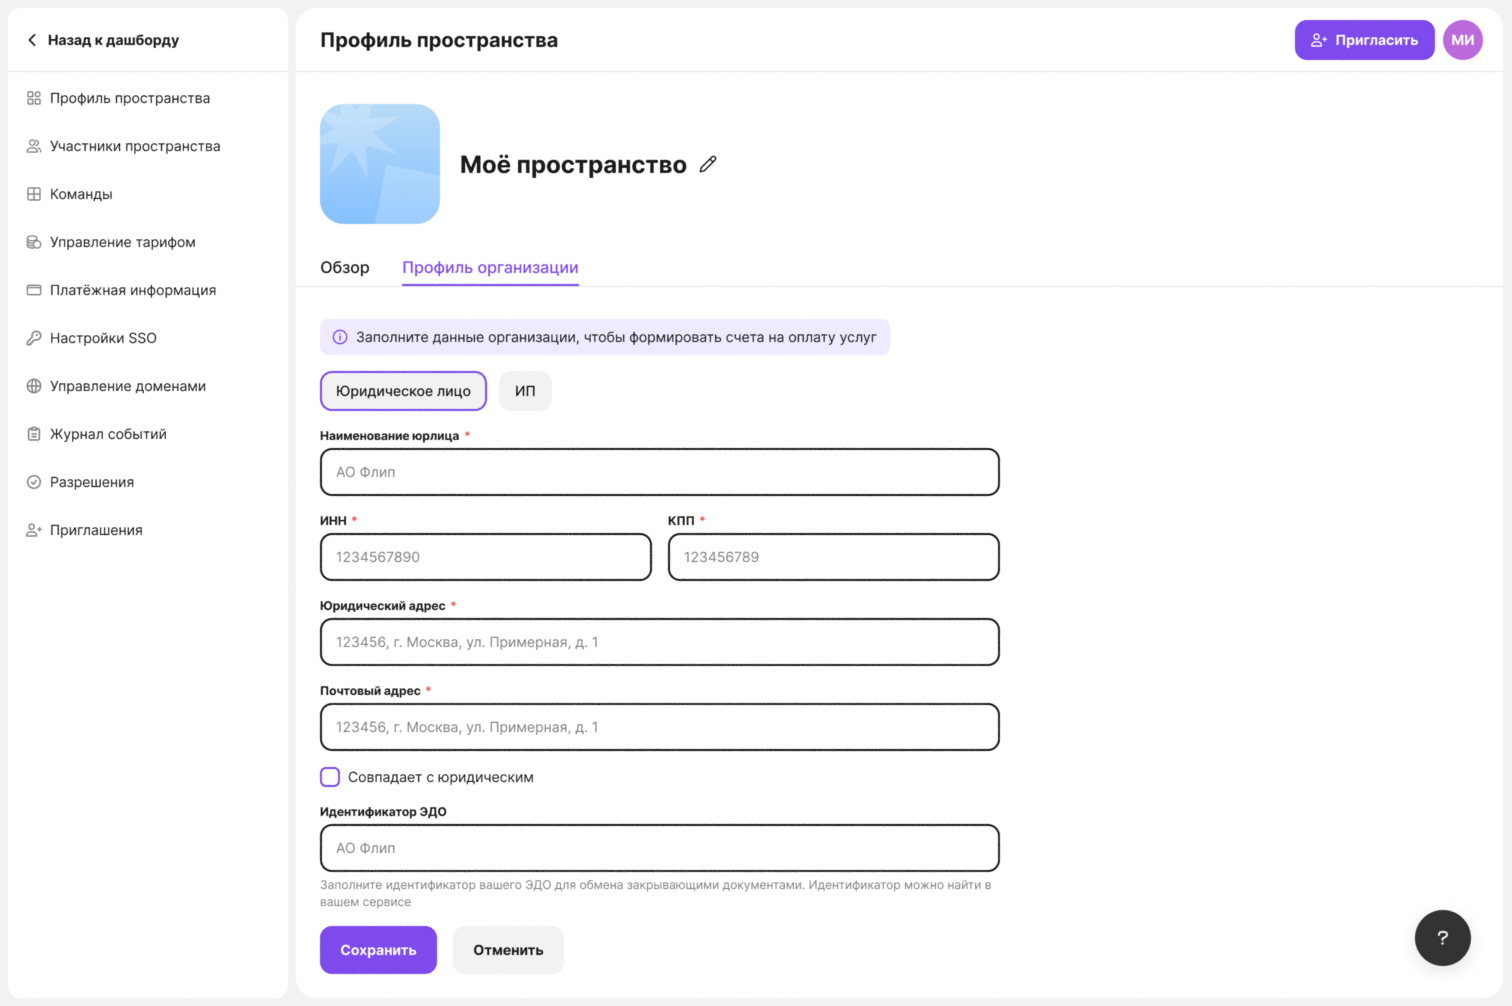
Fill in your details. Required fields are marked with an asterisk
- “TIN (INN)” — 10 digits for a legal entity or 12 for a sole proprietor
- “KPP” — 9 digits. This field is shown only for a legal entity
- For a sole proprietor, “Legal entity name” and “Legal address” are called “Sole proprietor name” and “Registration address”
- If your mailing address is the same, select the “Same as legal address” checkbox (for a sole proprietor — “Same as registration address”): the address is copied to the “Mailing address” field
- “EDO ID” is optional. Enter it if you exchange documents via EDO (electronic document management)
Click Save
The “Save” button becomes active once all required fields are filled in. You will see the “Organization details saved” message, and the form is replaced with the organization card: the name, the payer type, “TIN (INN)”, “KPP”, the addresses and the “EDO ID” if you entered it
To erase data you have entered but not saved yet, click Cancel
If the details could not be saved, you will see a message with the reason or “Couldn't save organization details”. Check the fields and try again
How the details get into an invoice
When you choose to pay “By invoice” and open the “Generating invoice” page, the details fields are already filled in from the profile, and the payer type from the profile is selected above the form. Your name, email and phone are still filled in from your flip account
You can correct the details on the invoice page before clicking “Generate”. These corrections apply only to the current invoice and don't change the saved profile. To change the profile, edit it on the “Organization profile” tab
If the profile is empty, you don't have to fill it in beforehand: after the first invoice is generated successfully, the details from the form are saved to the organization profile and will be filled in automatically next time
How to edit your details
Open the “Organization profile” tab
On the organization card, click Edit
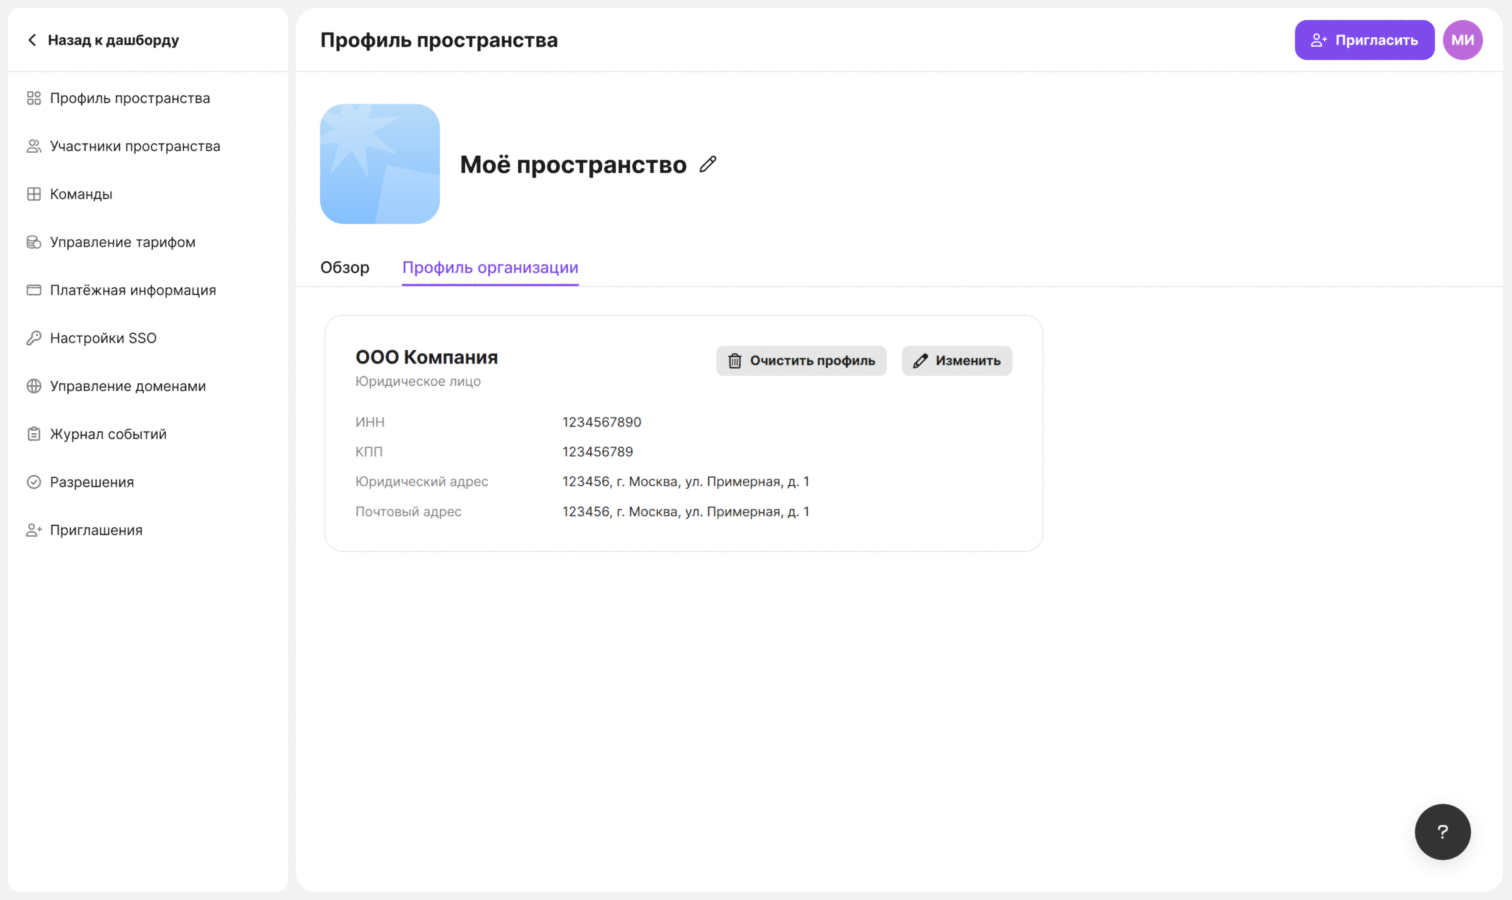
Make your changes in the form and click Save
To leave the form without saving, click Cancel — the card with the previous details opens again
How to clear the profile
On the organization card, click Clear profile
In the “Clear organization profile?” window, click Clear
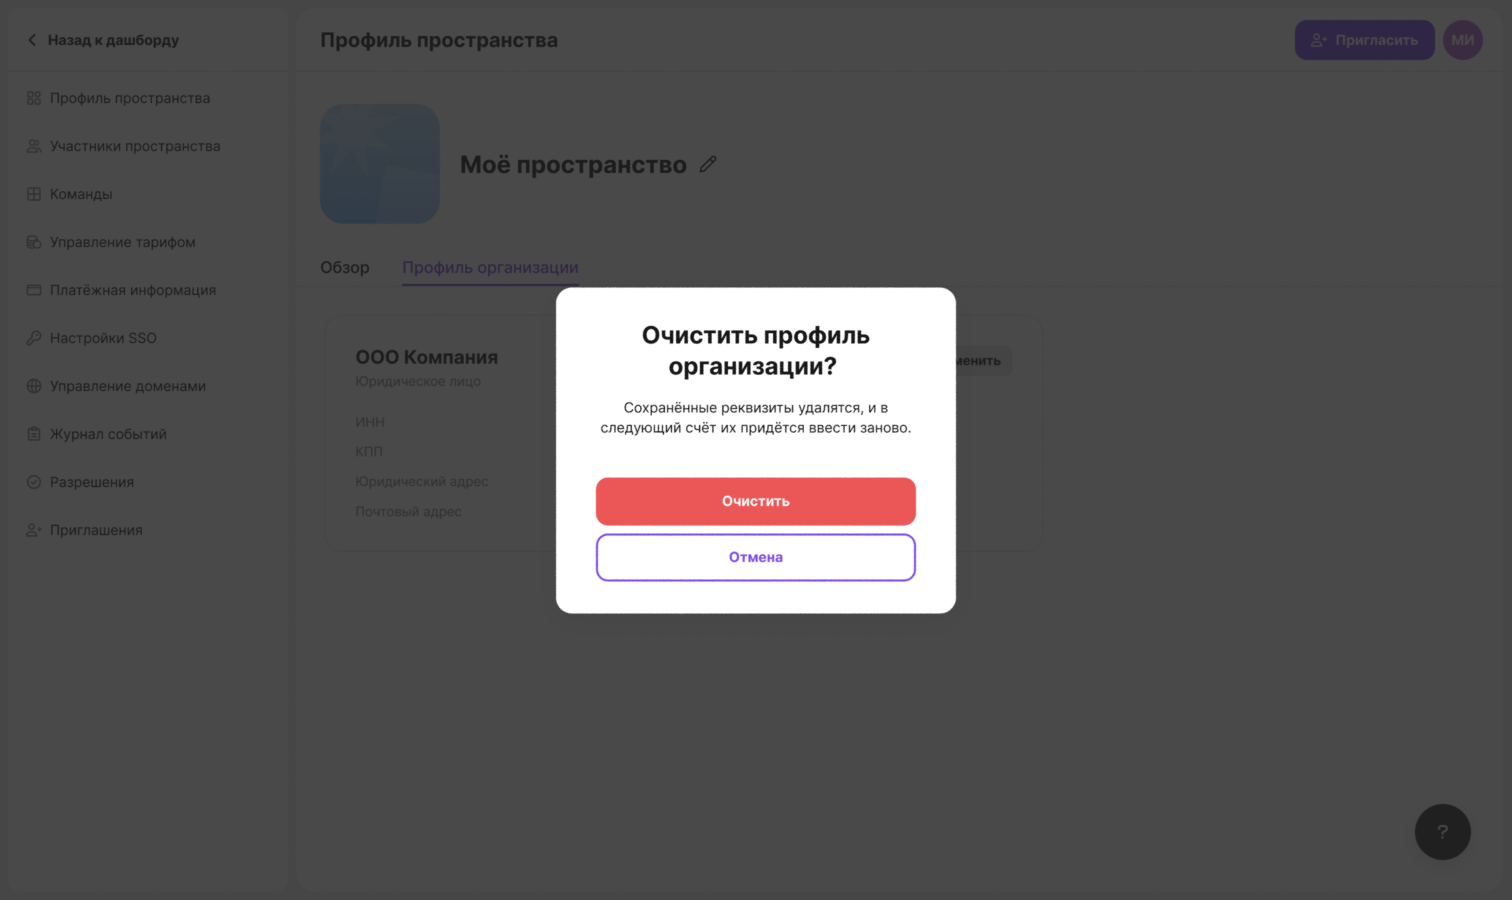
You will see the “Organization profile cleared” message, and the tab shows an empty form again. You will need to enter the details again for your next invoice
Limitations
- Only the space owner can see and fill in the organization profile, and only in the web version of flip
- A space has one organization profile. To issue invoices to another organization, change the details in the profile or correct them on the “Generating invoice” page for a specific invoice
- “EDO ID” — up to 46 characters: Latin letters, digits and hyphens only
- Corrections made on the “Generating invoice” page are not saved to a filled-in profile