

Voting helps your team quickly pick the best ideas right on a flip. You select an area with objects and set how many votes each participant gets, and participants spread their votes across stickers, shapes, text, images and frames. When the voting ends, the results appear in the “Voting” panel and on the board itself
For quick marks without a session or a timer, use dot voting
Requirements
- Voting is part of the paid plans. On the Mini plan, clicking “Voting” opens a window that offers to switch to another plan. Learn more in the plan comparison
- A voting can be started by a space member who is logged in to their account
- A voting can be extended or ended early by the person who started it, a space admin and the flip owner
How to create a voting
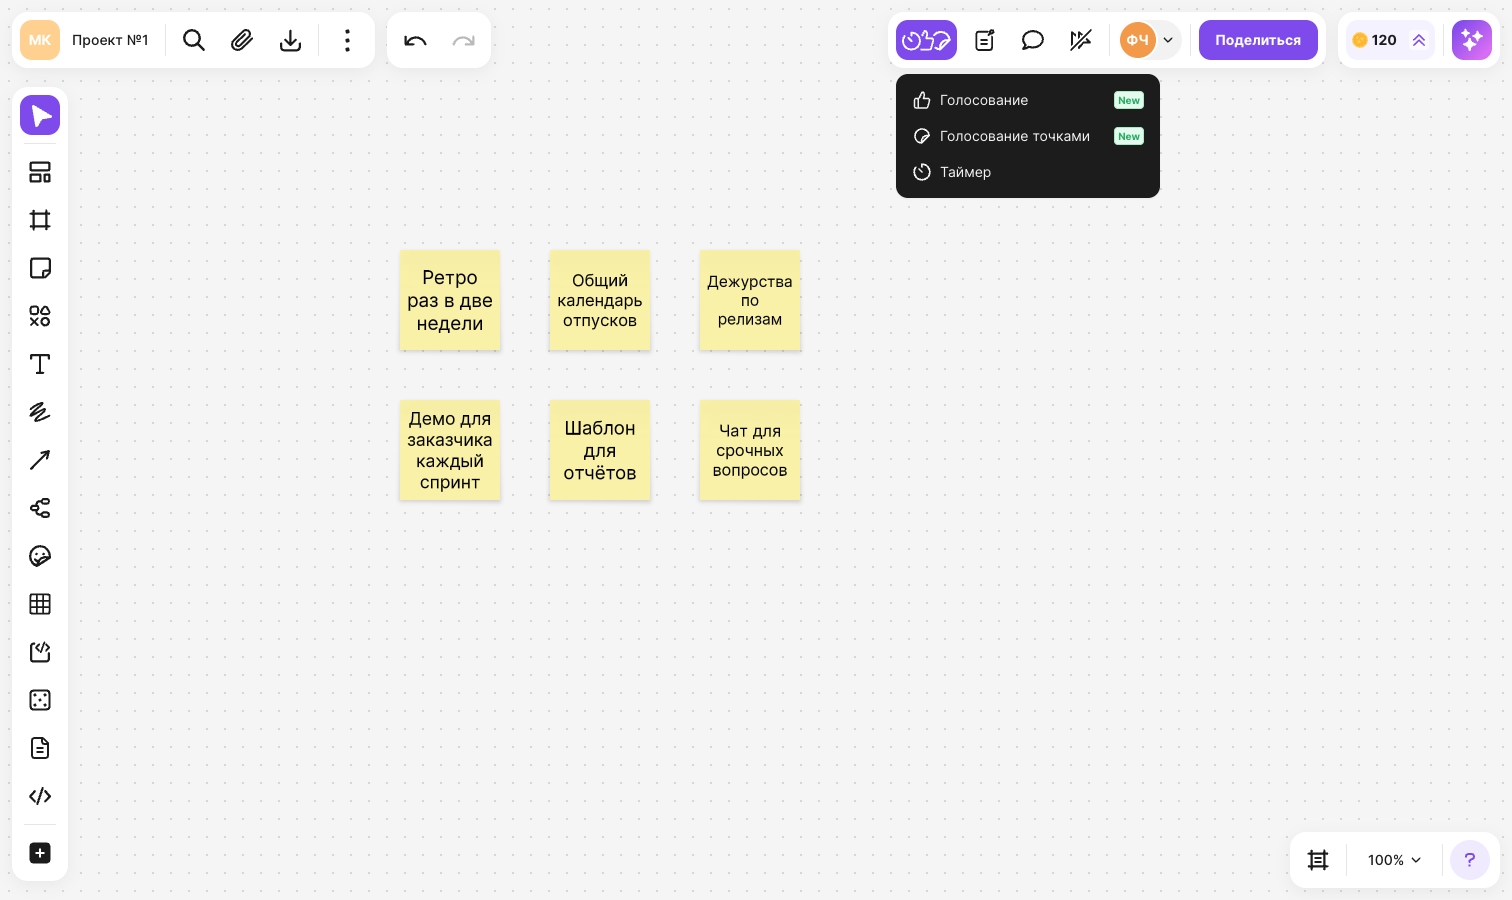
On the panel in the top right corner, click Facilitator tools and select Voting
If the browser window is narrow, these tools are in the More menu on the same panel
The “Voting” panel opens on the right on the “Create” tab, and a frame labeled “Voting area” appears on the flip. Drag the frame and resize it so that the objects to vote on are inside
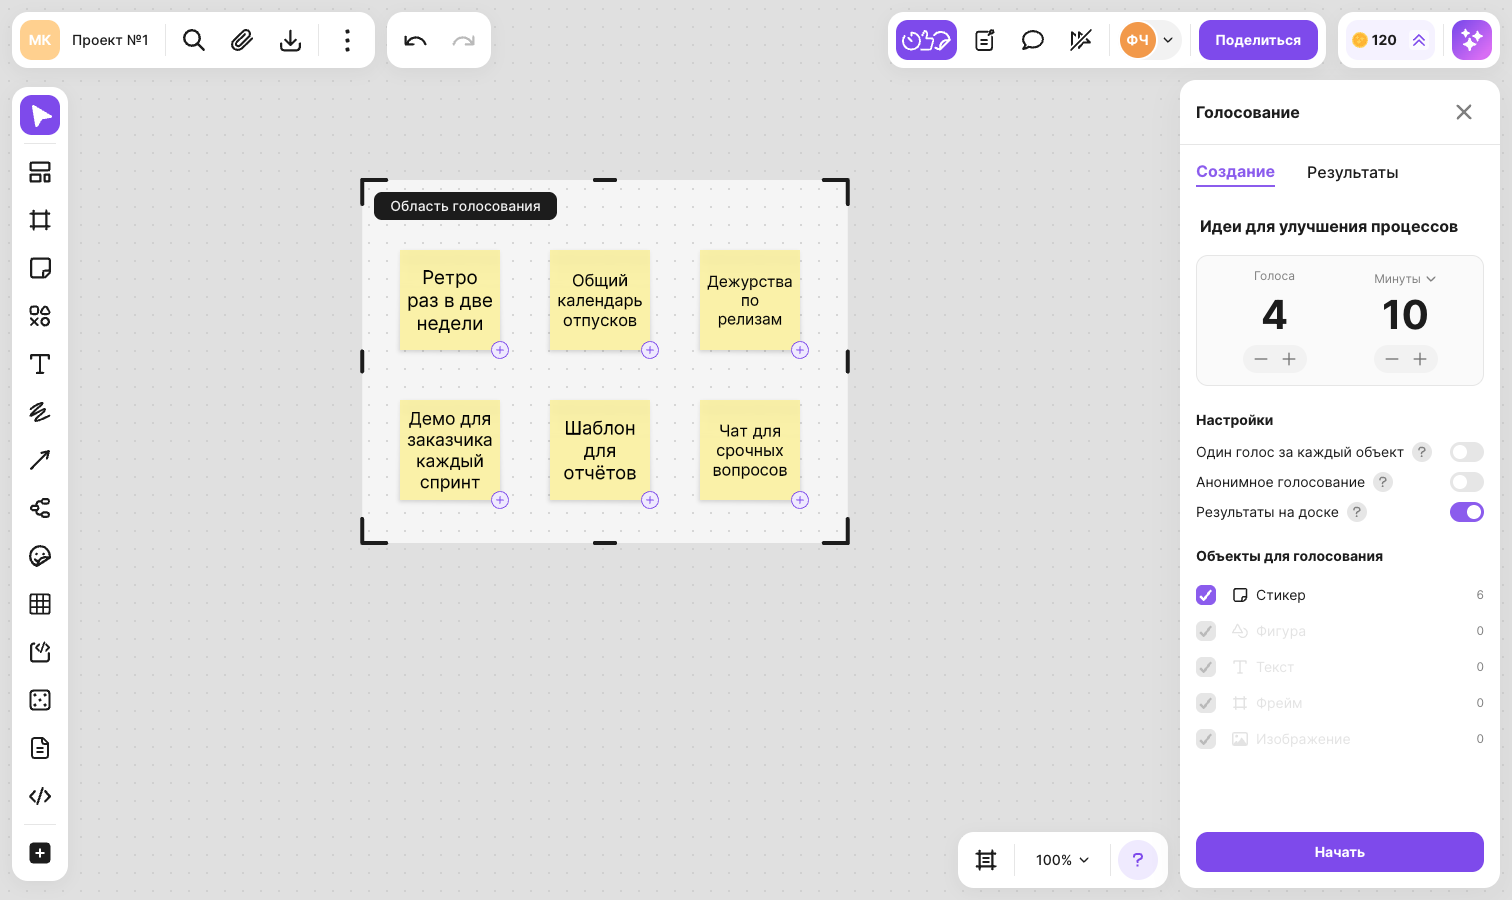
If needed, change the voting title — click it at the top of the panel and enter a new one. By default, votings are named “Voting 1”, “Voting 2” and so on
In the “Votes” field, set how many votes each participant gets. Next to it, set the voting duration and choose a unit: “Minutes”, “Hours” or “Days”. The default is 1 vote and 5 minutes
In the “Settings” section, turn on the options you need:
- “One vote per object” — a participant can vote for an object only once
- “Anonymous voting” — participants can't see who voted and for which object
- “Show results on the board” — after the voting ends, the number of votes is shown on the objects on the board
In the “Objects to vote on” section, check the object types that take part in the voting: “Sticker”, “Shape”, “Text”, “Image”, “Frame”. Next to each type, you can see how many such objects are in the area. Types that aren't in the area can't be selected
If there are frames in the area, the “Include objects inside frames” toggle appears — with it, objects inside frames become separate voting targets
Click Start
The button is inactive if there are no suitable objects in the area or there are too many of them — in this case, the message “Too many objects in the area, make it smaller” appears below the list
Once the voting starts, the flip participants receive an invitation to join
How to take part in a voting
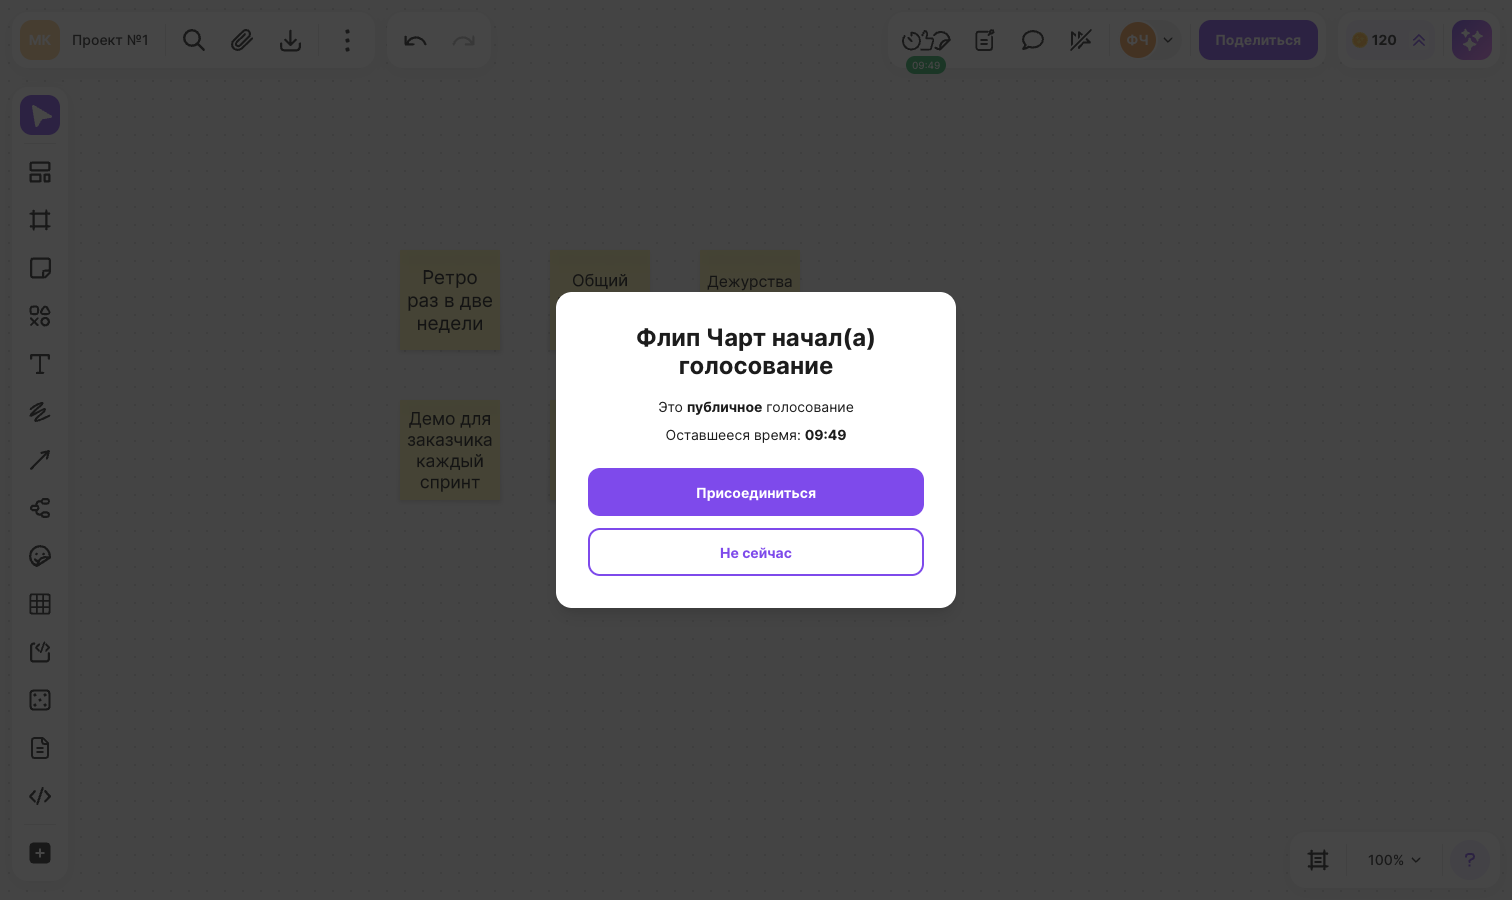
When someone starts a voting, participants who are on the flip at that moment see the “<Name> started a voting” window. It shows whether the voting is anonymous or public and how much time is left. Click Join to vote, or Not now to close the window
If you open the flip while a voting is already running, you'll see a notification with the voting title, the name of the person who started it, the time left and the number of participants who voted. Click Join in it. You can also join later via Facilitator tools → Voting
Once you join, a voting card appears in the top right corner: how many votes you have left, a timer and a counter of participants who voted. Objects you can vote for are marked with a “+” badge, and the rest of the flip is dimmed
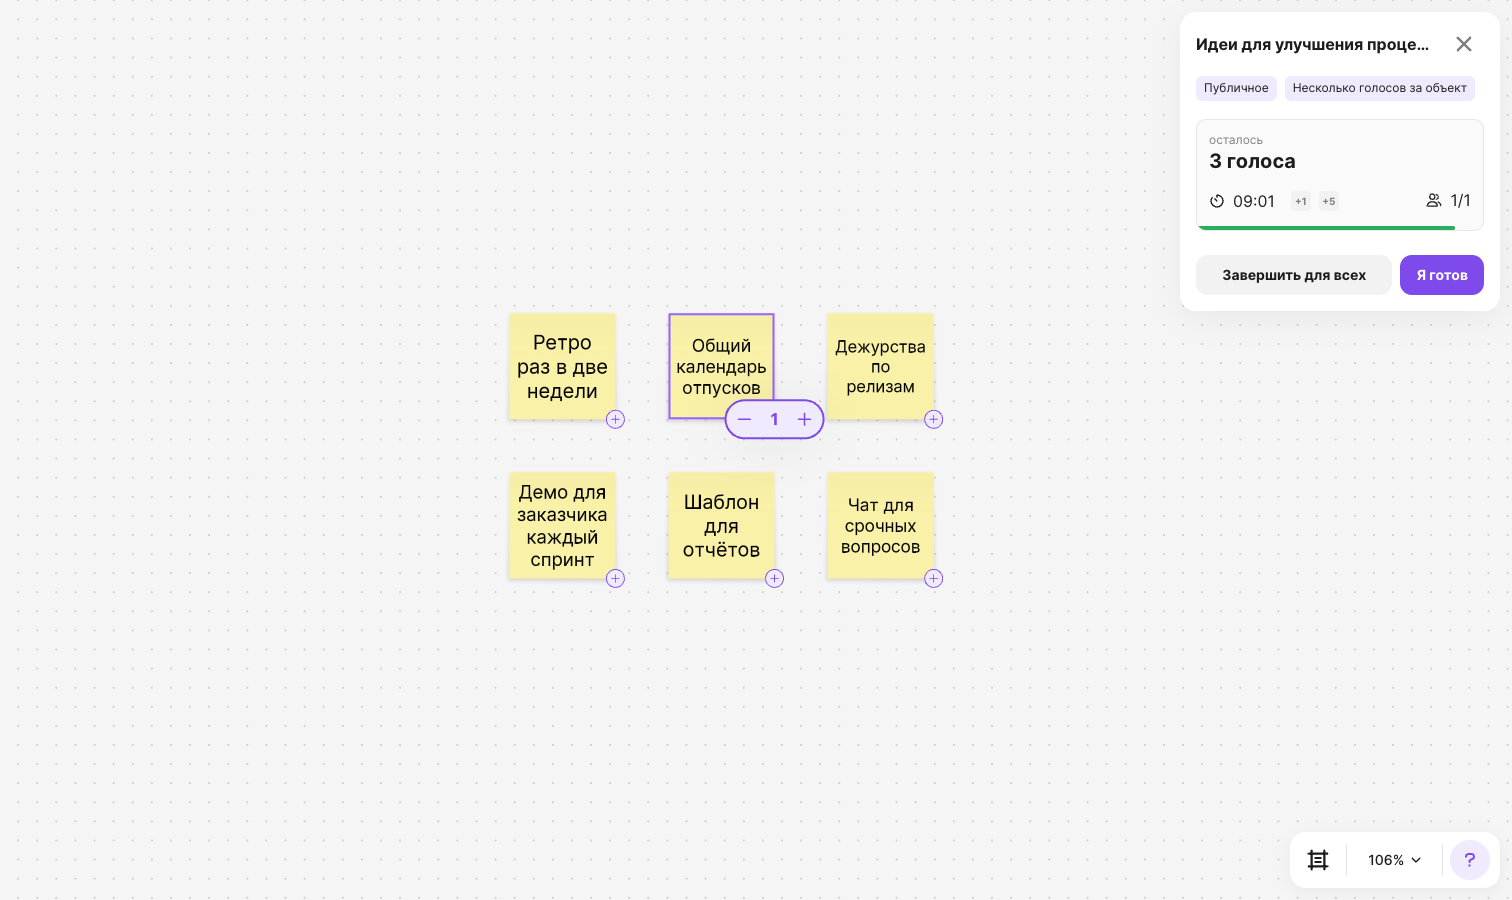
Click an object or the “+” badge on it — you give the object one vote, and a “− 1 +” counter appears next to it
Click “+” and “−” in the counter to add or take back votes
If you are out of votes, the “No votes left” hint appears when you hover over the badge. If the “One vote per object” option is on, you can't vote for an object you've already voted for — the “No votes left for this object” hint appears
When you're done, click I'm ready. The button becomes active after your first vote. To change your votes again, click Change decision
Click the counter of participants who voted in the card — the “Voting participants” list opens: for each participant, you can see how many votes they have left or that they are ready
Important
While the voting card is open, you can't edit the flip — you can only vote. If you close the card, the voting doesn't stop for you: you can return to it via Facilitator tools → Voting
How to extend or end a voting
A voting ends automatically when the time is up. The person who started the voting, a space admin and the flip owner can extend it or end it earlier:
To extend the voting, click +1 or +5 next to the timer in the card — 1 or 5 minutes are added to the remaining time
To end the voting for everyone, click End for everyone (or End if you've already clicked “I'm ready”). In the “End the voting” window, click End and view results
The voting ends for all participants, and the results are counted right away
How to view the results
The person who ended the voting manually sees the results right away. Other participants get the “Voting finished” window — click View results in it. If no votes were cast during the voting, the “Nobody voted” window appears
The results card shows:
- the end date, the voting type — anonymous or public — and how many votes could be given to one object
- who started the voting and how many participants voted
- the list of objects, from the most popular: a thumbnail of the object, its share of votes in percent and the number of votes. In a public voting, avatars of the voters are shown next to the number of votes — click the number to see everyone who voted and how many votes each of them gave
- the “My vote” mark on the objects you voted for
Click an object's thumbnail — the flip moves to that object. The “Results on the board” toggle shows or hides the number of votes on the objects on the flip
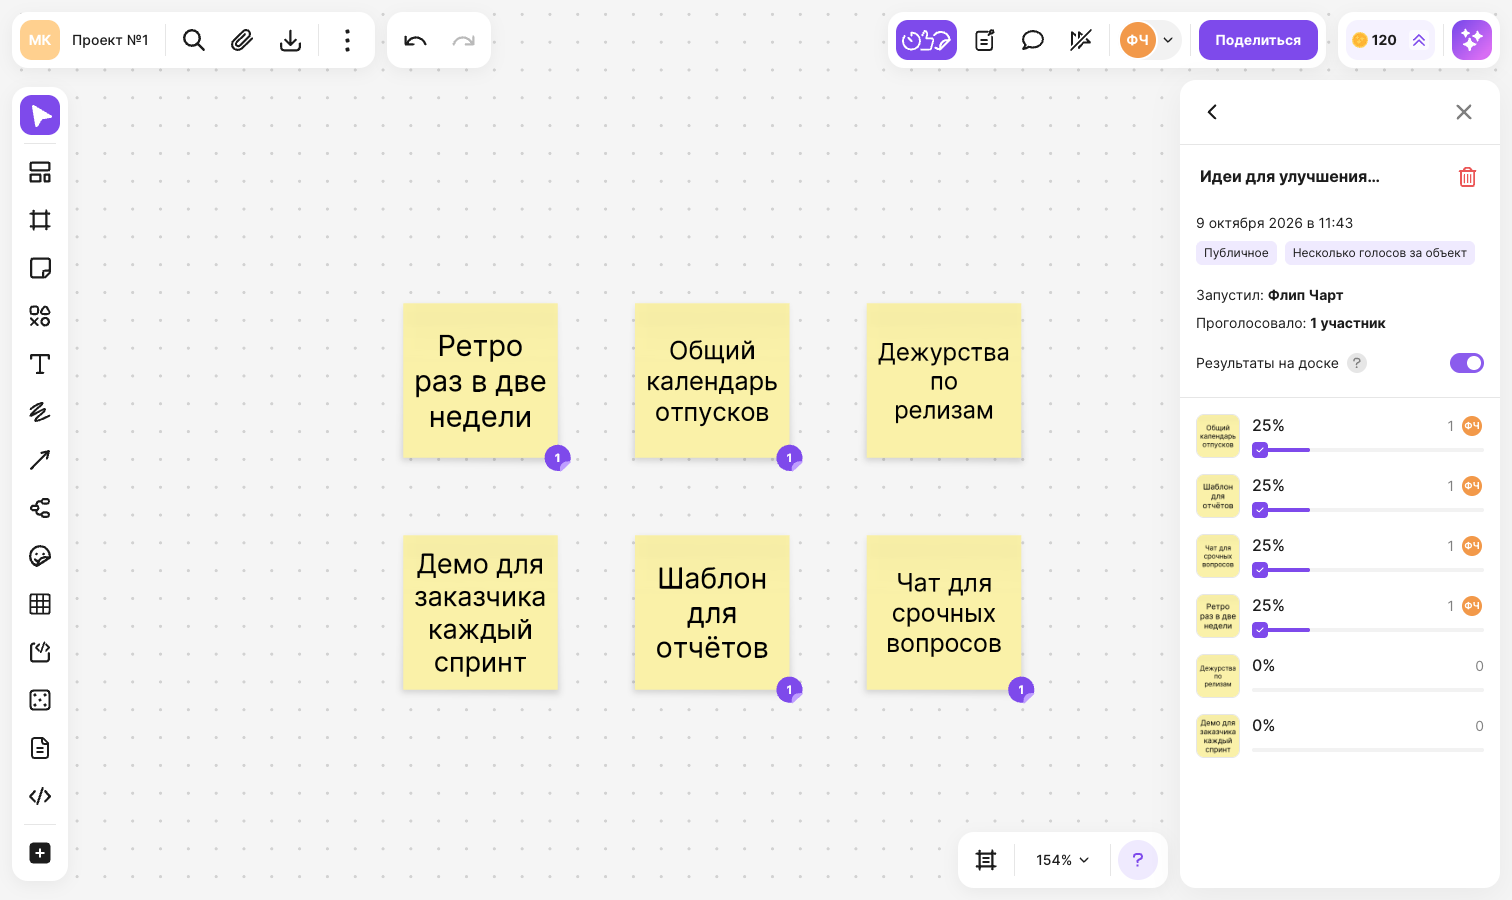
All finished votings of the flip are collected in the “Voting” panel on the “Results” tab: each one shows its title and date. Click a voting in the list to open its results
To rename or delete results, hover over a voting in the list, click More and select Rename or Delete. In an open results card, you can change the title by clicking it and delete the results with the trash icon
Important
Deleted voting results can't be restored
Dot voting
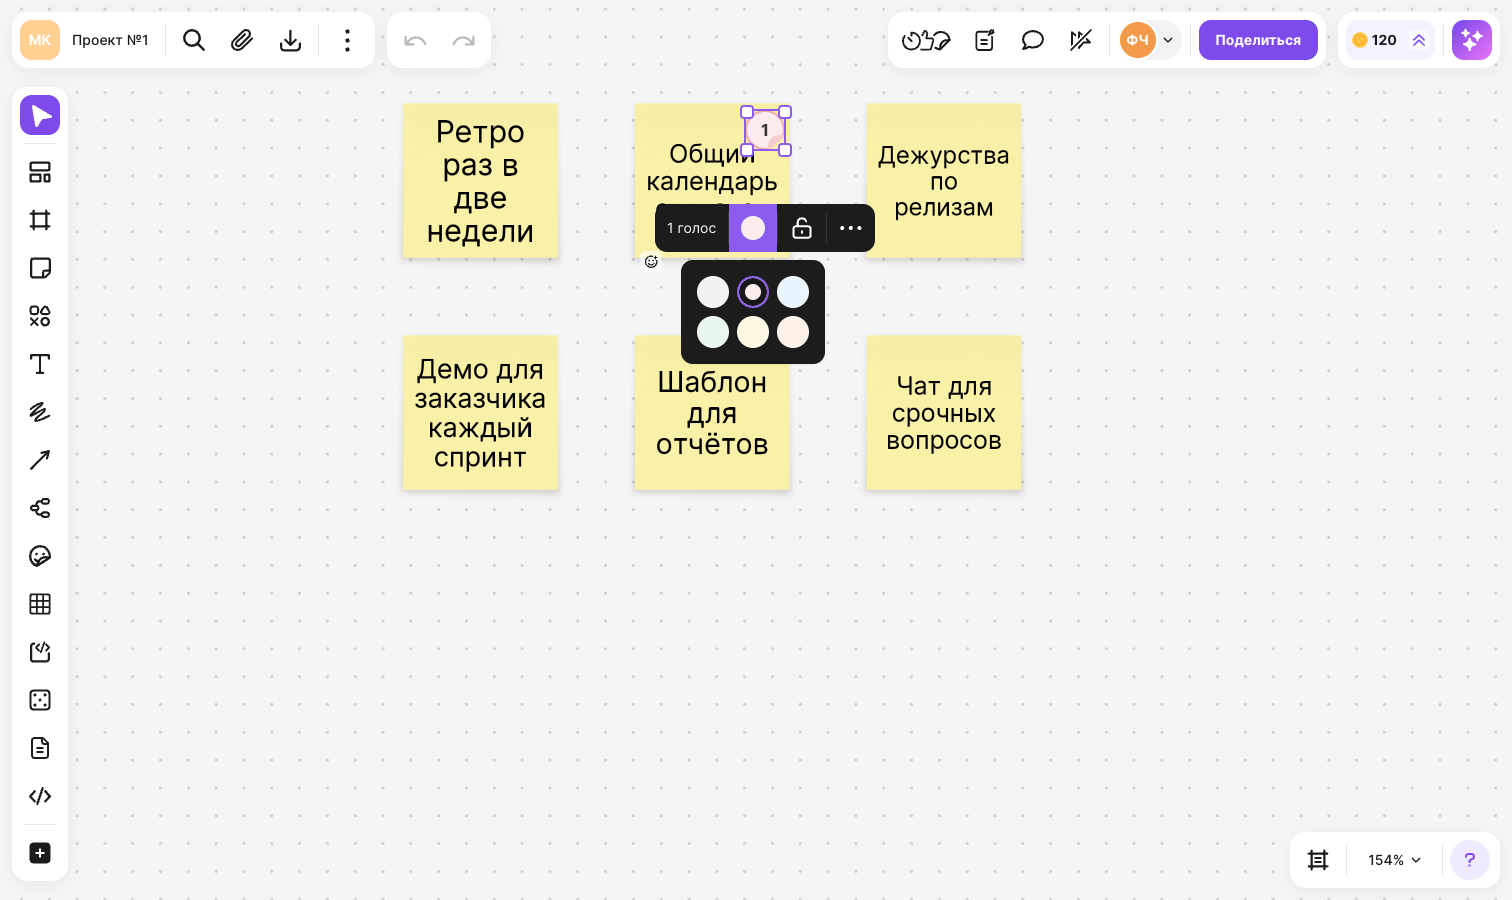
Dot voting is good for quick marks without a timer or a session: each participant places colored dot stickers on the flip, and others vote for them with one click
On the panel in the top right corner, click Facilitator tools and select Dot voting
Click the spot on the flip where you want to place a dot, for example on a sticker with an idea
To vote, click the center of the dot. To cancel your vote, click the center again
The number of votes on a dot is visible to those who have already voted for it
To change the color of a dot, select it and choose a color in the menu above the dot. If you voted for this dot, the menu also shows how many votes it has
Limitations
- Only one voting can run on a flip at a time
- Stickers, shapes, text, images and frames take part in a voting — up to 500 objects in the area
- Each participant can be given from 1 to 99 votes
- The voting duration is from 1 to 99 minutes, from 1 to 99 hours or from 1 to 9 days
- Only a voting whose duration is set in minutes can be extended, and only so that no more than 99 minutes remain until the end
- The voting title can be up to 255 characters long
- Dot voting is unavailable while a voting is running
- On a phone, you can join a voting that is already running. You can create a voting and place dots on a computer or tablet