

The “Share” window defines who can do what on a flip: separately for space members and for anyone with the link. Here you can also invite new members, set a password, create a temporary link and set permissions for actions with elements
How to open access settings
- On a flip, click “Share” in the top right corner
- In the list of flips, right-click a flip and select “Share flip”
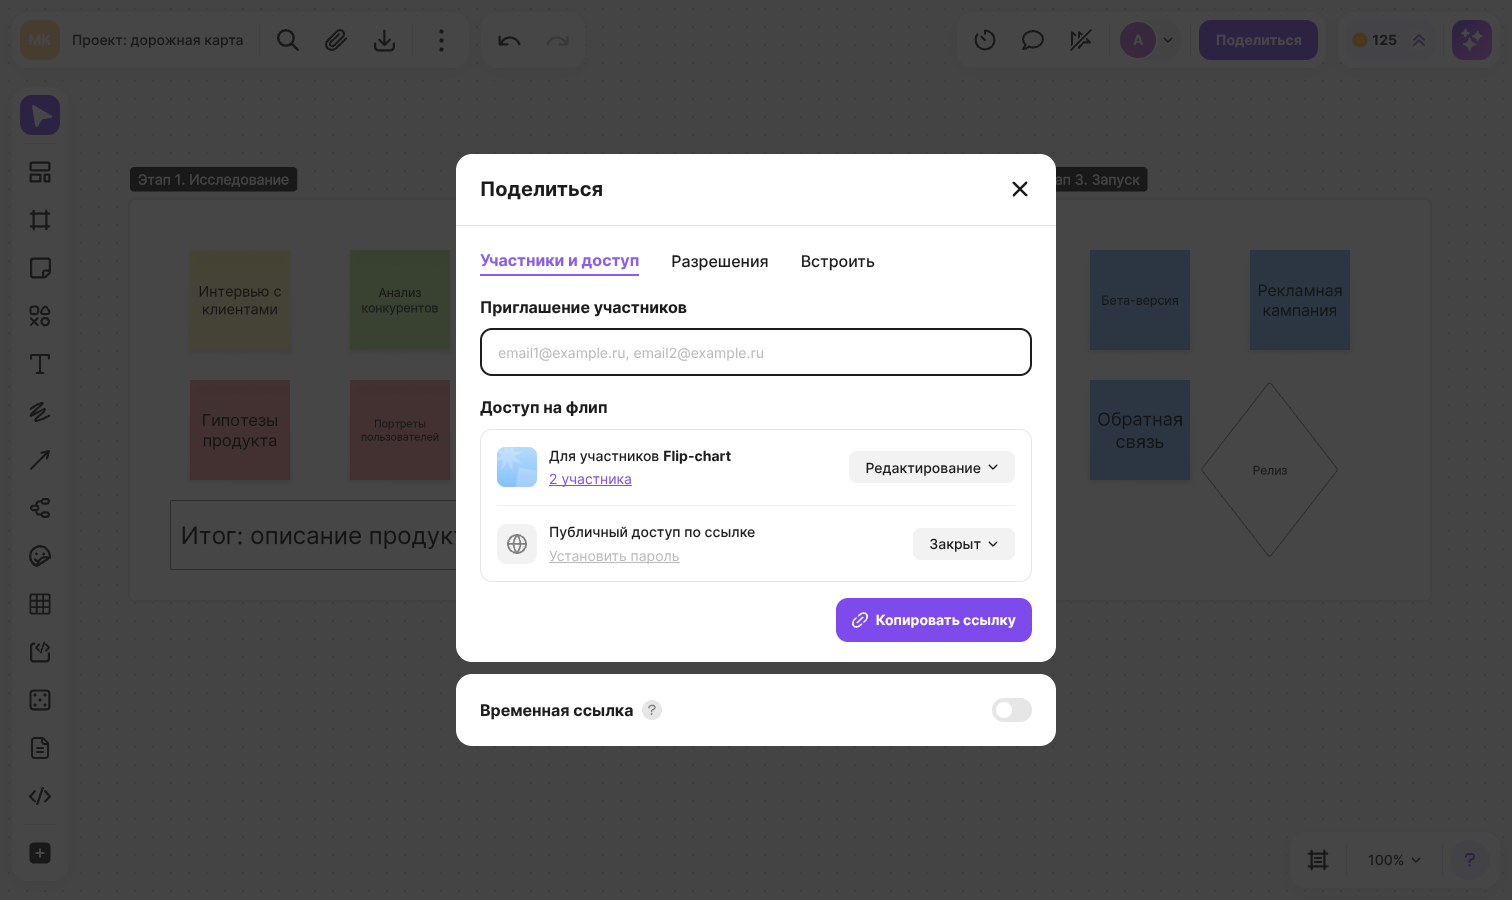
Access can be set up by the flip owner, admins and the space owner. Other members see their own access level in place of the button: “Editing”, “Commenting” or “View”. Learn more about roles in the article Space member roles
The window has three tabs:
- “Members and access” — invitations, access levels, password and temporary link. On the Individual plan the tab is called “Access”
- “Permissions” — actions with elements available to members
- “Embed” — the code for placing the flip on a website, see How to embed a flip on a website. The tab is only shown when the window is opened on a flip
Access levels
- “Deny access” — the flip can't be opened
- “View” — you can move around the flip and look at its content, but can't select or change elements
- “Comment” — viewing plus working with comments
- “Edit” — all tools are available: creating, changing and deleting elements
The flip owner and the space owner always work with the flip in edit mode, whatever level is selected
How to set up access
- Open the “Share” window on the “Members and access” tab
- In the “Flip access” block, in the “For members of” row with the space name, choose the access level for space members
- In the “Public access via link” row, choose the access level for anyone with the link, including users without a flip account
- Click “Copy link” and send the link to the people you want to share the flip with
Changes apply right away, there is no need to save them separately. People who open the flip via the public link don't become space members
Important
Public access via link can't be higher than the access level for space members: higher levels can't be selected, and when you lower the members' access, public access is lowered along with it. While “Deny access” is selected for members, the “Copy link” button is inactive
A flip with the “Deny access” level for space members is private. In the list of flips, a lock icon with the “Private flip” tooltip appears next to its name
How to invite members by email
On the “Members and access” tab, click the “Invite members” field
Enter email addresses separated by commas
Click “Invite”
Invited users become space members and get the access level selected for members. The number of invitations depends on the plan and the number of available licenses, see How to invite users to a space. Invitations aren't available on the Individual plan
How to protect a flip with a password
- In the “Public access via link” row, click “Set password”
- Enter a password — from 8 to 72 characters
- Click “Confirm” — the password is saved and copied to the clipboard
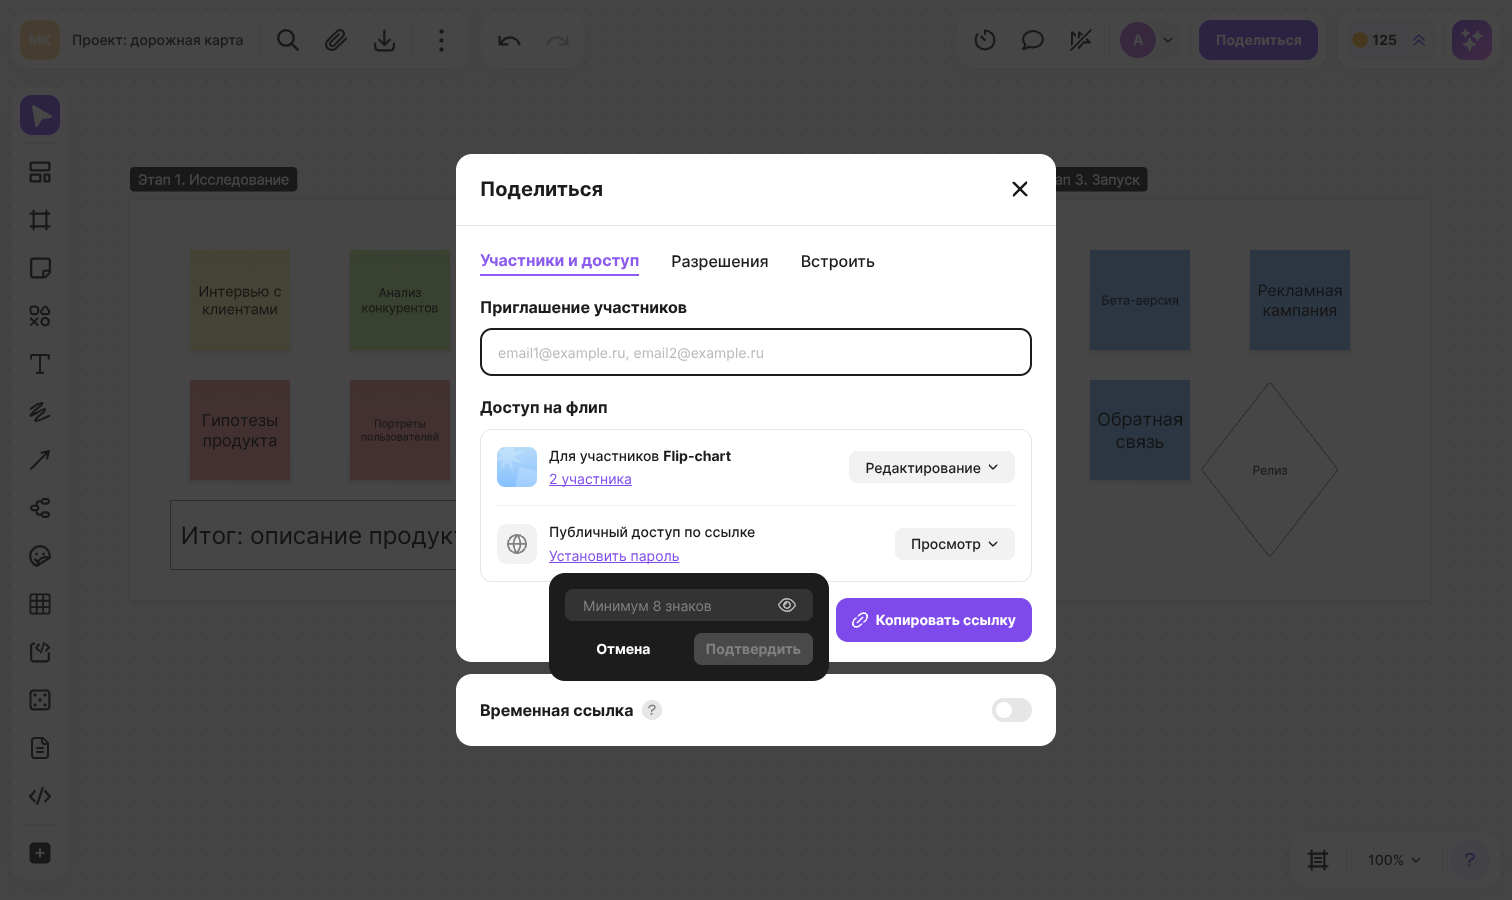
After that, the “Enter the password” window appears when the flip is opened via the link. After several wrong attempts in a row, entering the password is blocked for a minute
To view, copy or remove the password, click “Password is set” in the same row. The password is removed with the “Delete” button. A password can't be set while public access via link is denied
How to create a temporary link
The temporary link has its own access settings and switches off automatically once it expires
- On the “Members and access” tab, turn on the “Temporary link” switch below the access block
- In the “Access via temporary link” row, choose the level: “View”, “Comment” or “Edit”
- Click the “Valid until …” period and set the date and time when access ends. By default the link is valid for 24 hours
- Click “Copy temporary link”
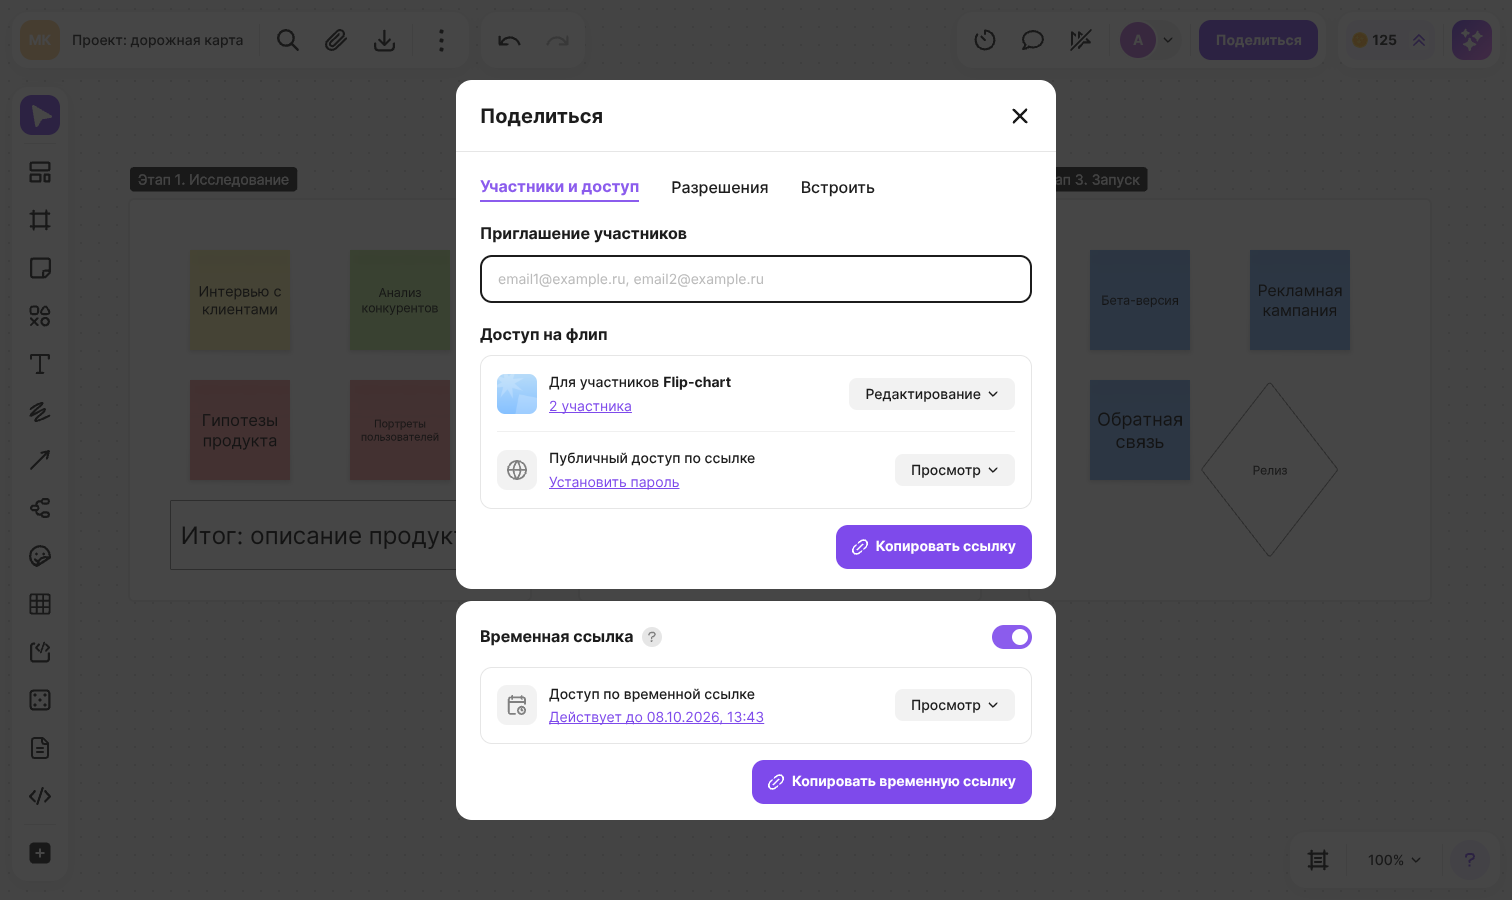
To switch the link off before it expires, turn off the switch. A link that has been switched off or has expired opens the “This link is no longer available” message
How to set permissions
The “Permissions” tab defines what members can do on the flip:
- “Element locking” — by default, elements can be locked and unlocked by the flip owner, the team creator, the space owner and admins. The “Allow all space members to lock elements” and “Allow all space members to unlock elements” switches open these actions to members with edit access
- “Copying elements” — choose who is allowed to copy elements of the flip: “For space members and external users”, “For space members” or “Disallow for everyone”
- “Deleting elements” — the “Forbid deleting elements created by other users” switch
- “Timer” — the “Allow all space members to start the timer” switch. By default the timer is started by the flip owner, the team creator, the space owner and admins
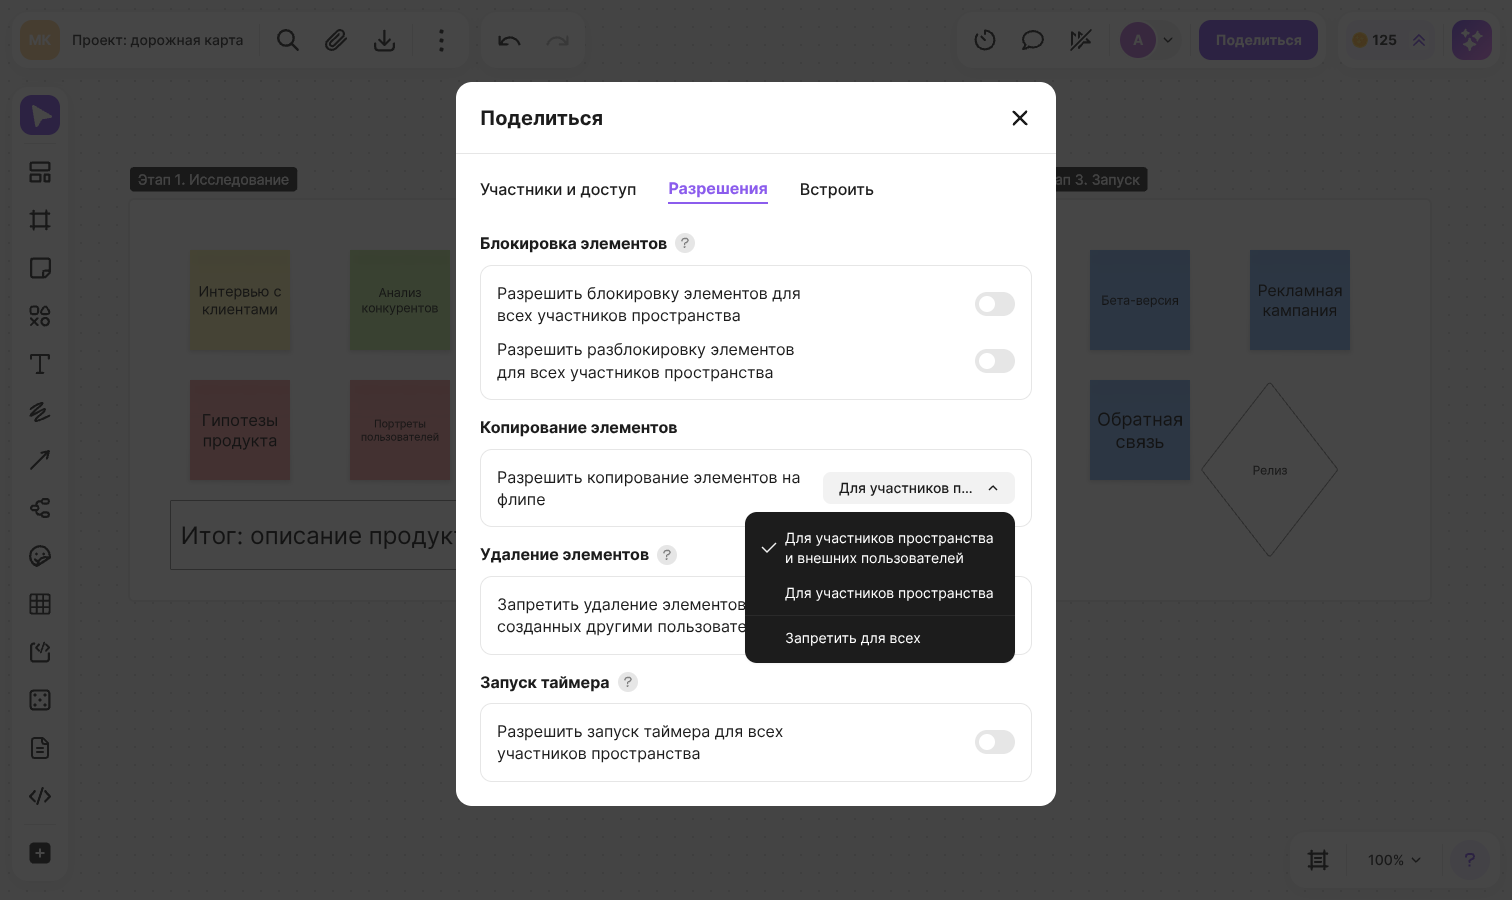
The restrictions on copying and on deleting other users' elements don't apply to the flip owner, admins and the space owner. On the Individual plan the tab only has copying and deleting elements
What a user without access sees
- The flip is closed — the “Flip access is restricted” window. A logged-in user is offered to go to their space or switch account, a user who isn't logged in — to log in or create an account
- The flip has a password — the “Enter the password” window
- The temporary link has been removed or has expired — the “This link is no longer available” message
- The flip has been deleted or the address is wrong — the “This flip does not exist” message
Plan limits
The “Deny access” level for space members (private flips) and the “Edit” level for the public and temporary links aren't available on all plans. On the Mini plan you can't invite editors via link. An unavailable option is marked with a lock icon, and the space owner sees the “Upgrade” button next to it. Plan features are listed in the article Comparison of flip plans